Introduction
Christmas is a time for indulgence, and what better way to celebrate than by creating a batch of Kitchen Sink Cookies? These delightful confections are a whimsical mixture of flavors, combining sweet and salty elements that encapsulate the spirit of the season.
The beauty of these cookies lies in their flexibility; throw in whatever you have on hand, from chocolates to nuts or even dried fruits. Not only does this make them a great way to use up leftovers, but it also adds a personal touch to your holiday baking.
With a chewy texture and a variety of flavors, each bite is a surprise. Perfect for sharing with family and friends, these cookies are bound to become a festive favorite in your home.
Ingredients
- 2 1/2 cups all-purpose flour
All-purpose flour serves as the foundation for your cookies, providing structure. It absorbs moisture and binds the ingredients together, helping achieve that perfect chewy texture. - 1 teaspoon baking soda
Baking soda is the leavening agent that helps the cookies rise and gives them a light, airy texture. It reacts with the acidic ingredients to create carbon dioxide, creating a nice lift. - 1 teaspoon salt
Salt enhances the flavor profile of the cookies, balancing the sweetness and bringing out the richness of the butter and sugars. A pinch of salt can make a significant difference in baked goods. - 1 cup unsalted butter, softened
Butter not only adds richness and flavor but also contributes to the cookies' tender texture. Using unsalted allows you to control the saltiness in the final product. - 1 cup brown sugar
Brown sugar adds moisture and a subtle caramel flavor to the cookies. Its higher moisture content compared to white sugar helps to keep the cookies chewy. - 1/2 cup granulated sugar
Granulated sugar provides the necessary sweetness and contributes to the cookies' crispiness. It helps the cookies spread out during baking. - 2 large eggs
Eggs contribute to the structure and moisture of cookies. They also help bind the ingredients together, providing a rich texture. - 2 teaspoons vanilla extract
Vanilla extract adds depth of flavor, enhancing the overall taste profile of the cookies. It introduces a comforting aroma that is particularly festive. - 2 cups semi-sweet chocolate chips
Chocolate chips add sweetness and texture, creating delightful pockets of melted chocolate in the cookies. They are a classic addition that everyone loves. - 1 cup mixed nuts (chopped)
Nuts bring a crunchy texture and nutty flavor, complementing the sweetness of the chocolate. They also provide a hearty feel to each cookie. - 1 cup dried fruits (like cranberries or raisins)
Dried fruits offer a chewy texture along with a burst of sweetness. They introduce a tart contrast to the chocolate and enrich the cookie with natural flavors.
Directions & Preparation
Step 1: Preheat your oven to 350°F (175°C).
Preheating ensures that your cookies bake evenly and achieve the perfect texture. An adequately heated oven allows the ingredients to react appropriately, helping cookies rise and set correctly.
Step 2: In a large bowl, mix together the flour, baking soda, and salt.
Combining the dry ingredients first ensures that the baking soda and salt are evenly distributed. This helps prevent any bubbles of baking soda from affecting the flavor of your cookies.
Step 3: In a separate bowl, cream together the softened butter, brown sugar, and granulated sugar until light and fluffy.
Creaming the butter and sugars aerates the mixture, creating tiny pockets of air that help your cookies rise. The fluffy texture is crucial for achieving the desired consistency.
Step 4: Add the eggs one at a time, beating well after each addition. Stir in the vanilla extract.
Incorporating each egg one at a time ensures thorough mixing and proper emulsification of the wet ingredients. The vanilla enhances the flavor and adds a lovely aroma.
Step 5: Gradually add the dry ingredients to the wet mixture, mixing until just combined.
Mixing just until combined prevents overdeveloping the gluten in the flour, which could result in tough cookies. A few lumps are perfectly fine at this stage.
Step 6: Fold in the chocolate chips, chopped nuts, and dried fruits until evenly distributed.
Folding helps keep your cookie dough airy while ensuring that the mix-ins are evenly spread throughout. This is key to each bite having balanced flavors.
Step 7: Drop rounded tablespoons of dough onto baking sheets lined with parchment paper, spacing them about 2 inches apart.
Spacing is crucial as cookies will spread during baking. Using parchment paper prevents sticking and helps retain even baking.
Step 8: Bake in the preheated oven for 10-12 minutes, or until the edges are lightly golden brown.
Baking time affects the texture—remove them a bit earlier for chewy cookies and leave them longer for a crunchier texture. Keep an eye on them to avoid overcooking.
Step 9: Allow the cookies to cool on the baking sheet for 5 minutes before transferring them to a wire rack.
Cooling on the sheet allows them to set and firm up slightly without falling apart. Transferring to a wire rack finishes the cooling process, preventing sogginess.

Mix and Match Your Favorites
One of the fun aspects of Kitchen Sink Cookies is their versatility. You can customize the mix-ins based on your preferences or what you have in your pantry. Whether you prefer white chocolate, butterscotch chips, or a mix of different nuts, these cookies allow for creativity and personal expression. Each batch can be a unique experiment, ensuring you never grow tired of this recipe.
Perfect for Holiday Sharing
These cookies are not just a treat for you; they make an excellent gift for friends and family during the holiday season. Package them in festive boxes or tins, and add a handwritten note for a personal touch. Sharing these cookies is a wonderful way to spread holiday cheer and bring smiles to those you love.
Enhancing Texture and Flavor
To elevate the texture and flavor of your Kitchen Sink Cookies, consider toasting your nuts before adding them to the dough. Toasting enhances their nutty flavor and provides a delightful crunch. Additionally, sprinkle a little sea salt on top before baking for a sweet and salty contrast that amplifies the taste experience.
FAQs
Can I substitute chocolate chips with other flavors?
Absolutely! Feel free to use white chocolate chips, butterscotch chips, or even peanut butter chips to create a different flavor profile.
What if my dough is too sticky?
If your dough feels stickier than expected, you can chill it in the refrigerator for about 30 minutes. This will firm it up and make it easier to scoop.
How can I avoid my cookies becoming too dry?
Ensure you don’t overbake them. Keep an eye on the edges; they should be golden but the center may look slightly underbaked as they will continue to cook while cooling.
Can I make these cookies with gluten-free flour?
Yes, you can substitute all-purpose flour with a 1:1 gluten-free baking mix. This will allow you to enjoy the same delicious flavors without gluten.
What can I do if my cookies spread too much during baking?
If your cookies spread excessively, try chilling your dough prior to baking. This helps to solidify the fats, resulting in less spread.
How can I make a smaller batch?
You can easily halve the recipe by using fewer ingredients. Just make sure to adjust your baking time, as smaller cookies may bake faster.
Conclusion
Creating Christmas Kitchen Sink Cookies offers a joyful and rewarding baking experience. They embody the spirit of the season, encouraging creativity and generosity.
Whether enjoyed fresh out of the oven with a mug of hot cocoa or presented as heartfelt gifts, these cookies are sure to warm hearts and fill homes with delightful aromas. So, gather your favorite ingredients and get baking!
Recipe Card
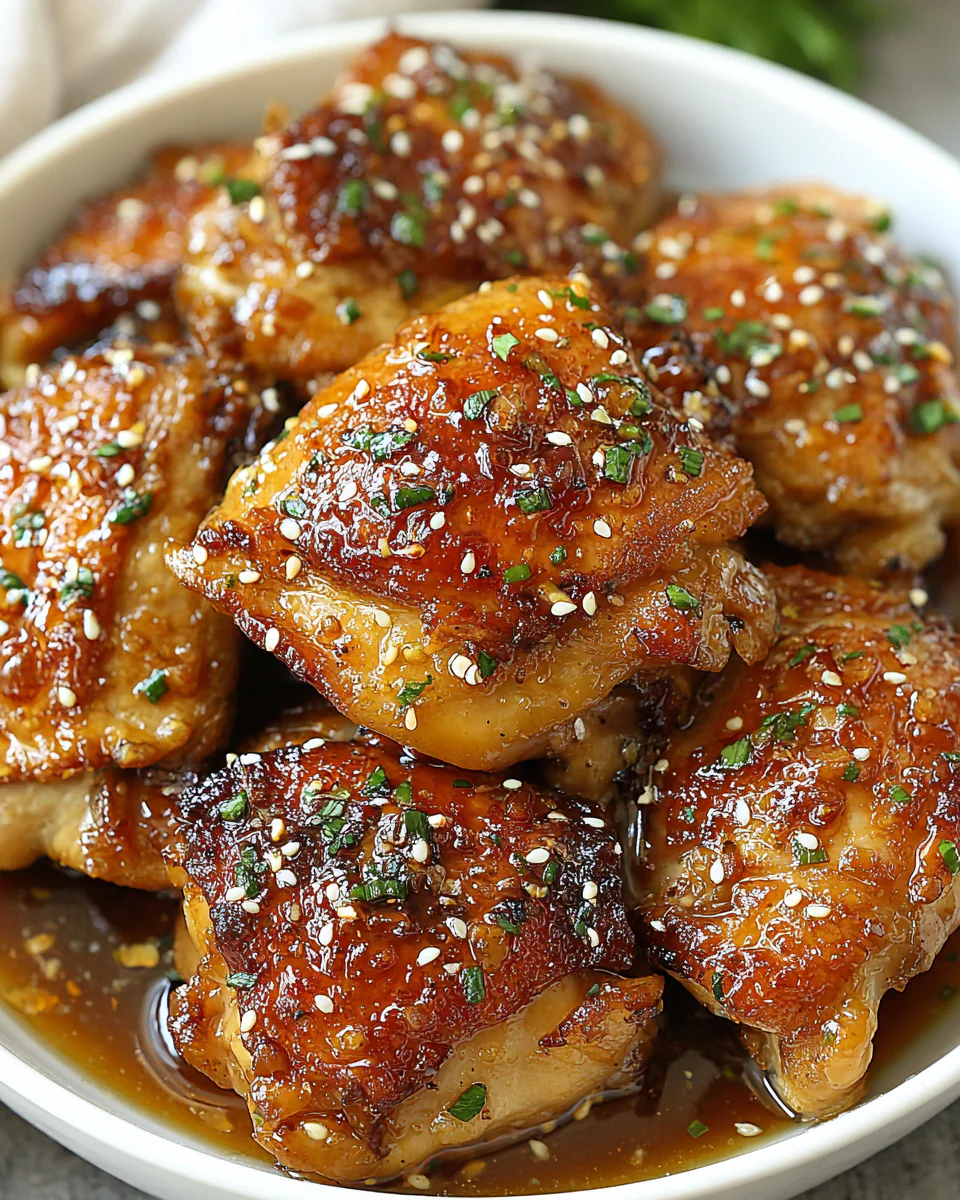
Honey Garlic Chicken Thighs for Easy Weeknight Dinners
Ingredients
Method
- Prepare the chicken thighs
- Mix the sauce ingredients
- Season the chicken
- Combine in the crock pot
- Cook on low for 6-7 hours
- Finish and garnish
Notes
Additional serving suggestions: pair with a crisp salad, garlic bread, or roasted seasonal vegetables for balance.
For make-ahead, prep components separately and assemble just before heating to preserve texture.
Taste and adjust with acid (lemon/vinegar) and salt right at the end to wake up flavors.


