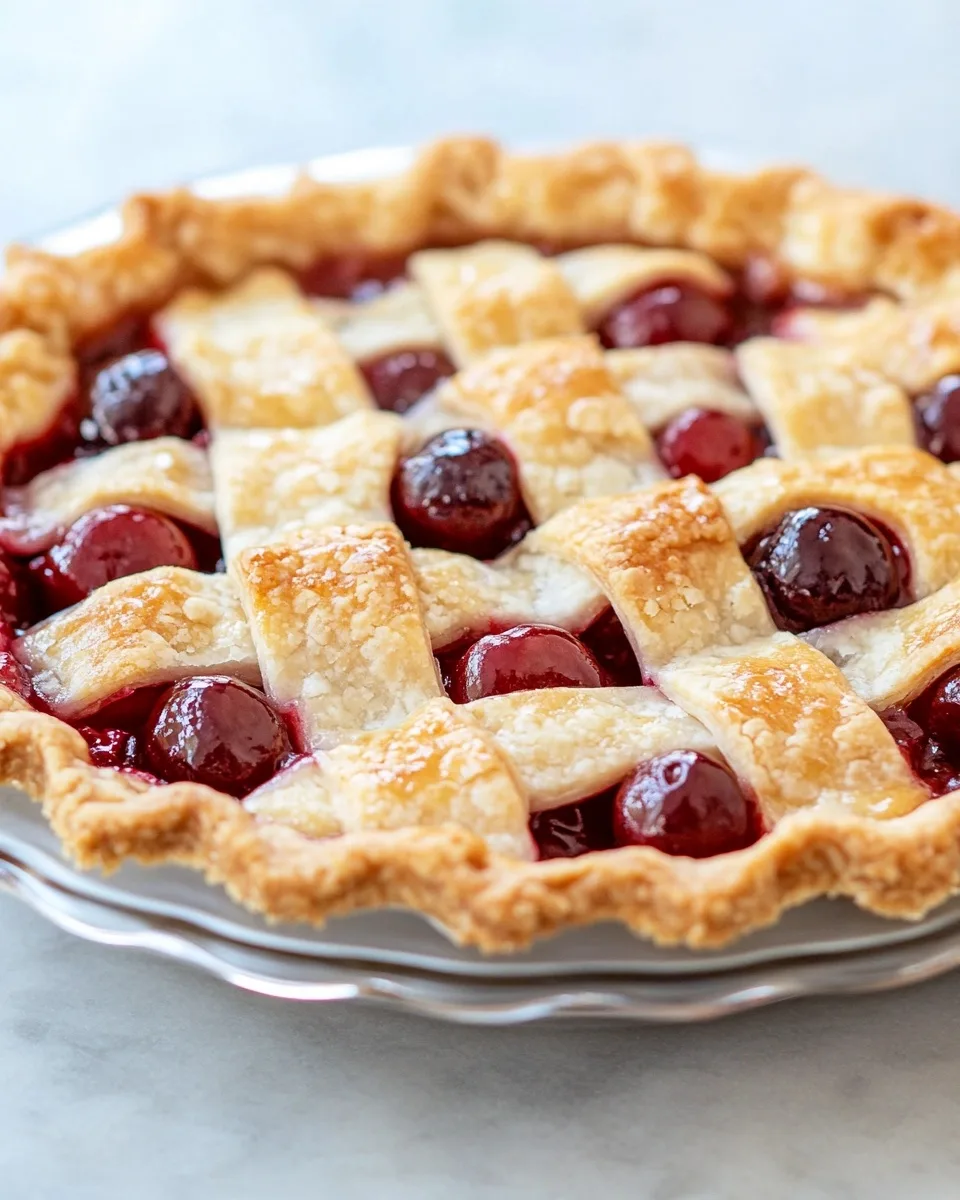
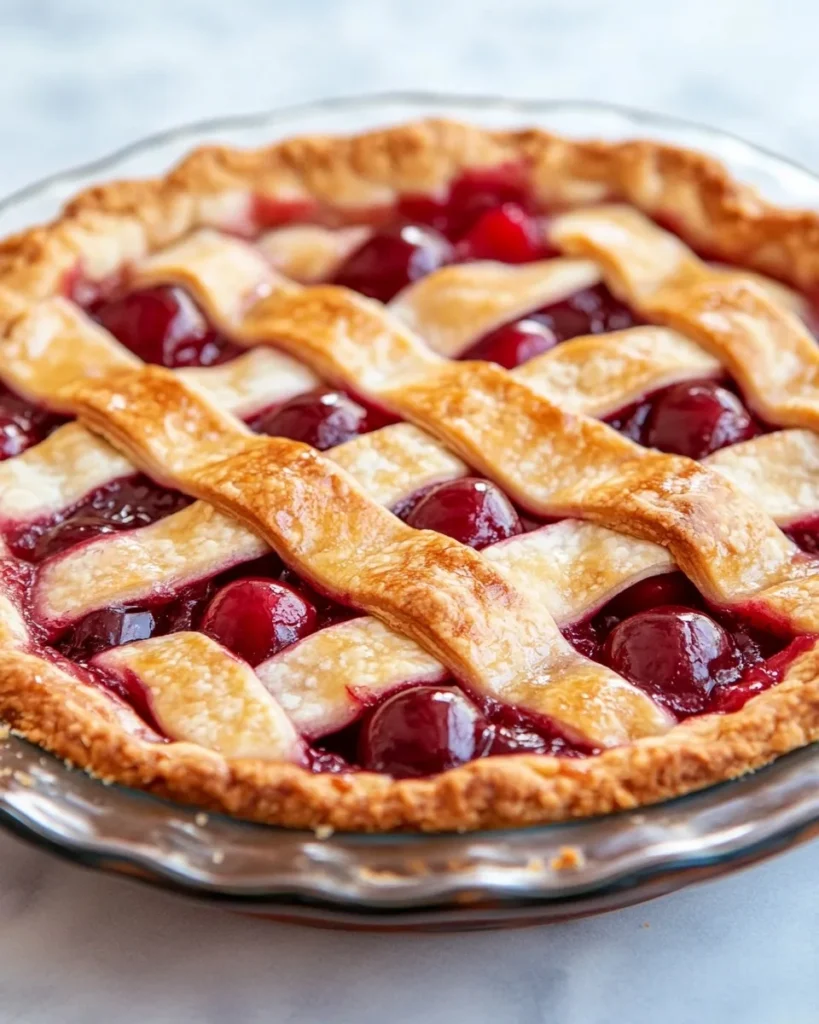
When it comes to desserts that comfort the soul and ignite nostalgia, cherry pie stands as a timeless classic. Its buttery, flaky crust wrapped around a sweet and tart cherry filling makes it a year-round favorite, whether you’re serving it on a summer picnic table or a cozy winter dinner.
In this comprehensive guide, we’re diving deep into the easy cherry pie recipe—how to make it from scratch (or semi-scratch!), why it’s so irresistible, the best tips to nail it every time, and answers to every common question you’ve had about cherry pie but were too shy to ask.
So grab your apron, preheat that oven, and let’s get into the ultimate cherry pie recipe experience. 🍒
🍒 What Makes Cherry Pie So Special?
Before we break down the step-by-step, let’s explore why cherry pie deserves a permanent spot in your dessert rotation:
- Burst of flavor: Tart cherries pair beautifully with sugar, giving you a balanced, juicy bite every time.
- Visual appeal: That ruby red filling beneath a golden crust is downright irresistible.
- Seasonal flexibility: While cherry season peaks in summer, canned cherry pie filling makes this a year-round delight.
- Simplicity: With a few ingredients and easy directions, you can pull this off even on a busy weekday.
🧾 Ingredients for Easy Cherry Pie Recipe
Making this easy cherry pie recipe doesn’t require a culinary degree. You’ll be amazed how just a few pantry staples can come together for a bakery-worthy result.
🍒 Ingredients:
- 🥧 2 refrigerated pie crusts (for top and bottom)
- 🍒 2 cans (21 oz each) cherry pie filling
- 🥚 1 egg (beaten, for egg wash)
- 🥄 1 tablespoon sugar (optional, for sprinkling)
That’s it! Simple, right? And yet the magic that comes from this blend is unforgettable.
🔥 Step-by-Step Directions to the Perfect Easy Cherry Pie Recipe
Let’s walk through every step of this easy cherry pie recipe together. It’s stress-free, promise!
1. Preheat the Oven
- Set your oven to 425°F (220°C) to get things heated up.
2. Prepare the Bottom Crust
- Unroll one pie crust and place it into a 9-inch pie plate.
- Press gently into the base and up the sides, smoothing any cracks.
3. Add the Cherry Pie Filling
- Pour in two full cans of cherry pie filling.
- Spread the filling evenly with a spoon or spatula to avoid any air pockets.
4. Top It Off
- Place your second pie crust on top.
- You can use it as a solid sheet with slits or get creative and make a lattice crust.
5. Seal the Edges
- Press the edges with a fork or pinch them together.
- This ensures no delicious filling escapes during baking.
6. Egg Wash and Sugar
- Brush the top crust with your beaten egg for that golden glow.
- Sprinkle with a tablespoon of sugar if you love a little crunch and sparkle.
7. Bake It
- Place your pie in the oven and bake for 30–35 minutes.
- Watch for a golden brown crust and bubbling filling—those are your signs of perfection.
8. Let It Cool
- Set it on a wire rack and cool for at least 2 hours before slicing.
- This sets the filling and prevents a gooey mess.
🕒 Cherry Pie Recipe Timings
| Stage | Duration |
|---|---|
| Prep Time | 10 minutes |
| Cook Time | 35 minutes |
| Total Time | 45 minutes |
Servings: 8 slices
Calories: ~400 kcal per slice
🎯 Why This Easy Cherry Pie Recipe Works
Still wondering if this is the best easy cherry pie recipe out there? Let’s break down why it consistently impresses:
✅ Foolproof Ingredients
Using refrigerated pie crusts and canned cherry filling removes the guesswork. No dealing with flour messes or pitting fresh cherries.
✅ Time-Saving
From start to finish, you’re done in under one hour. And most of that is just waiting while your home fills with the sweet scent of baking cherries.
✅ Consistent Results
With pre-made crust and measured filling, your pie will turn out nearly identical each time—perfect for family dinners or holiday events.
✅ Beginner-Friendly
Whether it’s your first time baking or your fiftieth, this recipe is welcoming, easy to follow, and delivers wow-worthy results.
👩🍳 Pro Tips for the Best Cherry Pie
Here’s how to elevate your easy cherry pie recipe from great to legendary:
🍋 Add a Touch of Lemon
Stir in 1 teaspoon of lemon juice or zest to the cherry filling for brightness.
🧂 Salt That Crust
Sprinkle a tiny pinch of sea salt over your egg-washed crust. It deepens flavor and balances sweetness.
🧊 Chill Your Pie Before Baking
Refrigerate the assembled pie for 15 minutes before baking. This helps the crust stay crisp.
🧼 Protect the Edges
Use a pie shield or foil strips around the edges to prevent over-browning.
🍨 Serve with a Twist
Pair your slice with vanilla ice cream, whipped cream, or even melted chocolate for an indulgent treat.
🛍️ Choosing the Right Cherry Pie Filling
There’s a wide range of cherry pie fillings on the market. For the best results:
- Go for premium brands that use whole cherries.
- Check the label for real fruit content and fewer artificial additives.
- Prefer sour or tart cherry varieties for authentic flavor balance.
🥧 Making Your Own Cherry Pie Filling (Optional)
Feeling ambitious? You can substitute canned filling with homemade:
Ingredients:
- 🍒 4 cups pitted cherries (fresh or frozen)
- 🥄 1 cup sugar
- 🥄 ¼ cup cornstarch
- 🥄 1 tbsp lemon juice
- 💧 ½ cup water
Directions:
- Combine cherries, sugar, and water in a saucepan.
- Bring to boil and reduce to simmer for 10 minutes.
- Stir in cornstarch and lemon juice.
- Cook until thickened, about 5 more minutes.
- Let cool before using.
🌎 Cherry Pie Across Cultures
Cherry pie may be iconic in American kitchens, but its appeal is global:
- Germany offers Kirschkuchen, a cherry sheet cake with almond toppings.
- In Eastern Europe, cherries are often folded into dumplings or pastries.
- France’s clafoutis is a cherry-rich custard dessert that’s halfway between pie and flan.
Wherever you are, the cherry’s charm transcends borders. This easy cherry pie recipe is a love letter to that universal joy.
🔁 Storing and Reheating Cherry Pie
Storage:
- Room temp: 2 days (covered loosely with foil)
- Fridge: Up to 5 days (in an airtight container)
- Freezer: Wrap slices in plastic wrap and foil, freeze up to 3 months
Reheating:
- Oven: 325°F for 10–15 minutes
- Microwave: 20–30 seconds (cover with paper towel)
Reheating in the oven retains that flaky crust better!
🍽️ Creative Variations of Cherry Pie
Looking to experiment with your easy cherry pie recipe? Try these fun twists:
🍫 Chocolate Cherry Pie
- Add ½ cup chocolate chips into the filling before baking.
🥥 Coconut Crust
- Mix ½ cup shredded coconut into the bottom crust for a tropical touch.
🧀 Cherry Cheesecake Pie
- Spread a thin layer of cream cheese on the bottom crust before the cherry filling.
🥧 Mini Cherry Pies
- Use muffin tins and cut pie crusts into rounds to create individual pies.
❓ FAQs About the Easy Cherry Pie Recipe
Can I use frozen cherries instead of canned filling?
Yes! But you’ll need to cook and sweeten them first. Refer to the homemade cherry pie filling section above.
Is it better to use store-bought crust or make my own?
Store-bought is faster and more convenient. However, homemade crust offers a richer, buttery flavor. Both work wonderfully!
Can I make cherry pie ahead of time?
Absolutely. You can assemble and refrigerate overnight, then bake fresh. Or bake and freeze it for later enjoyment.
What if my crust burns before the filling bubbles?
Use foil or a pie shield to cover the crust edges halfway through baking. Also, check your oven temperature accuracy.
Why is my pie runny after baking?
It probably didn’t cool long enough. Allowing the pie to cool for at least 2 hours helps the filling set properly.
Can I make this cherry pie gluten-free?
Yes! Just use gluten-free pie crusts and ensure your canned filling is also gluten-free.
🏁 Conclusion: Your Cherry Pie Journey Starts Here
There you have it—the ultimate, foolproof, and mouthwatering easy cherry pie recipe that you can make with confidence today. Whether you’re whipping it up for a special occasion or craving a slice on a random Tuesday, this dessert is sure to impress.
With a prep time of just 10 minutes and a flavor that tastes like hours of effort, there’s no reason to wait. Try the recipe today, play with the variations, and savor every last cherry-soaked bite.
Bake it. Share it. Devour it. 🍒🥧
Print
🍒 Easy Cherry Pie Recipe: The Only Guide You’ll Ever Need
Ingredients
-
▪️ 1 can (21 oz) cherry pie filling
-
▪️ 2 refrigerated pie crusts (or your favorite homemade version)
-
▪️ 1 tbsp butter (cut into small pieces)
-
▪️ 1 egg (for egg wash)
-
▪️ 1 tbsp milk (for egg wash)
-
▪️ 1 tbsp coarse sugar (optional, for sprinkling)
Instructions
-
Preheat oven to 425°F (220°C).
-
Place one pie crust into a 9-inch pie dish and gently press it down into the bottom and sides.
-
Pour in the cherry pie filling and spread evenly. Dot with small bits of butter.
-
Cover with the second crust. You can keep it whole and cut slits for steam, or make a lattice top.
-
Crimp the edges to seal.
-
Whisk the egg and milk, then brush over the top crust. Sprinkle with coarse sugar for sparkle. ✨
-
Place pie on a baking sheet and bake for 15 minutes.
-
Lower oven temperature to 350°F (175°C) and continue baking for 30–35 minutes, until the crust is golden and the filling is bubbly.
-
Let cool for at least 2 hours before slicing — this helps the filling set!