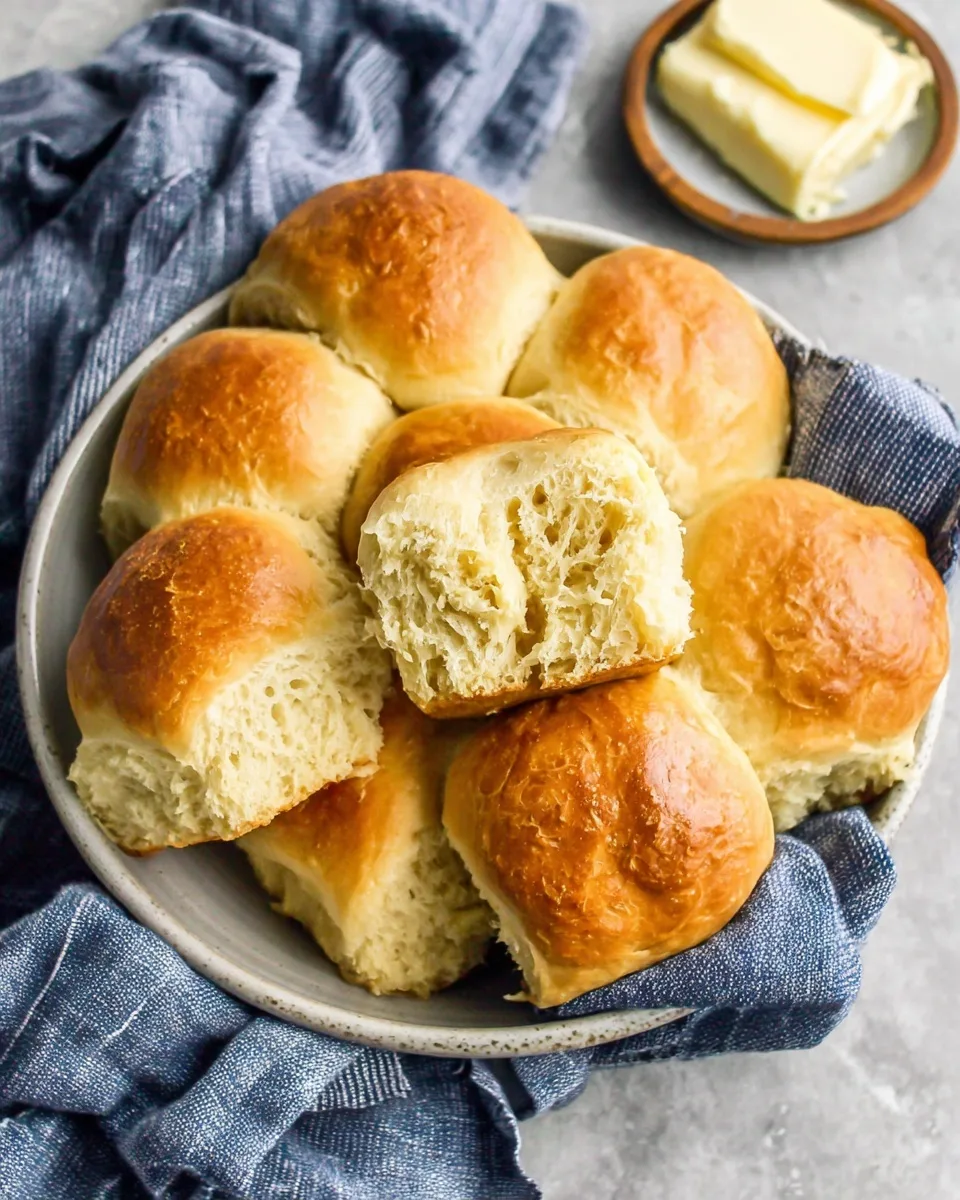
Soft, Buttery, and Perfectly Fluffy Rolls Every Time
There’s something magical about warm homemade dinner rolls fresh out of the oven. The soft, pillowy texture, the golden buttery crust, and that unmistakable freshly baked aroma—it’s the kind of comfort food that turns an ordinary meal into a memorable one. Whether you’re making them for a holiday feast, a weeknight dinner, or just because you’re craving something cozy and satisfying, these homemade dinner rolls are the perfect addition to your table.
In this in-depth guide, we’ll walk you through everything you need to know to make the best homemade dinner rolls from scratch. From mastering the yeast to shaping the dough just right, you’ll learn all the secrets behind making fluffy, golden, bakery-style rolls that are so good, they’ll steal the spotlight.
Why You’ll Love These Homemade Dinner Rolls
Before diving into the steps, let’s talk about why these homemade dinner rolls are worth making (again and again).
- Incredibly soft and fluffy – The perfect texture in every bite.
- Made with simple pantry ingredients – No need for anything fancy.
- Versatile and customizable – Sweet, savory, or classic.
- Freezer-friendly – Great for meal prep or making ahead for guests.
- Better than store-bought – Hands down, these rolls win every time.
Ingredients You’ll Need (Makes 12 Rolls)
Here’s a breakdown of what goes into making a perfect batch of homemade dinner rolls. Each ingredient plays an important role in creating that ideal texture and flavor.
- 3 ½ cups all-purpose flour – Start with this amount, but keep more on hand for kneading.
- 1 packet (2 ¼ tsp) active dry yeast – This is the rising agent that gives your rolls their lift.
- 1 cup warm milk (about 110°F / 43°C) – Warm milk activates the yeast and adds richness.
- ¼ cup granulated sugar – Feeds the yeast and adds a subtle sweetness.
- 1 large egg – Adds structure and contributes to the richness of the dough.
- ¼ cup unsalted butter, melted – Gives a soft, buttery texture and flavor.
- 1 tsp salt – Enhances the overall flavor of the rolls.
Optional for finishing:
- More melted butter for brushing the tops after baking (highly recommended!).

Step-by-Step Instructions: How to Make Homemade Dinner Rolls
1. Activate the Yeast
Start by waking up your yeast. In a small bowl, combine the warm milk, sugar, and active dry yeast. Let this mixture sit for 5 to 10 minutes until it becomes foamy on top. This tells you the yeast is alive and ready to work its magic.
Pro tip: The milk should be warm to the touch but not hot—about 110°F (43°C). If it’s too hot, it can kill the yeast.
2. Mix the Dough
In a large bowl or the bowl of a stand mixer, pour in the yeast mixture. Add the melted butter, egg, and salt. Begin stirring everything together with a wooden spoon or dough hook attachment.
Now, gradually add the flour, one cup at a time. The dough should start to come together and pull away from the sides of the bowl. You’re aiming for a soft, slightly sticky dough that’s not too dry.
Note: You may not need the full 3½ cups, or you may need a touch more. The humidity in your kitchen and the type of flour you’re using can affect how much you need.
3. Knead the Dough
Once the dough is combined, it’s time to knead. If using a stand mixer, knead on medium speed for 5 to 6 minutes using the dough hook. If kneading by hand, transfer the dough to a lightly floured surface and knead for about 8 to 10 minutes.
You’ll know the dough is ready when it’s smooth, elastic, and slightly tacky but not overly sticky.
4. First Rise (Let the Dough Rest and Grow)
Place the kneaded dough into a lightly greased bowl, turning it once to coat all sides. Cover the bowl with plastic wrap or a clean kitchen towel.
Let the dough rise in a warm, draft-free place for about 1 to 1.5 hours, or until it has doubled in size.
If your kitchen is cool, you can place the bowl in a turned-off oven with the light on or near a warm window.
5. Shape the Rolls
Once your dough has doubled, punch it down gently to release the air. Transfer it to a lightly floured surface and divide it into 12 equal pieces.
Shape each piece into a smooth ball by tucking the edges underneath and rolling it gently in your palms.
Place the shaped rolls in a greased 9×13-inch baking dish or on a parchment-lined baking sheet, spaced slightly apart for even baking.
6. Second Rise (Final Proofing)
Cover the rolls loosely with plastic wrap or a clean towel and let them rise again for 30 to 45 minutes, or until they’re noticeably puffy and almost doubled in size.
7. Bake the Rolls
Preheat your oven to 375°F (190°C) while the rolls are finishing their second rise.
Once ready, bake the rolls for 18 to 22 minutes, or until the tops are a beautiful golden brown. If you’re using a thermometer, the internal temperature of the rolls should be about 190°F (88°C).
8. Brush with Butter and Serve
Right after removing the rolls from the oven, brush the tops generously with melted butter. This gives the rolls a shiny, golden finish and an irresistible buttery flavor.
Let them cool for a few minutes before serving warm.
Tips & Variations to Master Homemade Dinner Rolls
Creating your own homemade dinner rolls gives you the freedom to tweak the recipe and make it your own. Here are some of the best ideas to try:
Make-Ahead Rolls
Want to prep the day before? After shaping the rolls, cover and refrigerate them overnight. Let them sit at room temperature for about an hour the next day before baking.
Garlic Herb Dinner Rolls
Add 1 teaspoon of garlic powder and 1 tablespoon of chopped fresh herbs (like rosemary or parsley) to the dough. You can also infuse the butter used for brushing with garlic for extra flavor.
Sweet Dinner Rolls
To make a sweeter version, add an extra tablespoon of sugar to the dough and finish with honey butter (mix melted butter with a bit of honey) after baking.
Whole Wheat Version
Substitute up to half of the all-purpose flour with whole wheat flour for a nuttier, heartier roll. You may need a little extra milk to keep the dough soft.
Cheese-Stuffed Dinner Rolls
Before shaping the rolls, place a small cube of mozzarella or cheddar inside each dough piece. Seal it up well and bake as usual for a gooey surprise inside.
Serving Suggestions for Homemade Dinner Rolls
Homemade dinner rolls are incredibly versatile and can elevate any meal. Whether you’re enjoying them fresh from the oven or using leftovers creatively, here are a few delicious ways to serve them:
Classic Pairings
- With soup or stew – Serve your warm, fluffy rolls alongside a comforting bowl of chicken noodle soup, beef stew, or creamy tomato bisque.
- Holiday dinners – These rolls are a must-have with roast turkey, ham, or pot roast.
- Sunday roast – Nothing beats warm rolls with gravy and mashed potatoes.
Creative Ways to Serve
- Mini sandwiches – Slice them in half and fill with leftover turkey, ham, or pulled pork.
- Breakfast sliders – Add scrambled eggs, bacon, and cheese inside for a hearty morning treat.
- Garlic bread – Halve and toast with garlic butter under the broiler for a quick side.
How to Store Homemade Dinner Rolls
Proper storage helps your homemade dinner rolls stay soft and delicious even after baking. Here’s how to do it:
Room Temperature
Once cooled, store rolls in an airtight container or zip-top bag at room temperature. They will stay fresh for about 2 to 3 days. You can refresh them by warming slightly in the oven or microwave.
Freezer Instructions
Freezing baked rolls:
- Allow the rolls to cool completely.
- Place them in a freezer-safe bag or container.
- Freeze for up to 3 months.
To reheat: Thaw at room temperature, then warm in a 325°F (160°C) oven for 10 minutes.
Freezing unbaked rolls:
- Shape the dough into rolls, then place them on a baking sheet lined with parchment.
- Freeze until solid, then transfer to a freezer-safe bag.
- When ready to bake, thaw and let rise at room temperature until puffy (about 1–2 hours), then bake as directed.
Tip: Label and date your rolls so you don’t forget how long they’ve been frozen.
Troubleshooting Common Dinner Roll Issues
Even experienced bakers sometimes run into issues with bread baking. Here are some helpful fixes:
Why Didn’t My Dough Rise?
This could be due to:
- Dead yeast – Always check the expiration date and proof your yeast properly.
- Milk too hot – Anything over 115°F can kill yeast.
- Cold environment – Yeast needs warmth to rise; try moving it to a warmer spot.
Why Are My Rolls Dense Instead of Fluffy?
- Not kneading long enough – The dough needs time to develop gluten for that light texture.
- Too much flour – Start with less and add more only as needed.
- Skipping the second rise – That final proof gives rolls their lift.
Why Are My Rolls Dry?
- Overbaking – Check at the minimum baking time.
- Lack of moisture – Make sure to use melted butter before and after baking for maximum softness.
FAQs About Homemade Dinner Rolls
1. Can I use instant yeast instead of active dry yeast?
Yes, you can substitute instant yeast in equal amounts. Since instant yeast doesn’t require proofing, you can mix it directly into the flour. However, activating it with warm milk and sugar (as in this recipe) can still give great results.
2. What’s the best flour to use for soft dinner rolls?
All-purpose flour works perfectly and creates soft, fluffy rolls. If you prefer a chewier texture, you can mix in some bread flour, but it’s not necessary for this recipe.
3. Can I double the recipe?
Absolutely! This recipe doubles easily. Just make sure your mixing bowl and baking pan are large enough to handle the larger quantity. The rise times and baking temperature remain the same.
4. How do I get a golden brown top without overbaking?
Brushing the tops with butter before and after baking helps. You can also use an egg wash (1 beaten egg with 1 tbsp milk) before baking if you prefer a shinier, darker top.
5. Can I make these without a stand mixer?
Yes! This dough is easy to mix and knead by hand. It just takes a bit more time and elbow grease, but the results are just as delicious.
6. Why is my dough sticky?
A slightly sticky dough is ideal. Don’t be tempted to add too much flour—this can lead to dry, dense rolls. Instead, lightly flour your hands and surface when shaping the dough.
7. Can I add fillings like cheese or herbs inside the rolls?
Definitely! Add shredded cheese, cooked bacon bits, or sautéed onions to the dough during mixing or place fillings inside each roll before shaping. You can also add fresh herbs for an aromatic twist.
8. How do I keep the rolls warm for serving?
Place them in a clean kitchen towel-lined basket or baking dish and cover with foil. You can also keep them warm in a low oven (around 200°F / 93°C) for up to 30 minutes before serving.
9. What’s the difference between these and store-bought dinner rolls?
The difference is night and day. Homemade dinner rolls are free of preservatives, taste fresher, and can be customized exactly to your liking. Plus, the satisfaction of baking them yourself is unbeatable.
10. Can I make these vegan?
Yes! Use plant-based milk, vegan butter, and a flax egg (1 tbsp flaxseed meal + 3 tbsp water) instead of the egg. The texture may vary slightly, but they’ll still be soft and tasty.
Conclusion: The Joy of Homemade Dinner Rolls
There’s nothing quite like the joy of pulling a tray of homemade dinner rolls out of the oven. The golden tops, the warm buttery aroma, and that soft, cloud-like bite—it’s all a reminder that simple ingredients can create something truly extraordinary. Whether you’re making them for a special holiday meal or just because your dinner needs a little something extra, these homemade dinner rolls will always impress.
They’re the kind of recipe that becomes a family favorite—passed down, memorized, and made with love. Once you get comfortable with the process, you’ll never want to buy store-bought rolls again. With endless variations, make-ahead convenience, and the power to turn any meal into something cozy and special, these homemade dinner rolls will become a go-to in your kitchen for years to come.
So roll up your sleeves, preheat that oven, and treat yourself (and your family) to the magic of fresh, fluffy, buttery rolls made completely from scratch. You’ve got this.
Print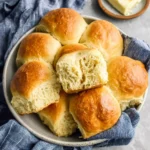
Homemade Dinner Rolls Recipe
Ingredients
-
3 ½ cups all-purpose flour (plus extra as needed)
-
1 packet (2 ¼ tsp) active dry yeast
-
1 cup warm milk (about 110°F / 43°C)
-
¼ cup granulated sugar
-
1 large egg
-
¼ cup unsalted butter, melted (plus more for brushing)
-
1 tsp salt
Instructions
1. Activate the yeast:
-
In a small bowl, combine warm milk, sugar, and yeast. Let sit for 5–10 minutes, until foamy.
2. Mix the dough:
-
In a large bowl (or stand mixer), combine the yeast mixture, melted butter, egg, and salt.
-
Add flour gradually until a soft, slightly sticky dough forms. Knead for 8–10 minutes until smooth and elastic (or 5–6 mins with dough hook).
3. First rise:
-
Place the dough in a lightly greased bowl, cover with a towel or plastic wrap, and let rise in a warm spot until doubled — about 1 to 1.5 hours.
4. Shape the rolls:
-
Punch down the dough. Divide into 12 equal pieces and shape into smooth balls.
-
Place in a greased 9×13-inch baking dish or on a parchment-lined baking sheet.
5. Second rise:
-
Cover and let rise again for 30–45 minutes, until puffy.
6. Bake:
-
Preheat oven to 375°F (190°C).
-
Bake rolls for 18–22 minutes, until golden brown.
7. Brush & serve:
-
Immediately brush hot rolls with melted butter for that shiny, soft top.
-
Serve warm and enjoy!