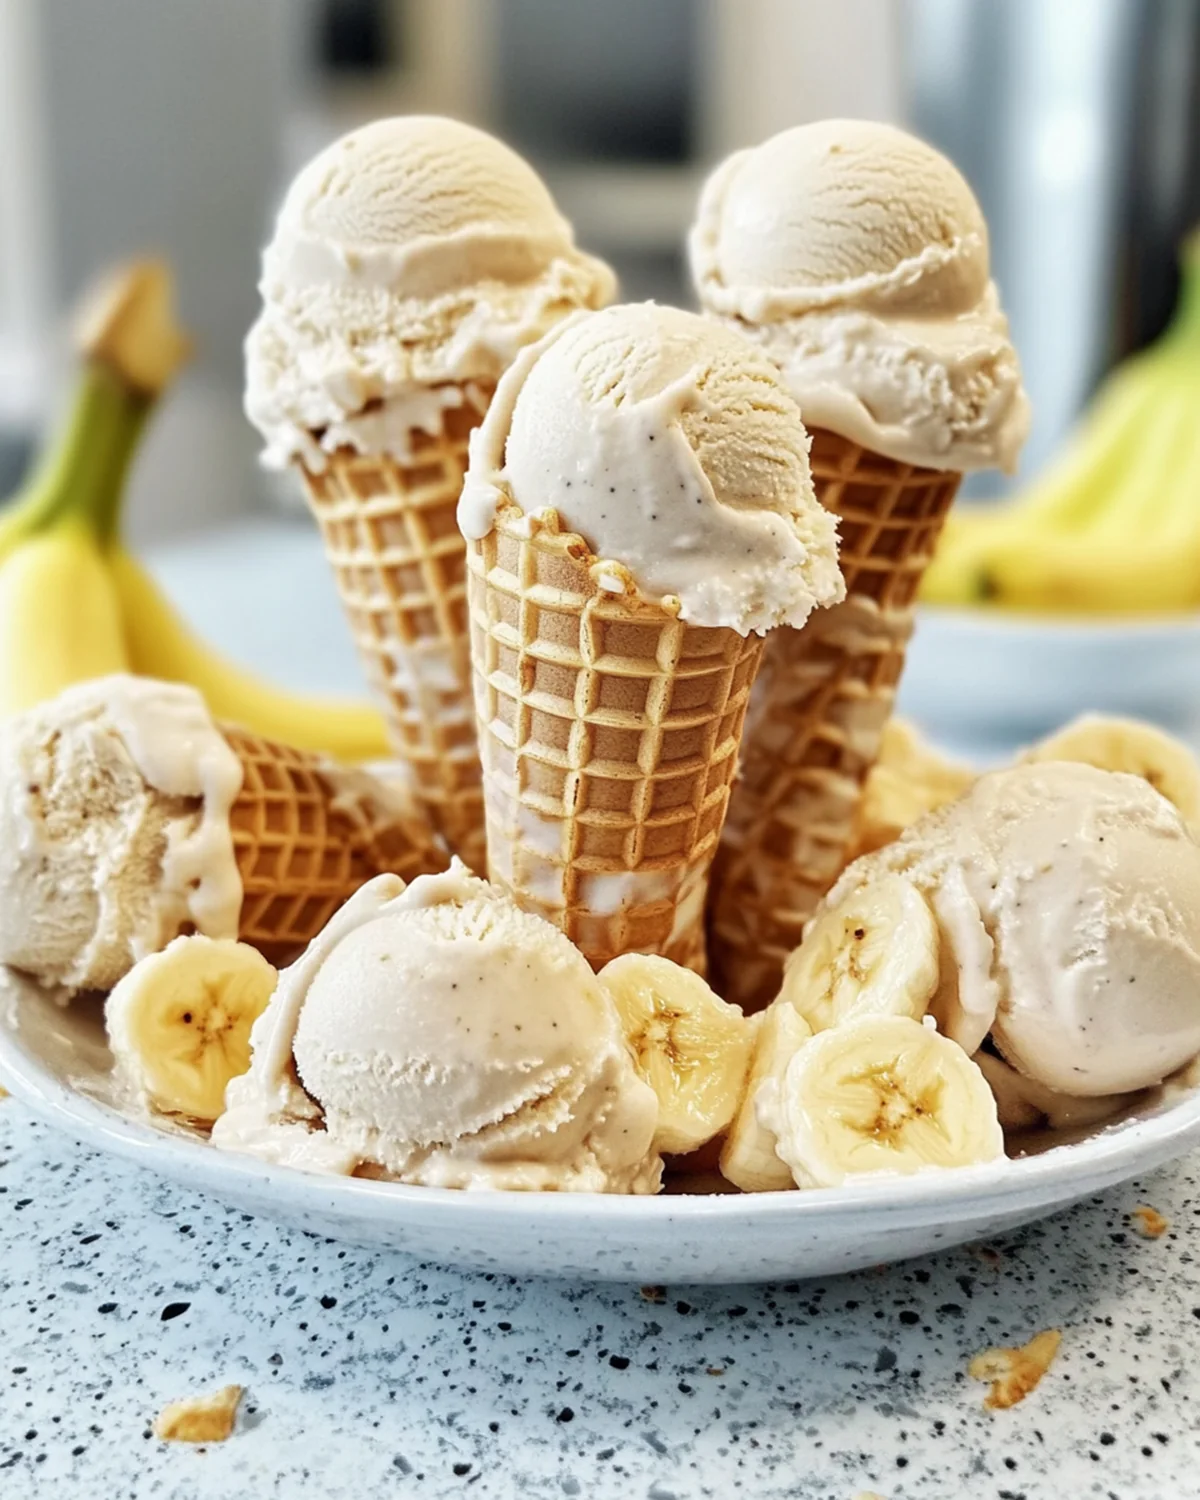
If you’re a fan of banana pudding, you’ll love this banana pudding ice cream recipe served in crispy waffle cones. This dessert is the perfect combination of creamy banana flavor, crunchy vanilla wafers, and smooth, rich ice cream. Whether you’re making it for a summer treat, a birthday party, or just to satisfy a sweet craving, this homemade banana pudding ice cream will be a crowd-pleaser. Best of all, it’s easy to make and requires just a few simple ingredients!
In this comprehensive guide, we’ll go over everything you need to know about making banana pudding ice cream cones from scratch, including expert tips, storage methods, and variations to customize your dessert. Let’s get started!
Why You’ll Love This Recipe
- Creamy and smooth texture – Thanks to the perfect blend of heavy cream and banana pudding mix.
- Easy to make – No complicated ingredients or techniques required.
- Perfect summer treat – Refreshing, light, and packed with banana flavor.
- Customizable – Add different toppings, drizzle caramel, or mix in nuts for added crunch.
Ingredients You’ll Need
For the Banana Pudding Ice Cream:
- 2 large ripe bananas, mashed
- 1 cup whole milk
- 2 cups heavy cream
- ¾ cup granulated sugar
- 1 teaspoon vanilla extract
- 1 (3.4 oz) box instant banana pudding mix
- ½ cup crushed vanilla wafers
For the Cones and Toppings:
- 6 waffle cones
- ½ cup whipped cream
- ½ cup crushed vanilla wafers
- Sliced bananas for garnish (optional)
- Caramel sauce for drizzling (optional)

Step-by-Step Instructions
1. Prepare the Ice Cream Mixture
In a large mixing bowl, whisk together mashed bananas, milk, heavy cream, sugar, and vanilla extract until well combined. Make sure the mixture is smooth and well incorporated.
2. Add Banana Pudding Mix
Slowly whisk in the banana pudding mix until fully dissolved. This will help create a rich, creamy texture and enhance the banana flavor.
3. Churn the Ice Cream
- If using an ice cream maker, pour the mixture into the machine and churn according to the manufacturer’s instructions (usually 20-25 minutes).
- In the last 5 minutes of churning, add crushed vanilla wafers for extra crunch.
- If you don’t have an ice cream maker, pour the mixture into a loaf pan, cover, and freeze for 4-6 hours, stirring every hour for a creamier texture.
4. Assemble the Cones
- Once the ice cream is set, scoop it into waffle cones.
- Top with whipped cream, extra crushed vanilla wafers, and sliced bananas.
- Drizzle with caramel sauce for added flavor (optional).
5. Serve and Enjoy!
Enjoy immediately or freeze assembled cones for a firmer texture.
Expert Tips for the Best Banana Pudding Ice Cream
- Use ripe bananas – The riper, the better for natural sweetness.
- Chill your mixture before churning for a smoother consistency.
- Don’t over-mix – Over-churning can make the ice cream too thick.
- Store properly – Keep ice cream in an airtight container to prevent freezer burn.
Frequently Asked Questions (FAQs)
1. Can I make this ice cream without an ice cream maker?
Yes! Simply mix the ingredients and freeze, stirring every hour to break up ice crystals.
2. How long does homemade ice cream last?
It can last up to 2 weeks in the freezer if stored in an airtight container.
3. Can I use other pudding flavors?
Absolutely! Try vanilla, chocolate, or butterscotch pudding for a fun twist.
4. What can I use instead of waffle cones?
Serve in bowls, sugar cones, or even as an ice cream sandwich between cookies.
5. Can I make this dairy-free?
Yes! Use coconut milk and a dairy-free pudding mix as substitutes.
Conclusion
This banana pudding ice cream cone recipe is a must-try for any banana lover! With a rich, creamy texture, crunchy vanilla wafers, and a delightful banana flavor, this homemade ice cream is guaranteed to impress. Whether you’re making it for a special occasion or just because, it’s an easy and rewarding recipe that’s worth every scoop. Try it today and enjoy a delicious, refreshing treat!
Print
Banana Pudding Ice Cream Cones – A Creamy, Crunchy Summer Delight
Ingredients
For the Banana Pudding Ice Cream:
2 large ripe bananas, mashed
1 cup whole milk
2 cups heavy cream
¾ cup granulated sugar
1 teaspoon vanilla extract
1 (3.4 oz) box instant banana pudding mix
½ cup crushed vanilla wafers
For the Cones and Toppings:
6 waffle cones
½ cup whipped cream
½ cup crushed vanilla wafers
Sliced bananas for garnish (optional)
Caramel sauce for drizzling (optional)
Instructions
Prepare the Ice Cream: In a large mixing bowl, whisk together mashed bananas, milk, heavy cream, sugar, and vanilla extract until well combined. Add banana pudding mix and continue whisking until smooth. Pour the mixture into an ice cream maker and churn according to the manufacturer’s instructions (usually 20-25 minutes). In the last 5 minutes of churning, add crushed vanilla wafers. If you don’t have an ice cream maker, pour the mixture into a loaf pan, cover, and freeze for 4-6 hours, stirring every hour for a creamier texture.
Assemble the Cones: Once the ice cream is set, scoop it into waffle cones. Top with whipped cream, extra crushed vanilla wafers, and sliced bananas. Drizzle with caramel sauce if desired.
Serve: Enjoy immediately or freeze assembled cones for a firmer texture.