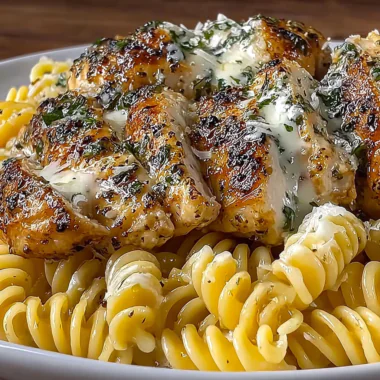
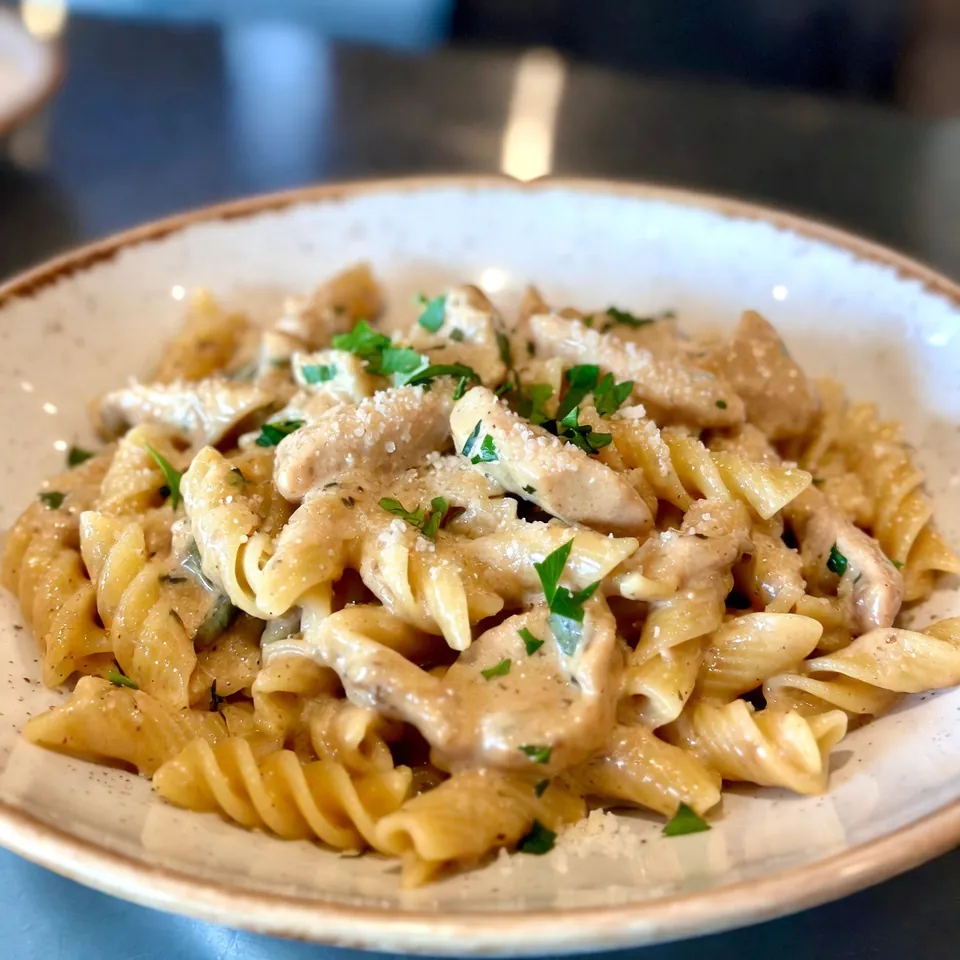
A rich, velvety sauce clinging to tender chicken and perfectly cooked pasta — all in one skillet, start to finish.
📋 In This Article
Introduction
Let’s be honest: most creamy garlic parmesan chicken pasta recipes lie to you. They promise “one-pan convenience” but sneakily require boiling pasta separately, dirtying a colander, and creating twice the cleanup. Not this one. Everything — the seared chicken, the aromatic garlic base, the al dente pasta — happens in the same skillet. The starch from the pasta thickens the sauce naturally, creating a silky, cohesive dish that tastes like it came from a restaurant kitchen.
The real magic here is layering. You’re not just dumping ingredients together. You’re building flavor in stages: searing the chicken to trigger the Maillard reaction (that’s the browning that creates hundreds of new flavor compounds), deglazing the pan to capture the fond, and finishing with freshly grated Parmesan that melts into the cream without a hint of graininess. Thirty minutes. One pan. Done. Creamy Garlic Parmesan Chicken Pasta Recipe.
Why You’ll Love This Recipe
Busy weeknight? This one-pan method means you’re not juggling multiple pots or scrubbing burned cheese off a colander. The entire dish comes together in 30 minutes, making it a legitimate option for those evenings when takeout feels tempting but you want something homemade.
The flavor profile hits every note: the sharp, nutty depth of real Parmesan, the aromatic punch of garlic, and the subtle sweetness of sautéed onion. It’s rich without being heavy. And because the pasta cooks directly in the broth and cream, it absorbs flavor rather than just getting coated on the surface.
This is a family favorite for a reason. Kids love the creamy sauce. Adults appreciate the depth. And you’ll love that cleanup takes approximately 90 seconds.
Key Ingredients for the Perfect Creamy Sauce
Chicken
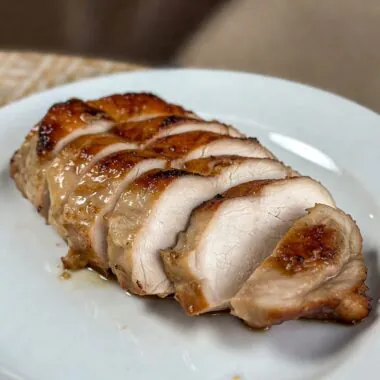
Boneless, skinless chicken breasts work well here because they cook quickly and stay tender. But here’s the thing: cut them into uniform 1-inch pieces. Uneven chunks mean some pieces dry out while others are still raw. Season aggressively with Italian seasoning, salt, and pepper before they hit the pan — you can’t fix bland chicken after the fact.
Sauce
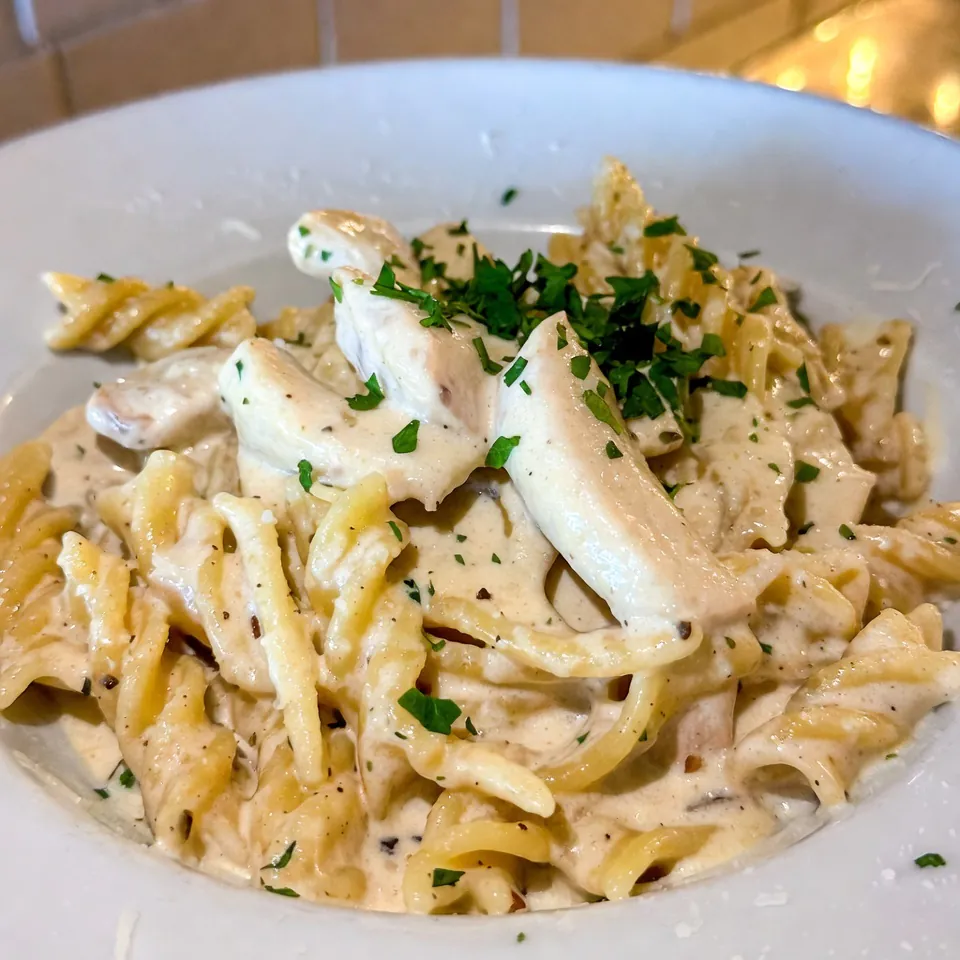
The sauce is where most recipes fail. They use pre-grated Parmesan, which contains anti-caking agents like cellulose that prevent proper melting. The result? A grainy, broken mess. Use freshly grated Parmesan cheese — ideally from a wedge you grate yourself. It melts smoothly and delivers that sharp, umami-rich flavor.
Heavy cream provides the velvety base. Don’t sub in half-and-half unless you want a thinner, less luxurious sauce. The fat content matters for both texture and flavor. Start by building your base: sauté onion in olive oil and butter until translucent, then add minced garlic for just 30 seconds — any longer and it turns bitter. A small amount of flour creates a roux that stabilizes the sauce, and chicken broth adds depth while providing liquid for the pasta to absorb.
Pasta
Penne or rigatoni are ideal. Their tubular shape and ridges trap the sauce, ensuring every bite is coated. Avoid long pasta like spaghetti — it’s harder to manage in a skillet and doesn’t hold the sauce as effectively. Cook the pasta directly in the liquid, which releases starch into the sauce and creates natural thickening.
Final Touch
Finish with fresh parsley for color and a mild herbal brightness that cuts through the richness. A final shower of extra Parmesan never hurts, either.
Step-by-Step Instructions
Step 1: Prepare and Sear the Chicken
Pat boneless, skinless chicken breasts dry and cut into 1-inch pieces. Wet chicken steams instead of searing. Season generously with salt and pepper. Heat a large, deep skillet over medium-high heat with a drizzle of olive oil. When the oil shimmers — this is crucial, so don’t rush it — add the chicken in a single layer.
Here’s the mistake I made for years: overcrowding the pan. When you cram too much chicken in at once, the temperature drops, moisture releases, and you end up with gray, boiled meat. Work in batches if needed. Cook 5-7 minutes until golden brown and the internal temperature reaches 165°F. Remove and set aside.
Step 2: Build the Aromatic Base
Reduce heat to medium. Add 2 tablespoons unsalted butter and a splash of olive oil to the same skillet. Once melted, add 1 diced yellow onion and sauté 3 minutes until translucent. Add 4 minced garlic cloves and cook exactly 30 seconds. Garlic burns fast, and burnt garlic is irredeemably bitter.
Step 3: Deglaze and Create the Cooking Liquid
Pour in 1 cup chicken broth, scraping the bottom of the pan with a wooden spoon. Those browned bits — the fond — are concentrated flavor. Leaving them stuck to the pan wastes the best part of the dish. Let the liquid come to a gentle boil.
Step 4: Cook the Pasta in the Sauce
Add 8 ounces penne pasta directly to the skillet. Make sure it’s submerged in the liquid. Cover and cook 10-12 minutes, stirring occasionally to prevent sticking. The pasta should reach al dente texture — tender but with a slight bite. It will continue cooking slightly in the residual heat, so pull it a touch early if you’re unsure.
Step 5: Finish the Sauce
Lower the heat. Stir in ¾ cup heavy cream and ½ cup freshly grated Parmesan cheese. Simmer gently for 2-3 minutes. Do not let it boil — high heat can cause the dairy proteins to separate, creating a grainy texture. The sauce should coat the back of a spoon. Taste and adjust seasoning.
Step 6: Combine and Serve
Return the chicken to the skillet. Toss everything together until the chicken is warmed through and evenly coated. If the sauce seems too thick, add a splash of pasta water or chicken broth to loosen it.
Serve hot, garnished with fresh parsley and additional Parmesan if desired. Crusty bread on the side is non-negotiable in my house — you’ll want something to soak up every last bit of sauce.
💡 Pro Tips for Success
Uniform chicken pieces are non-negotiable. Aim for 1-inch cubes. Smaller pieces overcook and dry out; larger ones stay raw in the center while the exterior browns. Use a sharp knife and take the extra 30 seconds to cut evenly.
Preheat your pan properly. Here’s the test: flick a few drops of water into the skillet. If they dance and evaporate immediately, the pan is ready. If they sit there, it’s too cold. If they vanish instantly with a sizzle, it’s too hot. Proper preheating ensures the chicken sears rather than steams.
Grate your own cheese. I tested this side-by-side with pre-grated Parmesan, and the difference was striking. Pre-grated cheese created a slightly grainy, less cohesive sauce. Freshly grated melted seamlessly into the cream, creating a velvety texture. The anti-caking agents in pre-grated cheese — usually cellulose or potato starch — interfere with emulsification.
Rest your chicken before adding it back. When meat cooks, heat forces moisture toward the center. Resting allows the juices to redistribute. Cut into it immediately, and you lose up to 40% of that moisture onto the cutting board. A 3-4 minute rest makes a measurable difference in juiciness.
Save some pasta water. Before draining (if you cooked pasta separately) or when the liquid level gets low, reserve a small cup. The starch-rich water is liquid gold for adjusting sauce consistency without diluting flavor.
⚠️ Common Mistakes to Avoid
Overcooking the chicken. This is the most common error. Chicken breast goes from perfectly done to dry and stringy in a matter of minutes. Use a meat thermometer and pull at 165°F. Carryover cooking will push it slightly higher as it rests. Creamy Garlic Parmesan Chicken Pasta Recipe.
Using pre-grated Parmesan. I mentioned this already, but it bears repeating. Pre-grated cheese contains anti-caking agents that prevent clumping in the package — and also prevent smooth melting in your sauce. The result is a grainy, broken texture that no amount of whisking can fix.
Skipping the deglazing step. Those browned bits stuck to the pan after searing the chicken? That’s the fond, and it’s packed with concentrated flavor from the Maillard reaction. Deglazing with broth releases those compounds into your sauce. Skip it, and you’re leaving flavor behind.
Burning the garlic. Garlic goes from fragrant to acrid in seconds. Add it after the onions have softened, and cook it only until aromatic — about 30 seconds. If it starts browning, you’ve gone too far.
Boiling the cream. Heavy cream can separate if subjected to high heat. Once you add it, keep the heat low and gentle. A simmer, not a boil.
Flavor Variations & Customizations
This recipe is a template, not a rulebook. Once you master the technique, the variations are endless.
Add vegetables. Fresh spinach wilts beautifully into the hot sauce at the very end. Sautéed mushrooms add earthy depth — cook them after the chicken and before the aromatics to brown them properly. Sun-dried tomatoes bring concentrated umami and a chewy texture. Broccoli florets can cook alongside the pasta; just add them in the last 5 minutes.
Spice it up. Red pepper flakes added with the garlic provide gentle heat. For more intensity, add a pinch of cayenne or a diced jalapeño.
Swap the protein. Shrimp cooks faster than chicken — add it in the last 4-5 minutes of pasta cooking. Sliced Italian sausage brings fennel and heat. For a vegetarian version, use white beans or chickpeas.
Make it gluten-free. Use gluten-free pasta and substitute the flour with a 1:1 gluten-free blend or cornstarch. Check that your chicken broth is certified gluten-free.
Dairy-free adaptations. Coconut cream creates a rich, slightly sweet sauce. Cashew cream works well too. For the cheesy flavor without dairy, nutritional yeast is your friend — though it won’t melt like Parmesan.
Herb variations. Fresh basil adds sweetness. Thyme brings earthiness. Chives contribute a mild onion flavor. Add delicate herbs at the end; sturdy herbs like thyme can cook with the aromatics.
Serving Suggestions
This dish is substantial enough to stand alone, but the right sides elevate it into a complete meal.
Crusty bread is essential. A baguette or ciabatta gives you something to drag through the sauce. Garlic bread works too, though it doubles down on the garlic intensity.
A simple side salad provides contrast. Mixed greens, cherry tomatoes, and a sharp vinaigrette cut through the richness of the cream sauce. The acid balances the fat.
Roasted vegetables add color and texture. Asparagus, broccoli, or Brussels sprouts roasted with olive oil and salt complement the creamy pasta without competing with it.
Wine pairings. A chilled Chardonnay with moderate oak mirrors the creamy sauce. Pinot Grigio offers a lighter, crisper counterpoint. For red wine drinkers, a light Pinot Noir won’t overwhelm the delicate flavors.
Storage & Reheating
Cream-based pasta doesn’t hold indefinitely, but with proper handling, you can enjoy leftovers for days.
Refrigeration. Allow the dish to cool to room temperature — but no longer than 2 hours — before transferring to an airtight container. Store in the refrigerator for 3-4 days maximum. The sauce may thicken considerably as it chills; this is normal.
Freezing. Cream sauces can separate upon thawing, so freezing is not ideal. If you must freeze, portion into individual containers and consume within 2-3 months. Thaw overnight in the refrigerator before reheating.
Reheating. The stovetop method yields the best results. Place the pasta in a skillet over medium-low heat. Add a splash of chicken broth or milk to loosen the sauce. Stir frequently until heated through. The microwave tends to create hot spots and can make the sauce grainy, so use it only as a last resort. Creamy Garlic Parmesan Chicken & Cheesy Pasta: The Ultimate Comfort Food Recipe.
Frequently Asked Questions (FAQ)
+Why does my Parmesan sauce get grainy?
Grainy sauce usually results from one of two issues: using pre-grated cheese (which contains anti-caking agents) or overheating the dairy. Always grate your own Parmesan from a wedge, and keep the heat low once you add the cream. Gentle simmering, never boiling.
+Can I use milk instead of heavy cream?
You can, but the sauce will be thinner and less rich. Heavy cream contains at least 36% fat, which creates that velvety mouthfeel. Whole milk has only about 3.5% fat. If you substitute milk, consider adding extra butter or a bit of cream cheese to compensate.
+How do I know when the chicken is fully cooked?
The most reliable method is an instant-read thermometer inserted into the thickest piece. It should register 165°F. If you don’t have a thermometer, cut into the largest piece — the meat should be opaque throughout with no pink, and the juices should run clear.
+Can I make this recipe ahead of time?
You can, but the texture is best fresh. If you need to prep ahead, cook the chicken and make the sauce base (through the deglazing step), then store separately. When ready to serve, reheat the sauce, add the pasta, and finish with cream and cheese.
+How long does this dish last in the fridge?
Properly stored in an airtight container, this dish keeps for 3-4 days. The sauce may thicken as it sits; add a splash of broth when reheating to restore the consistency.
+What sides go well with this pasta?
A crisp green salad with vinaigrette provides acidity to balance the richness. Roasted vegetables like asparagus or broccoli add nutrition and texture. And crusty bread is always welcome for sauce-soaking duty.
+Can I use chicken thighs instead of breasts?
Absolutely. Boneless, skinless chicken thighs have more fat and stay juicier than breasts. They take slightly longer to cook — figure 7-9 minutes for bite-sized pieces — but the flavor is deeper and more robust.
+Is this recipe gluten-free?
Not as written, but it’s easily adapted. Use gluten-free pasta and substitute the all-purpose flour with a 1:1 gluten-free blend or cornstarch. Verify that your chicken broth is gluten-free as well, since some brands contain wheat-based additives.