Introduction
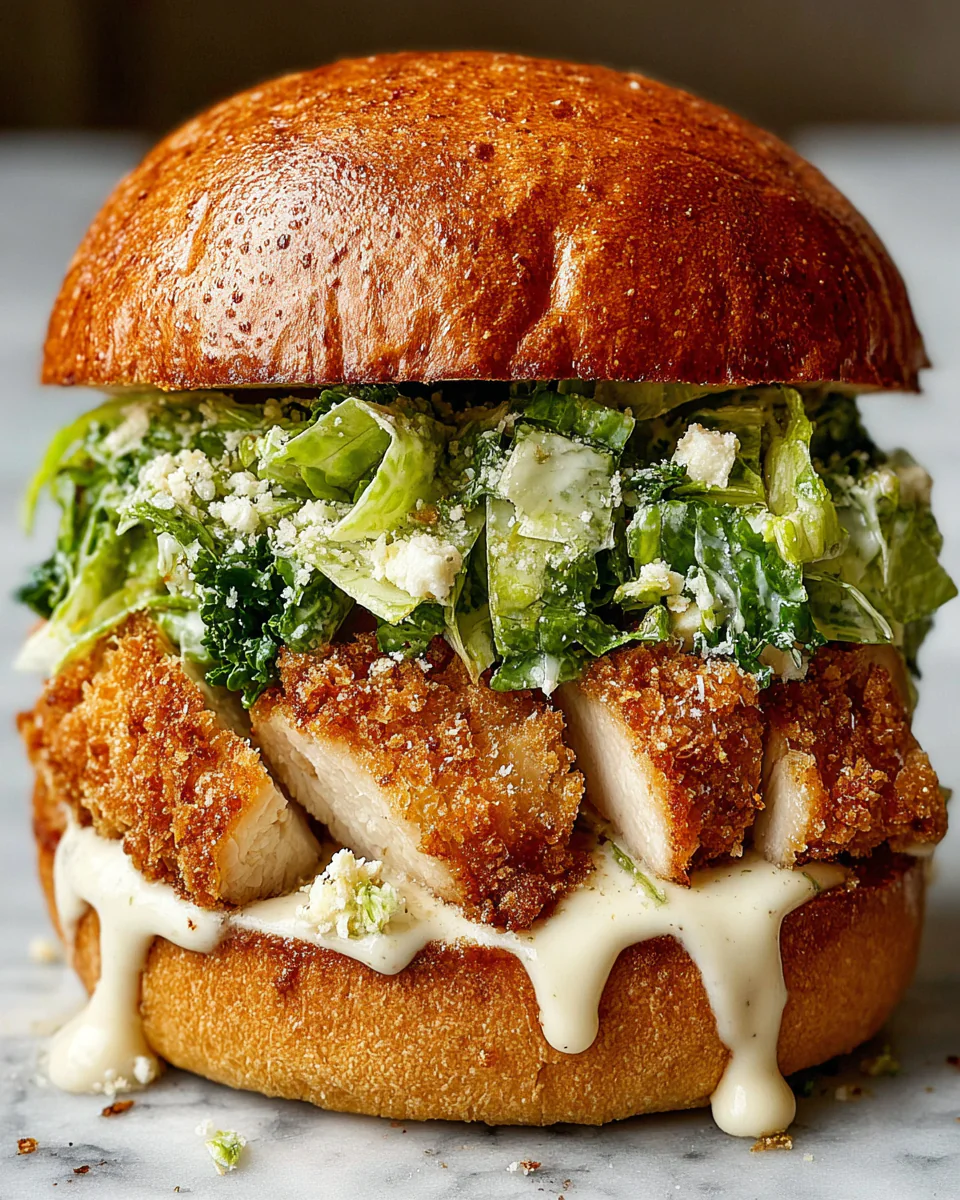
The Crispy Chicken Caesar Sandwich offers an astonishing blend of flavors and textures that elevates a classic dish to new heights. With every bite, you'll experience the satisfying crunch of perfectly fried chicken, the creamy richness of Caesar dressing, and the refreshing crunch of romaine lettuce—all housed within a crisp, golden-brown piece of bread.
Unlike its more traditional counterparts, this sandwich incorporates a balance of spice and sweetness, making it a delightful meal any time of day. Whether you're hosting a casual gathering or simply treating yourself, this recipe provides a tantalizing experience that you won't soon forget.
Ingredients
- 4 boneless, skinless chicken thighs
These chicken thighs provide a flavorful, juicy meat base. They have a higher fat content than chicken breasts, which helps keep the chicken moist during frying. - 1 cup buttermilk
Buttermilk acts as a marinade that tenderizes the chicken while adding a subtle tang. This acidity enhances the flavor and helps the coating adhere better. - 1 cup all-purpose flour
Flour forms the backbone of the crispy coating. It combines with spices to create a crunchy exterior that contrasts beautifully with the juicy chicken. - 1 tsp garlic powder
Garlic powder enriches the flavor profile of the coating, offering an aromatic base that complements the richness of the chicken. - 1 tsp paprika
Paprika adds depth of flavor and a hint of smokiness to the chicken. This spice enhances the color of the coating, making it visually appealing. - Salt and pepper to taste
Essential seasonings that elevate the dish by enhancing the natural flavors of the chicken and other ingredients. - 4 slices of ciabatta or sourdough bread
These breads are sturdy enough to hold the sandwich without becoming soggy. They provide a rustic flavor and chewy texture that pairs well with the filling. - 1 cup romaine lettuce, chopped
Romaine adds a fresh, crunchy element that balances the richness of the chicken and sauce, contributing to a well-rounded flavor. - 1/2 cup Caesar dressing
This dressing brings a creamy, tangy flavor profile, elevating the sandwich with its familiar, bold taste complementing the chicken. - 2 tbsp grated Parmesan cheese
Parmesan enhances the savory aspect of the sandwich, adding a nutty richness that beautifully ties the flavors together. - 1 tbsp chili flakes (optional)
For those who enjoy a spicy kick, chili flakes add heat and a layer of warmth to the flavor profile, making each bite more interesting.
Directions & Preparation
Step 1: Marinate the chicken in buttermilk for at least 2 hours.
Marinating in buttermilk not only infuses flavor but also tenderizes the chicken, giving it a juicier texture after cooking. The longer you marinate, the more pronounced the flavor and tenderness become, so if you have time, consider doing this overnight.
Step 2: Mix flour, garlic powder, paprika, salt, and pepper in a bowl.
Combining the dry ingredients creates a well-seasoned coating for the chicken. This step is essential for ensuring that the spices are evenly distributed, which will improve the flavor with each bite, preventing any bland areas.
Step 3: Heat oil in a skillet over medium-high heat.
Choosing the right oil and temperature is crucial for achieving a crispy exterior. Oils with high smoke points, like vegetable or canola oil, are ideal. Consistently monitor the heat to avoid burning the coating, which can ruin the texture and taste.
Step 4: Dredge marinated chicken in the flour mixture and fry until golden brown.
Coating the chicken thoroughly is key to achieving that crispy crust. Make sure each piece is well-covered and gently shake off excess flour. Frying until golden brown not only provides texture but also adds depth of flavor through the Maillard reaction.
Step 5: Drain the fried chicken on paper towels.
Draining excess oil will prevent the sandwich from becoming greasy while keeping the chicken crispy. This is an important step that balances the textures and ensures an enjoyable eating experience.
Step 6: Toast the bread slices in the skillet until golden.
Toasting the bread enhances its flavor and provides a sturdy base for the filling. This step also adds an extra layer of crunch that contrasts nicely with the soft, juicy chicken. Consider brushing the bread lightly with oil or butter before toasting for added richness.
Step 7: Assemble the sandwich with lettuce, chicken, Caesar dressing, and Parmesan.
Layering is essential to ensure even distribution of flavors throughout the sandwich. Start with a generous layer of lettuce, which will not only provide crunch but also create a barrier that helps keep the bread from getting soggy. Top it with the chicken, drizzle dressing, and sprinkle the cheese for a finishing touch.
Step 8: Sprinkle chili flakes on top for an optional kick.
Adding chili flakes at this stage allows you to control the spice level of each sandwich. This optional step is perfect for those who enjoy a little heat, transforming this crispy classic into a spicy treat. The flavors marry beautifully with the chicken and dressing.
Step 9: Serve immediately and enjoy your creation!
Serving the sandwich right away ensures that each component retains its optimal texture and flavor. This is the moment to relish the satisfaction of creating a delicious meal from scratch while sharing it with others enhances the joy of cooking.

The Flavorful Marinade
The buttermilk marinade is the secret weapon in this recipe. By soaking the chicken in buttermilk, you not only infuse the meat with flavors but also ensure tenderness. The lactic acid in buttermilk breaks down protein fibers, resulting in a succulent piece of chicken that’s flavorful and melt-in-your-mouth delicious. Don't rush this step—let the chicken marinate for as long as possible!
Achieving Perfect Crispiness
To get that coveted crispy texture on your chicken, attention to detail in the frying process is crucial. The flour coating serves as insulation against the hot oil, ensuring the chicken cooks evenly while locking in moisture. Monitor the temperature closely; too hot leads to burned exteriors while too cold causes sogginess. A steady medium-high heat is key to achieving the perfect fry, yielding a golden, crunchy delight.
Elevating the Caesar Experience
This sandwich transforms traditional Caesar salad elements into a handheld treat. By layering fresh romaine, rich dressing, and savory Parmesan cheese with the crispy chicken, the sandwich becomes not just a meal but an experience. Each bite delivers a satisfying crunch, followed by creamy, tangy notes, enhancing the overall dining experience. Explore this unique twist on a beloved classic!
FAQs
What can I do if the chicken coating is too thick?
If the coating is too thick, it might be helpful to dip it again into buttermilk and then back into the flour mixture to evenly coat the chicken. This creates a lighter, crispier texture.
Can I use chicken breasts instead of thighs?
Yes, but chicken breasts may be prone to drying out during frying. Consider brining them briefly before marinating to enhance moisture and flavor.
What happens if my chicken gets overcooked?
Overcooking can lead to a dry texture. Keep an eye on the internal temperature; it should reach 165°F for perfect doneness while remaining juicy.
How can I make the sandwich spicier?
You can increase the amount of chili flakes or add hot sauce to the Caesar dressing for a bolder flavor.
Is it essential to let the chicken marinate overnight?
While it enhances flavor and tenderness, even a 2-hour marinade can work well if you're short on time. Adapt to your schedule!
Conclusion
Creating a Crispy Chicken Caesar Sandwich at home is an enjoyable and satisfying endeavor. The combination of crispy chicken, fresh ingredients, and rich dressing comes together for a delightful meal that is sure to impress family and friends.
Experimenting with the spices and additional toppings can make this sandwich your own. Enjoy the vibrant flavors and satisfying textures in each bite, and don't hesitate to share this culinary gem!
Recipe Card

Savory Honey Roasted Beets and Carrots Delight
Ingredients
Method
- Preheat your oven to 400°F (200°C).
- Prepare the beets and carrots by peeling and chopping them.
- In a large mixing bowl, combine the cubed beets and sliced carrots.
- Drizzle the honey and olive oil over the vegetables, then season with salt and pepper.
- Toss everything together until the beets and carrots are well coated.
- Spread the coated vegetables on a parchment-lined baking sheet.
- Roast in the preheated oven for about 30-40 minutes, stirring halfway.
- Check for doneness; they should be fork-tender and caramelized.
- Remove from oven and garnish with fresh herbs, if desired.
Tried this recipe?
Let us know how it was!Notes
Additional serving suggestions: pair with a crisp salad, garlic bread, or roasted seasonal vegetables for balance.
For make-ahead, prep components separately and assemble just before heating to preserve texture.
Taste and adjust with acid (lemon/vinegar) and salt right at the end to wake up flavors.