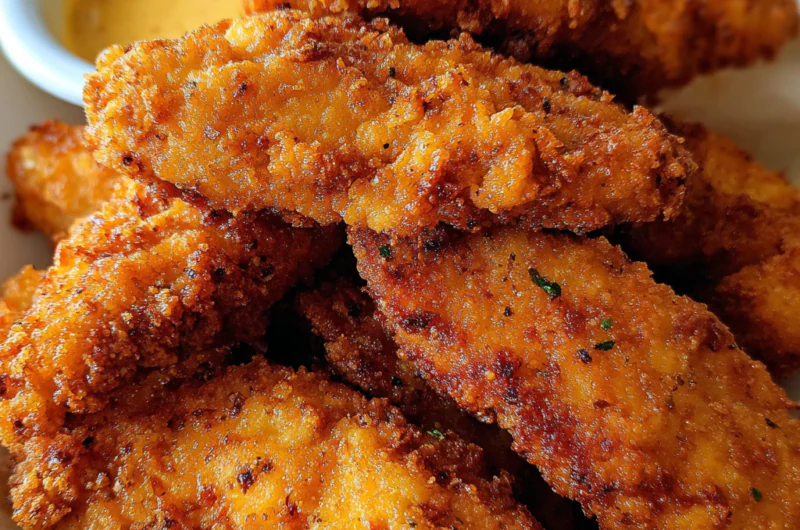
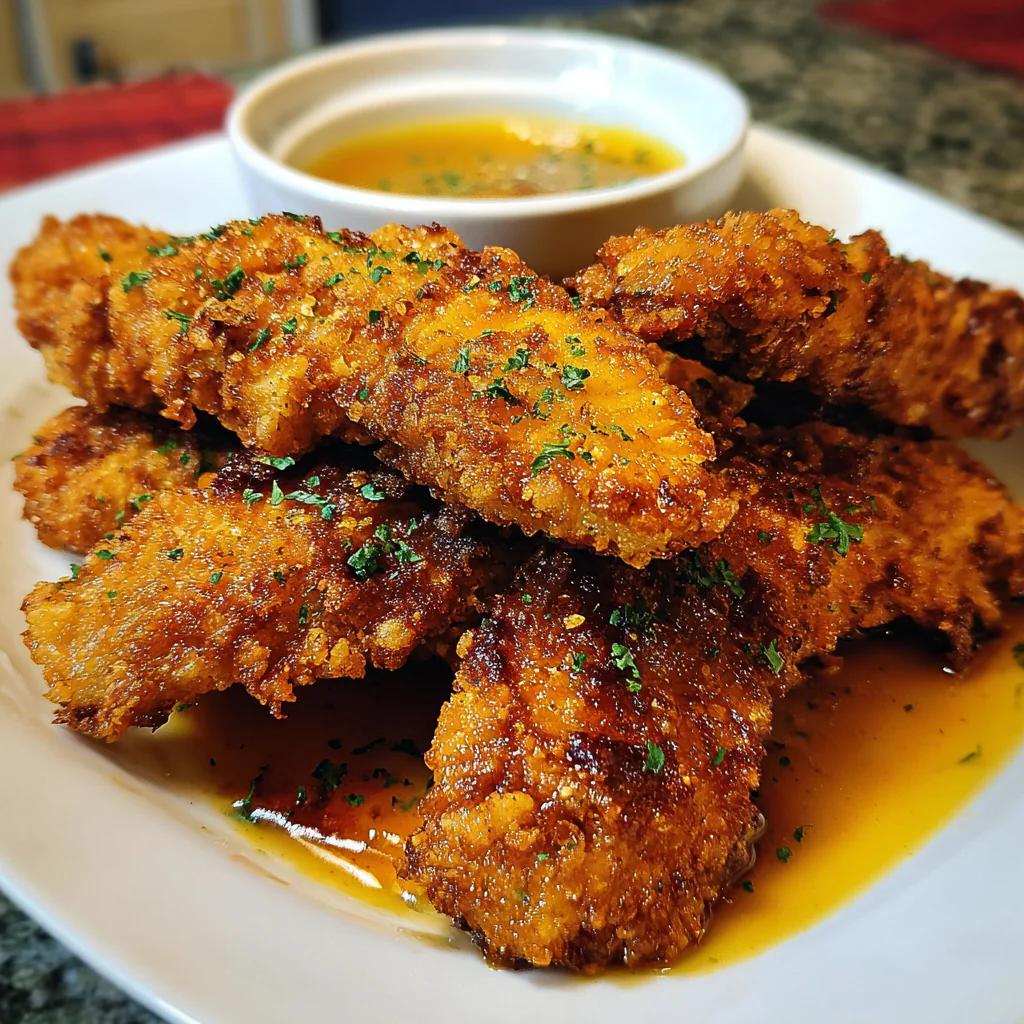
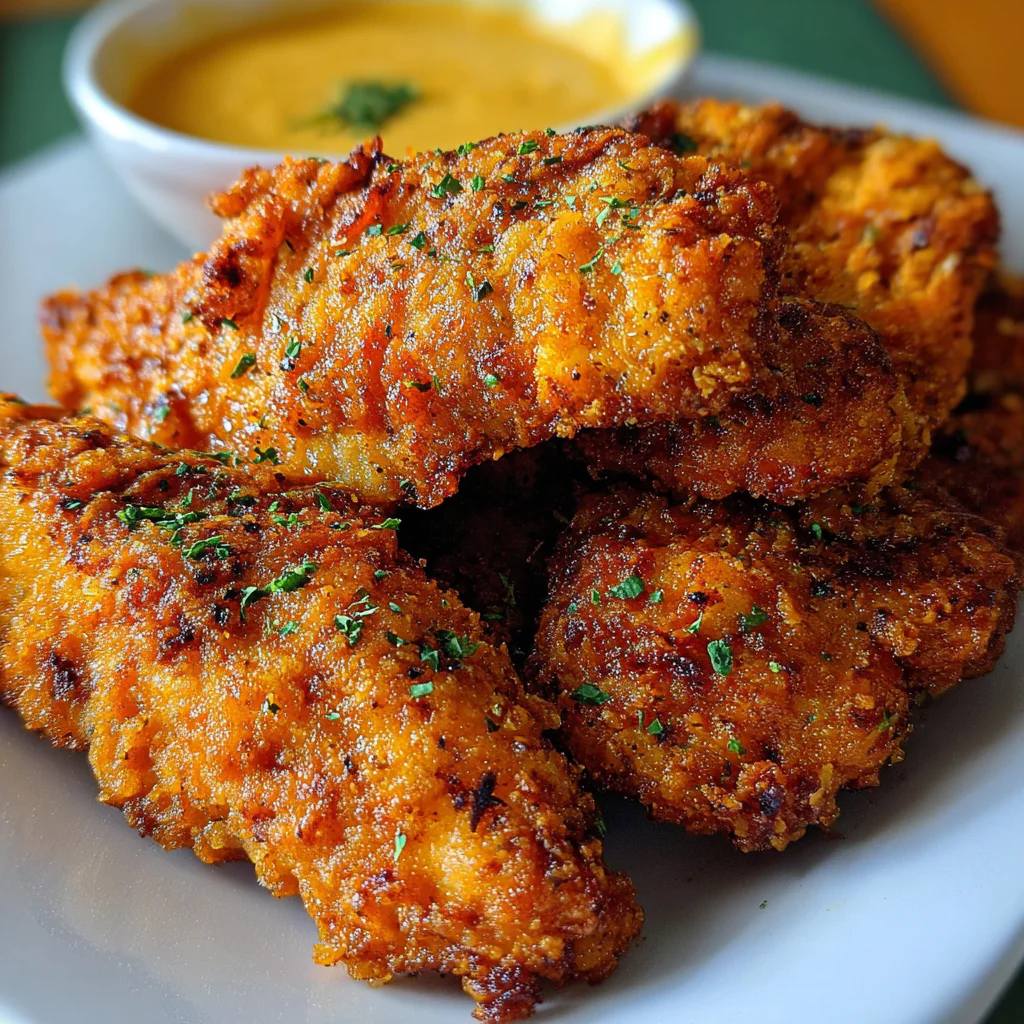
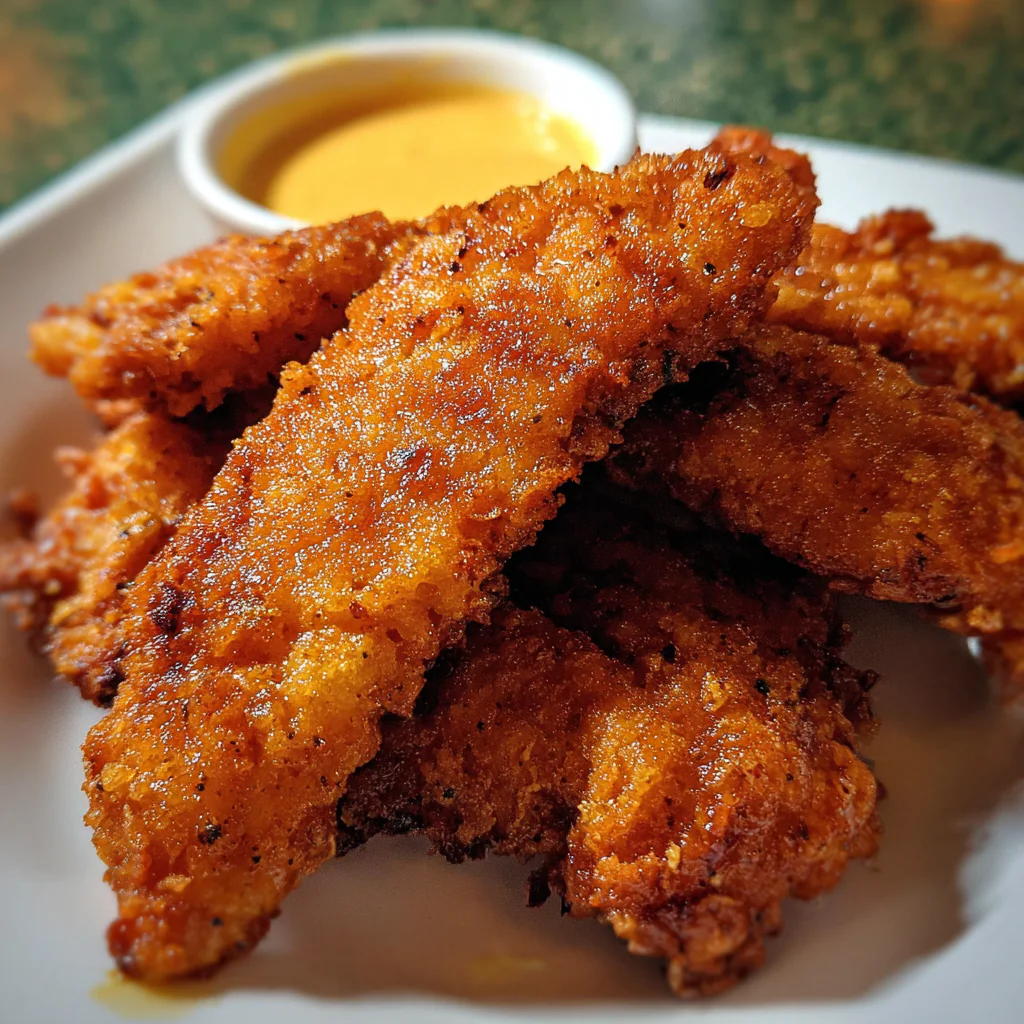
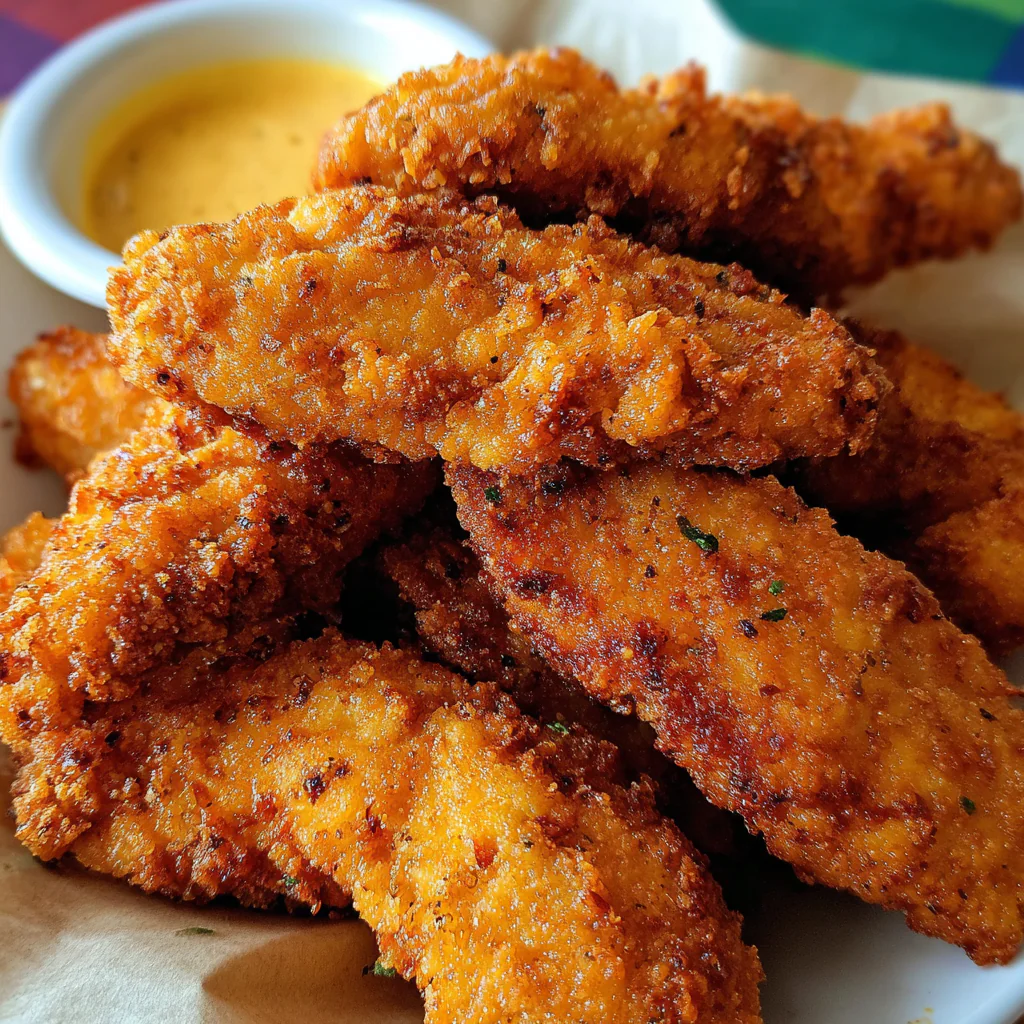
Golden, juicy tenders with a shatteringly crunchy coating — ready in under an hour using a double-dredge technique that actually delivers.
📋 In This Article
Introduction
When it comes to crispy chicken tenders, achieving that perfect golden-brown crunch is the whole game. This homemade recipe is designed for those who crave an irresistible texture — crunchy on the outside, succulent on the inside. Using a double-dredging method paired with a seasoned buttermilk soak ensures each tender is enveloped in a flavorful coating that locks in moisture. Whether you’re serving them as a family meal or a party favorite, these tenders are sure to impress. With the right balance of spices and proper frying technique, you’ll master crispy chicken tenders in your own kitchen.
Why This Recipe Works: The Science of the Crunch
Crispy chicken tenders get their irresistible texture through a combination of chemistry and technique. First, we employ a buttermilk brine to tenderize the chicken while enhancing moisture content. Here’s the thing: the lactic acid in buttermilk gently denatures muscle proteins without turning the meat mushy, which is why even a 30-minute soak makes a noticeable difference in tenderness. Crispy Buffalo Chicken Tenders for Home Cooks.
The real secret to that shatteringly crisp exterior is our breading method, which combines a starch-heavy coating with the option of a double-fry technique. During frying, starch gelatinization occurs when flour particles hit the hot oil — they swell, burst, and form a rigid structure that resists moisture penetration. This is what gives you that audible crunch rather than a soft, bread-like coating.
Maintaining the right frying oil temperature is critical. At 350°F, the exterior browns via the Maillard reaction — that beautiful chemical process where amino acids and sugars create hundreds of new flavor compounds — while giving the interior enough time to cook through safely. Too hot, and you get a burned shell around raw meat. Too cool, and the coating absorbs oil like a sponge, resulting in greasy, heavy tenders.
The optional double-fry method takes things further. The first fry cooks the chicken to a safe internal temperature. After a brief rest, a second fry at slightly higher heat drives off any surface moisture and creates an extra-crispy crust that holds up longer. This is the same principle behind great french fries.
Essential Ingredients for Crispy Chicken Tenders
To create tenders that are genuinely crunchy and flavorful, you’ll need:
- 1 ½ pounds boneless, skinless chicken breasts or thighs – Breasts offer lean tenderness; thighs bring more fat and juiciness.
- 1 cup buttermilk – Tenderizes through mild acidity while adding tangy depth.
- 1 egg – Acts as the binder that helps dry ingredients adhere to the meat.
- 2 cups all-purpose flour – Forms the structural base of your coating.
- ½ cup cornstarch – The secret weapon for extra crunch. Cornstarch creates a lighter, crispier texture than flour alone.
- 1 teaspoon baking powder – Generates tiny air bubbles during frying, making the coating less dense.
- 1 tablespoon seasoning blend (such as Montreal Steak Seasoning) – Distributes flavor throughout the coating.
- 1 teaspoon kosher salt – Essential for bringing out the chicken’s natural flavor.
- 1 teaspoon fresh coarse ground black pepper – Adds subtle warmth to the breading.
- Frying oil (6-8 cups of canola or peanut oil) – High smoke point oils prevent off-flavors and burning.
- Optional: ¾ teaspoon MSG – Boosts umami without overpowering the chicken.
Step-by-Step Instructions
Prepare the Chicken
Begin by marinating your chicken in buttermilk, garlic powder, and a pinch of salt for at least 30 minutes. This step isn’t optional if you want juicy results — the acid and salt work together to season the meat deeply and keep it moist during frying.
Set Up Your Dredging Station
Prepare three shallow dishes: one with seasoned flour (mixed with cornstarch, baking powder, and spices), another with a whisked egg wash, and a third with panko or breadcrumbs if you want extra texture. For the double dredging technique, coat the marinated chicken in flour first, then dip in egg, then back into flour. This creates multiple layers that fry up into those signature craggy, crunchy bits. I used to skip the second flour dip to save time — the result was noticeably less crispy. Don’t make that mistake.
Fry to Golden Perfection
Heat oil in a deep pan to 350°F (175°C). No thermometer? Drop a cube of bread in — it should sizzle immediately and turn golden in about 60 seconds. Carefully lower tenders into the oil without overcrowding. Overcrowding drops the temperature and produces greasy, soggy results. Fry in batches for 4-5 minutes per batch, until deep golden brown.
For the optional double-fry method, remove tenders after the first fry and let them rest 3-4 minutes. Return them to 375°F oil for 60-90 seconds. This second fry evaporates surface moisture and creates a crust that stays crunchy longer.
Rest Before Serving
Transfer cooked tenders to a wire rack — not paper towels. Paper towels trap steam underneath the chicken, softening the crust you worked so hard to build. Let them rest 2-3 minutes before serving.
⚠️ Common Mistakes to Avoid
Crispy chicken tenders fail for predictable reasons. The most common? Not brining the chicken. Without that buttermilk soak, you’re fighting an uphill battle against dry, bland meat. The brine is your insurance policy for juicy results.
Insufficient breading is another culprit. If you’re stingy with the coating or don’t press it firmly onto the chicken, you end up with bald spots and uneven texture. Take the time to coat thoroughly.
Frying at the wrong oil temperature ruins more tenders than anything else. Oil that’s too cool — usually from overcrowding the pan — means the coating absorbs fat instead of frying crisp. The chicken becomes heavy and greasy. Work in small batches and let the oil return to temperature between rounds.
Conversely, oil that’s too hot burns the exterior before the interior reaches a safe 165°F. Use a thermometer and adjust your heat as needed throughout cooking.
Finally, overcooked chicken is dry chicken. Once the internal temperature hits 165°F, pull the tenders. Carryover cooking will bring it up a few more degrees during resting.
Variations and Serving Suggestions
Spicy chicken tenders are an easy pivot — add cayenne pepper, paprika, or your favorite hot sauce to the buttermilk marinade. The heat permeates the meat while the spices in the coating add another layer. Crispy Pretzel Crusted Chicken Tenders with Honey Mustard Dip.
For herb-crusted tenders, fold dried thyme, oregano, or rosemary into the flour mixture. Fresh herbs can burn at frying temperatures, so dried works better here.
Going gluten-free? Substitute the all-purpose flour with a 1:1 gluten-free blend or rice flour. The texture will be slightly different, but still satisfyingly crisp.
When it comes to serving, dipping sauces make the meal. Homemade honey mustard (equal parts honey and Dijon), tangy ranch, or zesty buffalo sauce all work beautifully. For something different, try a smoky BBQ sauce or sweet chili sauce.
Round out the plate with fries, creamy coleslaw, or mac & cheese. The creamy acidity of coleslaw cuts through the richness of fried chicken perfectly.
Storage and Reheating Tips
Let tenders cool completely before storing in an airtight container. They’ll keep in the refrigerator for up to 3 days. For longer storage, freeze them on a baking sheet until solid, then transfer to a freezer bag for up to 3 months.
Reheating is where most people go wrong. The microwave is the enemy of crispiness — it creates steam that softens the coating. Instead, reheat in a 400°F oven for 10-15 minutes, or until the internal temperature reaches 165°F. An air fryer at 400°F for 5-7 minutes works even better, restoring that just-fried crunch.
💡 Pro Tips for Next-Level Results
Start with proper brining — 30 minutes is the minimum, but 4 hours is ideal. The chicken becomes noticeably more tender and flavorful. After brining, a quick ice bath tightens the proteins on the surface, which helps the coating adhere better.
Let breaded chicken rest for 15-30 minutes before frying. This resting period allows the flour to fully hydrate from the egg wash, creating a stronger bond that won’t slide off in the oil.
For seasoning that actually distributes evenly, use granulated garlic and onion powder rather than fresh. Fresh herbs and minced aromatics tend to clump and burn.
And always — always — cool on a wire rack. Steam is the enemy of crispy chicken, and a wire rack allows air circulation from all sides. 🍗 Crack Chicken Tenders – The Ultimate Cheesy, Crispy, Addictive Dinner.
Frequently Asked Questions
+Why does my breading fall off the chicken?
Breading falls off when the chicken surface is too wet, the breaded chicken didn’t rest before frying, or the oil temperature fluctuated. Pat the chicken dry after marinating, let breaded tenders rest 15 minutes, and maintain steady oil temperature.
+Can I use regular milk instead of buttermilk?
Yes — make a substitute by adding 1 tablespoon vinegar or lemon juice to 1 cup regular milk. Let it sit 5 minutes until slightly curdled. The acid is essential for tenderizing and helps the coating stick.
+How do I know when chicken tenders are done?
Use an instant-read thermometer to check for 165°F at the thickest part. Without one, cut into the thickest tender — the meat should be opaque throughout with clear juices, not pink.
+Can I skip the double dredging?
You can, but you’ll lose significant crunch. Single-dredged tenders taste fine but lack the substantial, crispy crust that makes this recipe special. If time is tight, it works — just expect a lighter coating.
+How long do cooked chicken tenders last in the fridge?
Store cooled tenders in an airtight container for up to 3 days. Freeze for up to 3 months for longer storage. Always reheat to 165°F internal temperature before serving.
+What sides go with chicken tenders?
Classic pairings include french fries, coleslaw, mac and cheese, or a green salad. The creamy tang of coleslaw or sharp bite of pickles cuts through the richness of fried chicken nicely.
+Why are my tenders soggy?
Soggy tenders usually mean the oil temperature dropped too low, causing the coating to absorb oil instead of frying crisp. Use a thermometer to maintain 350°F and fry in small batches.
+Can I make these in an air fryer?
Yes. Preheat to 400°F and cook breaded tenders for 10-12 minutes, flipping halfway. Lightly spray with oil before cooking for better browning. The texture won’t match deep-fried, but it’s a solid alternative with less oil.
Extra Crispy Fried Chicken Fingers
Ingredients
Method
- In a large bowl, mix together the flour, steak seasoning, salt, pepper, MSG, paprika, garlic and onion powder with a fork or whisk. Divide the seasoned flour between two pie plates or cake pans. Line a pan or cooling rack with paper towels or newspapers. Set flour and towel lined pan aside.
- Pour oil into a large, deep, heavy-bottomed pan (or fryolator, fry-daddy or other frying apparatus) over medium to medium-high heat. Remember this rule of thumb when deep-frying on your stove-top: "Never fill your pan more than halfway full of oil." Remember that liquids rise higher as they boil and that you'll also raise the level of the oil each time you drop something else into it ('Law of Displacement' if you're physics-minded...) And since this is The Evil Genius's cooking show today, I'll quote him, "You can't argue with physics. It is or it isn't." If you have a thermometer, you're shooting for 350°F. If you don't have a thermometer, don't sweat it. Just heat it until the tip of one of the breaded chicken fingers dipped into the oil results in many, many enthusiastic bubbles flying up around the edges of the chicken.
- Add egg and buttermilk to a medium-sized mixing bowl and whisk to combine thoroughly. Set aside with the flour.
- Trim the chicken breasts or thighs and slice lengthwise into about 3 largish strips. (If you have really small breasts- quit snickering- just slice into two strips.)
- Now, let's prepare to fry. Lay out your ingredients -assuming you have a counter near your stove and your oil is ready to go- like this starting closest to the stove: one bowl with flour, bowl with buttermilk/egg mixture, other bowl of flour, cutting board with chicken on it. Decide on which hand you're going to use. Use your hand and work with one piece of chicken at a time. Drag it through the flour so it is evenly coated and shake the extra off. Dredge (drag through) the floured piece of chicken in the egg/buttermilk mixture, shake off the excess. Dredge the gooey piece of chicken through the last bowl of flour, making sure it is well coated and gently shake off the excess. Finally, using your gooey-gross right hand gently slide that fully-coated piece of chicken into the oil. Whatever your impulse may be, DO NOT THROW THE CHICKEN IN THE OIL. That is how burns happen. Trust me. You're much better off and much safer gently allowing the chicken to slide from your hands near the surface of the oil. And this is where using your one hand to do all that dredging and dipping and dunking pays off. You have so much goo on your hands that no oil is going to penetrate to your skin in the short amount of time it takes you to carefully place a piece of chicken in the oil.
- By coating one piece at a time, you're ensuring that they won't stick together in the oil. Each piece gets a few moments to start cooking and forming its crust before another gooey piece is eased into the oil.
- Stir the chicken gently with tongs and allow to cook for between 8-15 minutes, depending on how thick your chicken strips were. If it is browning too quickly, lower the heat a bit. The best way to test the chicken is to remove a thick piece to a cutting board. Slice into the thickest part of the chicken. If the juices run clear it is done!
- Transfer hot chicken to the towel lined pan and allow to cool for at least 5 minutes before eating. You really don't want to bite into it right away unless you'd like to rid yourself of the skin inside your mouth. These little beauties are screaming hot!
Nutrition
Notes
- For perfectly crispy chicken fingers, ensure the oil reaches 350°F; if you don't have a thermometer, look for vigorous bubbling around a dipped piece of chicken to gauge readiness.
- To prevent dryness, avoid overcrowding the pan while frying; cook in batches if necessary, allowing each piece enough space to create that golden crust.
- If you're out of buttermilk, regular milk works in a pinch, but add a splash of vinegar or lemon juice to mimic the tangy flavor and help tenderize the chicken.
- Store any leftovers in an airtight container in the fridge for up to 3 days; for the crispiest reheating, place them in a preheated oven at 400°F for about 10 minutes.
- Keep the chicken fingers warm while frying the rest by placing them on a cooling rack in a 200°F oven; this prevents them from getting soggy while you finish cooking the entire batch.