Introduction
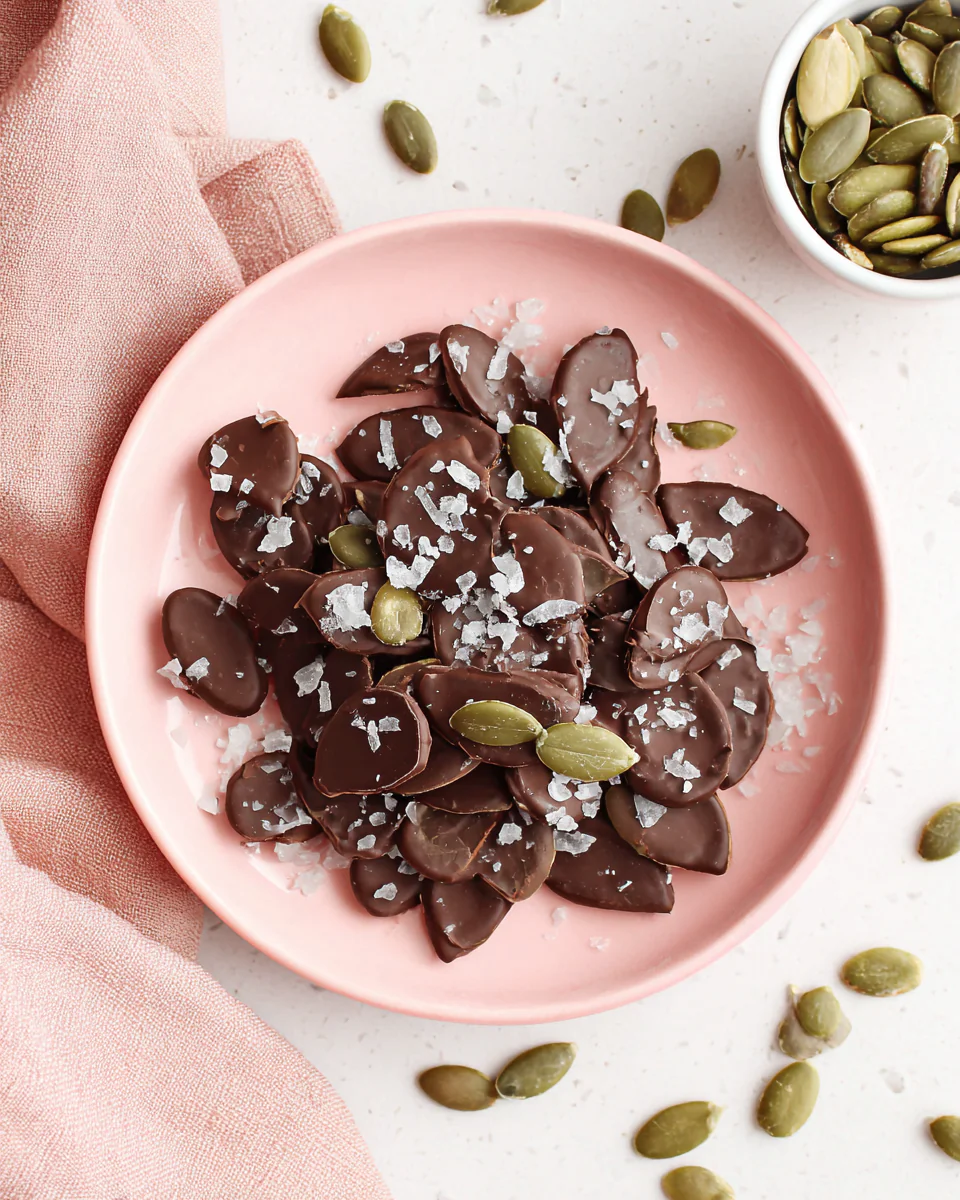
If you're looking for a snack that's both healthy and indulgent, you’ve come to the right place. Crunchy chocolate covered pumpkin seeds are a delightful treat that combine the nutritious benefits of pumpkin seeds with the rich sweetness of chocolate. Perfect for snacking or as an addition to your dessert table, this recipe promises to satisfy both your cravings and your health-conscious mind.
Pumpkin seeds, also known as pepitas, are packed with nutrients like magnesium, zinc, and healthy fats that contribute to overall wellness. Coating them in chocolate not only enhances their flavor but also adds an extra layer of decadence that makes them irresistible. Dive into this recipe that perfectly balances health and indulgence!
Ingredients
- 1 cup pumpkin seeds
Pumpkin seeds are the base of this recipe. They provide essential nutrients and a satisfying crunch. Roasting them enhances their natural nuttiness, making them a perfect complement to the chocolate coating. - 1 cup bittersweet chocolate chips
Bittersweet chocolate adds a rich depth of flavor that balances the slight earthiness of pumpkin seeds. The chocolate melts easily and provides a luscious coating that binds the seeds together. - 1 tablespoon coconut oil
Coconut oil is used to help the chocolate melt smoothly and create a glossy finish. It also adds a touch of tropical flavor while keeping the chocolate from hardening too quickly on the seeds. - 1/2 teaspoon sea salt
A sprinkle of sea salt elevates the flavors of the chocolate and pumpkin seeds, balancing sweetness with a savory bite. It enhances the overall taste experience while making each handful even more addictive. - 1 teaspoon vanilla extract
Vanilla extract adds warmth and depth to the chocolate flavor. This subtle enhancement ties all the ingredients together and elevates the sweet notes.
Directions & Preparation
Step 1: Preheat the oven to 350°F (175°C).
Preheating the oven ensures that the pumpkin seeds roast evenly. A properly heated oven allows the seeds to become golden and crispy without burning, enhancing their flavor and texture.
Step 2: Spread the pumpkin seeds on a baking sheet.
Lay the pumpkin seeds in a single layer on a parchment-lined baking sheet. This allows for even roasting, preventing steaming and ensuring the seeds get that delightful crunchy texture.
Step 3: Roast the seeds for 10-15 minutes.
Keeping an eye on the pumpkin seeds as they roast is essential. Stirring them halfway through helps achieve an even golden color. They should become fragrant and slightly darker in color. Burnt seeds can ruin the taste, so check regularly.
Step 4: Remove the seeds from the oven and let them cool.
Allowing the roasted pumpkin seeds to cool is important. This step helps maintain their crispness before they are coated with chocolate. If they are too hot, they might seize the chocolate during coating.
Step 5: Melt the chocolate and coconut oil together.
In a microwave-safe bowl, combine the chocolate chips and coconut oil. Microwave in short intervals, stirring until smooth. This mixture is crucial for a shiny and even coat on the seeds, ensuring every bite is deliciously chocolatey.
Step 6: Add vanilla extract and sea salt to the melted chocolate.
Mixing in the vanilla extract and sea salt once the chocolate is melted enhances the flavor profile. The salt cuts through the sweetness, while the vanilla enriches the chocolate experience, making this treat utterly irresistible.
Step 7: Combine the roasted pumpkin seeds with the chocolate mixture.
Using a spatula, gently fold the roasted pumpkin seeds into the melted chocolate until they are fully coated. Ensure all seeds get an even layer of chocolate, creating that perfect crunch and sweetness in every bite.
Step 8: Spread the chocolate-covered seeds on a baking sheet.
Transfer the coated seeds back onto the parchment-lined baking sheet. Spread them out evenly to prevent clumping as they cool and set, ensuring each piece remains separate and crunchy.
Step 9: Refrigerate for about 30 minutes to set.
Chilling the chocolate-covered seeds allows the chocolate to firm up properly. This creates a wonderfully crunchy texture once set, which is essential for that satisfying bite when you dig in.
Step 10: Break apart any clusters and store in an airtight container.
After chilling, if you notice any clusters, gently break them apart. Storing the chocolate covered pumpkin seeds in an airtight container keeps them fresh and crunchy for snacking throughout the week.

The Nutritional Powerhouse
Pumpkin seeds are a powerhouse of nutrition, rich in magnesium, phosphorus, and antioxidants. These tiny seeds not only boost heart health but also promote better sleep and can aid in prostate health. By coating them with chocolate, you don’t lose their health benefits but rather enhance your snacking indulgence, making this recipe a tasty and nutritious choice.
Perfect for Any Occasion
These crunchy chocolate covered pumpkin seeds are versatile and perfect for a myriad of occasions. Whether you're hosting a gathering, preparing a gift for a friend, or just seeking a late-night snack, they fit right in. They're also great as a topping for yogurt or salads, adding a delightful chocolaty crunch that elevates your dishes.
Customization Tips
Feel free to customize this recipe to suit your taste! Add spices like cinnamon or cayenne for an exotic twist, or toss in a handful of dried fruit or nuts for additional texture. Experimenting with different types of chocolate, such as milk or dark, allows you to create your own signature flavor, making the experience even more enjoyable.
FAQs
Why are my chocolate-covered pumpkin seeds not crunchy?
If your chocolate-covered pumpkin seeds aren't crunchy, it may be due to excess moisture from the chocolate or not roasting the seeds long enough. Ensure they are fully cooled before coating and adequately roasted to achieve desired crunch.
Can I use a different type of chocolate for this recipe?
Absolutely! You can use milk chocolate for a sweeter flavor or dark chocolate for a richer taste. Each chocolate type will give a unique flavor profile to your seeds while still maintaining the delicious crunch.
What if I want a spicier version?
To add a kick, try incorporating a dash of cayenne pepper or chili powder into the melted chocolate before coating the seeds. This creates a delightful spicy contrast to the sweetness of the chocolate.
How do I know if I’ve roasted the seeds correctly?
You will know the seeds are roasted properly when they have a light golden color and emit a nutty aroma. They should also feel crunchy and firm to the bite, without any bitterness.
Can I use the seeds raw instead of roasting?
While you can use raw seeds, roasting enhances their flavor and crunchiness. Roasting is recommended to bring out the best in the seeds, making them a more enjoyable snack.
What if my chocolate seized while melting?
If your chocolate seizes, it's likely due to moisture. Make sure your bowl and tools are completely dry. You can try adding a small amount of vegetable oil to help loosen it back up, although it might not regain its original texture.
Conclusion
Crunchy chocolate covered pumpkin seeds combine healthful ingredients with a delightful sweetness that makes them an enjoyable treat for any snacking occasion. Their versatility allows them to shine in various settings, whether alone or as part of a dish.
With simple ingredients and straightforward steps, you can create a batch that you’ll love to share—and keep for yourself. Experiment with flavors and make this recipe your own. There's nothing quite like the satisfaction of making a snack that’s both good for you and incredibly indulgent!
Recipe Card
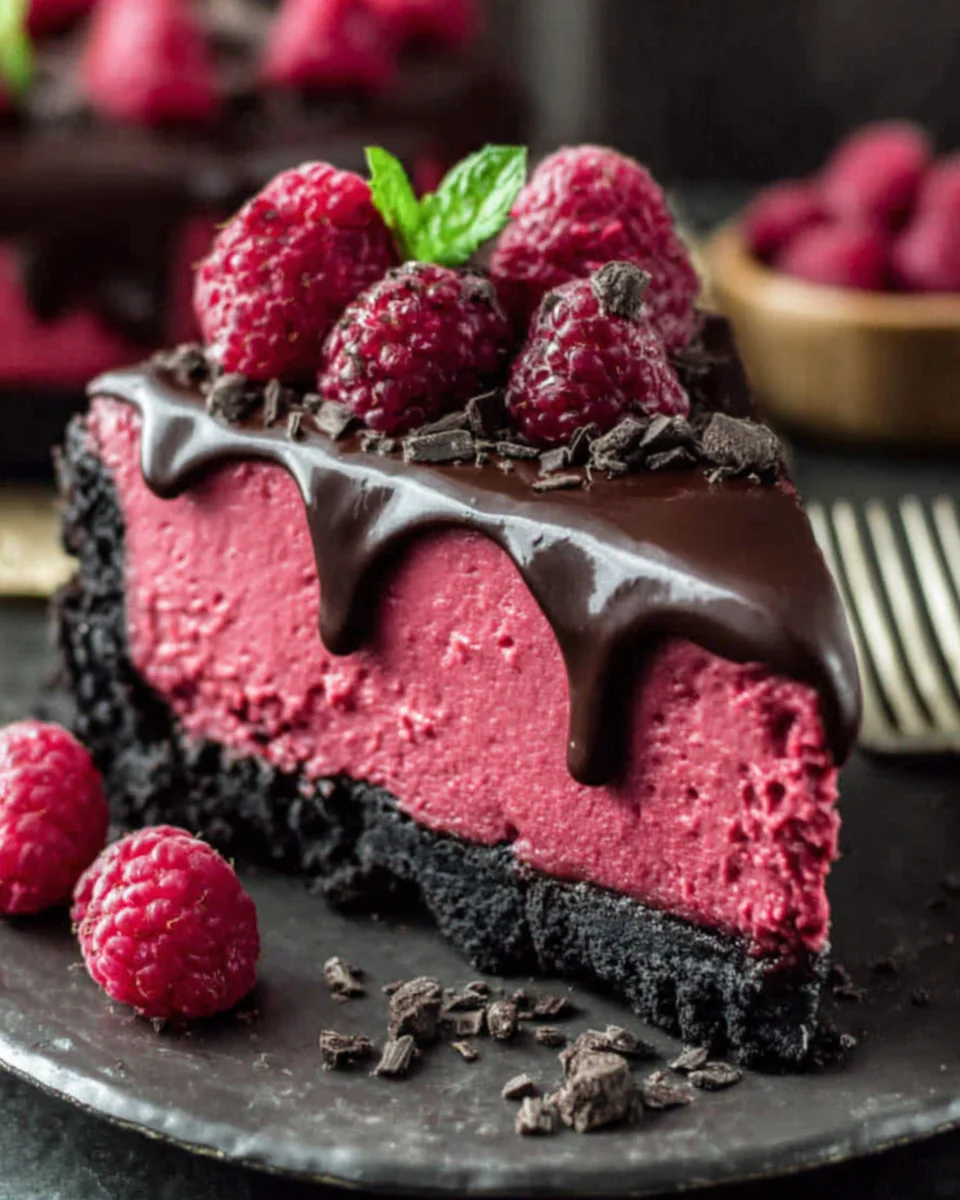
Dark Chocolate Raspberry Cheesecake: A Rich, Creamy Delight
Ingredients
Method
- Prepare the crust by preheating the oven to 350°F (175°C).
- In a medium bowl, combine the graham cracker crumbs and melted butter until well mixed.
- Press the crumb mixture into the bottom of a springform pan and bake for 10 minutes.
- While the crust cools, melt the dark chocolate in a microwave or double boiler until smooth.
- In a large mixing bowl, beat the softened cream cheese and sugar until light and fluffy.
- Add the melted chocolate and vanilla extract to the cream cheese mixture and mix until combined.
- Add eggs, one at a time, mixing well after each addition until fully incorporated.
- Fold in the sour cream and fresh raspberries gently using a spatula.
- Pour the mixture over the cooled crust in the springform pan and smooth the top.
- Bake in the preheated oven for 50-60 minutes or until the edges are set but the center still jiggles slightly.
- Once baked, turn off the oven and crack the door slightly, allowing the cheesecake to cool in the oven for an hour.
- After an hour, remove the cheesecake from the oven and let it cool at room temperature before refrigerating for at least 4 hours or overnight.
- Before serving, garnish with additional raspberries and a drizzle of melted chocolate if desired.
Tried this recipe?
Let us know how it was!Notes
Additional serving suggestions: pair with a crisp salad, garlic bread, or roasted seasonal vegetables for balance.
For make-ahead, prep components separately and assemble just before heating to preserve texture.
Taste and adjust with acid (lemon/vinegar) and salt right at the end to wake up flavors.