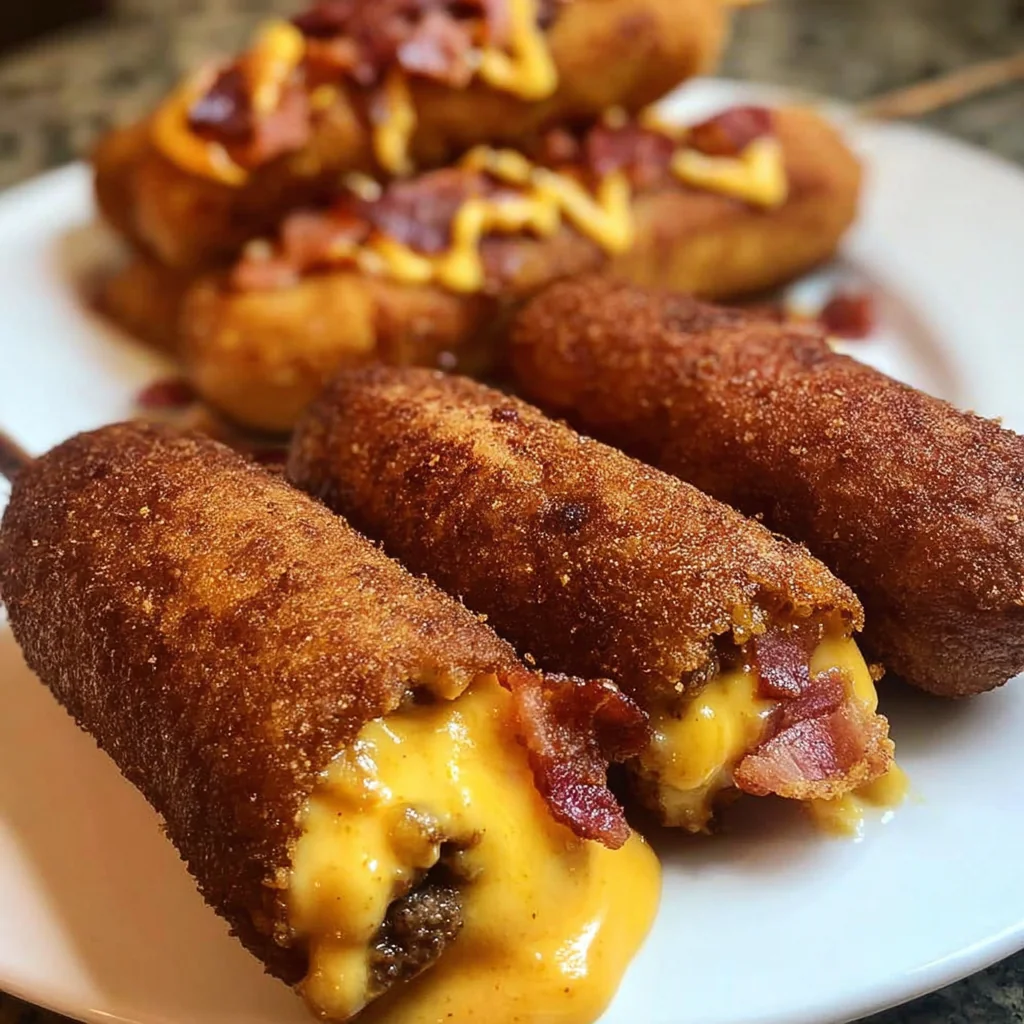
Corn dogs are a nostalgic fairground classic, but when you take the traditional recipe and elevate it with a cheeseburger twist, you enter the world of indulgence. These Deep-Fried Turkey Bacon Cheeseburger Corn Dogs combine juicy ground beef, smoky turkey bacon, gooey cheddar cheese, and the satisfying crunch of a golden cornmeal batter. Perfect for parties, game nights, or whenever you crave comfort food with a bold flavor punch, this recipe is guaranteed to impress.
In this article, we’ll walk through everything you need to know: the background, ingredients, preparation methods, frying tips, serving ideas, and answers to common questions.
Why This Recipe Works
The combination of a corn dog and a cheeseburger may sound ambitious, but it’s surprisingly harmonious:
- Ground beef provides the juicy, savory base.
- Turkey bacon adds smoky crispness without being overly heavy.
- Cheddar cheese melts beautifully for that gooey, cheesy bite.
- Cornmeal batter gives the outer shell its golden crunch, locking in all the flavors inside.
The result? A handheld snack that’s crispy on the outside, cheesy and meaty on the inside—everything you love about corn dogs and cheeseburgers combined in one.
Ingredients with Quantities
To make 8 servings of Deep-Fried Turkey Bacon Cheeseburger Corn Dogs, you will need:
- 1 lb ground beef
- 4 slices turkey bacon, cooked and crumbled
- 4 slices cheddar cheese, cut into strips
- 8 hot dogs
- 8 wooden skewers
For the batter:
- 1 cup yellow cornmeal
- 1 cup all-purpose flour
- ¼ cup sugar
- 1 tbsp baking powder
- ½ tsp salt
- 1 cup milk
- 2 large eggs
For frying:
- Oil for frying (vegetable, canola, or peanut oil)
Step-by-Step Directions and Preparation Method
Step 1: Prepare the Turkey Bacon
- Cook the turkey bacon in a skillet or oven until crispy.
- Drain on paper towels, then crumble into small pieces.
- Set aside for later use.
Step 2: Cook the Ground Beef
- Heat a skillet over medium heat and add the ground beef.
- Season lightly with salt and black pepper.
- Cook until browned and fully cooked through, about 6–8 minutes.
- Drain any excess grease and let the beef cool slightly.
Step 3: Wrap the Hot Dogs
- Take each hot dog and gently press cooked ground beef around it, forming an even layer.
- Tuck cheddar cheese strips and crumbled turkey bacon into the beef layer.
- Insert a wooden skewer through the center of each hot dog, making sure it goes all the way through for stability.
Step 4: Make the Batter
- In a large bowl, whisk together the cornmeal, flour, sugar, baking powder, and salt.
- Add the milk and eggs, whisking until a smooth batter forms.
- The batter should be thick enough to coat the hot dogs but not too runny.
Step 5: Heat the Oil
- Pour enough oil into a deep fryer or large pot to fully submerge the corn dogs.
- Heat oil to 350°F (175°C). Use a thermometer for accuracy.
Step 6: Fry the Corn Dogs
- Dip each beef-wrapped hot dog into the batter, ensuring it is coated completely.
- Carefully place 2–3 corn dogs into the hot oil at a time.
- Fry for 4–5 minutes, turning occasionally until golden brown.
- Remove and drain on paper towels to absorb excess oil.
Step 7: Serve
- Serve hot with ketchup, mustard, ranch, or burger sauce.
- Add a side of fries or onion rings for a complete fair-style meal.
Pro Tips for Perfect Corn Dogs
- Keep batter cold – A chilled batter clings better and makes for crispier results.
- Dry hot dogs – Pat dry with paper towels before wrapping in beef, so the meat sticks.
- Use skewers for support – Prevents the hot dogs from breaking apart in the oil.
- Don’t overcrowd the fryer – Fry 2–3 at a time to maintain oil temperature.
- Double dip for extra crunch – Dip once, let batter set for 1–2 minutes, then dip again before frying.
Flavor Variations
This recipe is flexible and can be customized:
- Spicy Kick: Add diced jalapeños to the beef layer or cayenne pepper to the batter.
- BBQ Twist: Mix cooked beef with a tablespoon of BBQ sauce before wrapping.
- Cheese Lovers: Swap cheddar for mozzarella or pepper jack.
- Breakfast Corn Dogs: Use breakfast sausages instead of hot dogs, and add scrambled eggs inside.
Nutritional Information (Approximate per serving)
- Calories: ~480 kcal
- Protein: 19g
- Carbohydrates: 35g
- Fat: 28g
- Fiber: 2g
- Sugar: 5g
FAQs
1. Can I bake these instead of frying?
Yes, but they won’t have the same crispy texture. Preheat the oven to 400°F, place the coated corn dogs on a baking sheet, and bake for 15–20 minutes until golden.
2. Can I prepare them ahead of time?
Yes! Assemble and batter-coat the hot dogs, then freeze them on a tray. Once frozen, transfer to a bag. Fry directly from frozen, adding 1–2 minutes to cook time.
3. What oil is best for frying?
Neutral oils with a high smoke point work best—vegetable, canola, or peanut oil. Avoid olive oil as it burns too quickly.
4. Can I make them smaller for appetizers?
Absolutely! Use cocktail sausages or cut hot dogs in half for bite-sized mini corn dogs. Great for parties.
5. How do I reheat leftovers?
The best way is to reheat in an air fryer or oven at 350°F for 5–7 minutes to restore crispiness. Avoid microwaving as it makes them soggy.
6. Can I use regular bacon instead of turkey bacon?
Yes. Regular bacon works just as well, but turkey bacon keeps the dish slightly lighter.
Conclusion
These Deep-Fried Turkey Bacon Cheeseburger Corn Dogs bring together the best of both worlds—classic fair food and indulgent cheeseburgers. With crispy golden batter, a cheesy meaty filling, and the smoky crunch of turkey bacon, every bite is a treat.
Whether you’re hosting a party, tailgating, or simply craving comfort food, this recipe delivers big flavor and fun. Serve them with your favorite sauces, share them with friends, and enjoy a modern twist on a beloved classic.
If you’re ready to wow your guests and satisfy your cravings, this recipe deserves a spot in your kitchen.