Introduction
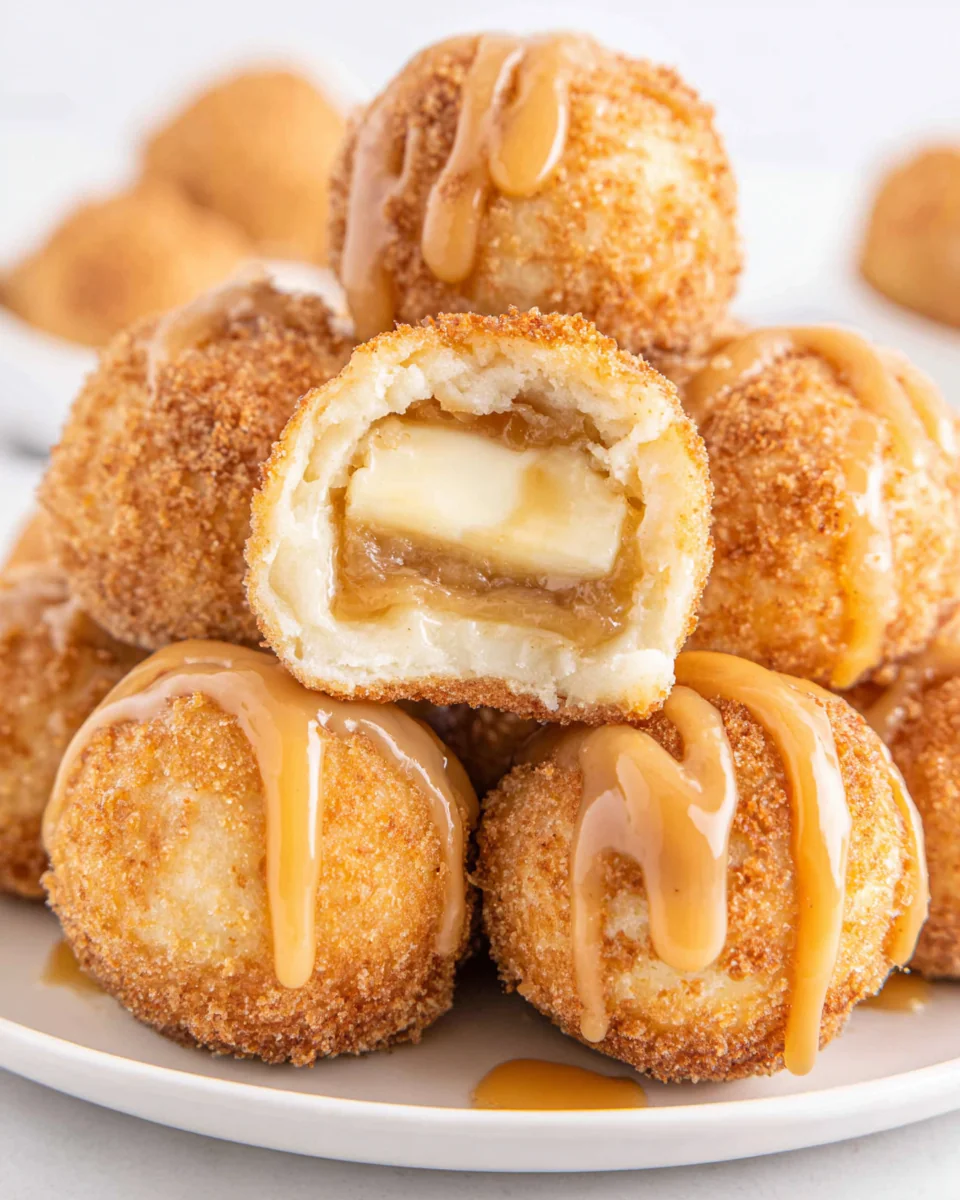
Caramel apple pie bombs are a delightful twist on classic dessert favorites. These bites combine the comforting flavors of apple pie and luscious caramel, all wrapped in a flaky pastry shell. Perfect for gatherings or cozy nights at home, they’re simple to make yet bursting with flavor.
The beauty of these pie bombs lies not only in their taste but also in their presentation. Imagine golden, crispy pockets of sweet apple and gooey caramel that melt in your mouth. Whether served warm or at room temperature, they will surely impress family and friends.
Ingredients
- 2 cups diced apples
Fresh diced apples serve as the star filling in these pie bombs, providing sweetness and a hint of tartness. Choose a mix of Honeycrisp and Granny Smith for the best flavor balance. - 1 cup caramel sauce
Caramel sauce adds richness and creaminess to the pie bombs. It enhances the apple flavor while creating a gooey, indulgent contrast to the crisp pastry. - 1 tsp cinnamon
Cinnamon beautifully complements apples with its warm, aromatic essence. It enhances the overall flavor profile and brings a comforting vibe to the dessert. - 1 package refrigerated pie crusts
Using refrigerated pie crusts saves time and ensures a flaky, buttery pastry without the hassle of making dough from scratch. It forms the crisp outer layer for the pie bombs. - 1 egg (for egg wash)
The egg wash is brushed on the pastry before baking, giving the pie bombs a beautiful golden finish. It helps create that desirable crisp texture on the outside. - Powdered sugar (for dusting)
A light dusting of powdered sugar adds an appealing visual element and a touch of sweetness on top of the caramel apple pie bombs, making them look as delightful as they taste.
Directions & Preparation
Step 1: Preheat the oven to 375°F (190°C).
Preheating the oven is crucial for achieving the proper texture in baked goods. This ensures that when the pie bombs enter the oven, they begin to cook immediately, resulting in a perfectly flaky and golden exterior.
Step 2: Prepare the apples by peeling, coring, and dicing them into small pieces.
Properly preparing the apples ensures even cooking and helps prevent large chunks from breaking the pastry. Diced apples allow for a consistent bite and better mixing with the caramel and spices.
Step 3: In a mixing bowl, combine diced apples, caramel sauce, and cinnamon. Stir until well coated.
Coating the apples in caramel and cinnamon enhances their flavor and ensures that each bite delivers a flavor punch. Mixing them thoroughly allows the spices to infuse into the apples.
Step 4: Roll out the dough and cut it into 4-5 inch squares.
Rolling out the dough and cutting it into squares creates the foundational shape for the pie bombs. Ensuring they are uniform in size will help them cook evenly.
Step 5: Place a spoonful of the apple mixture in the center of each square.
Placing the filling in the center ensures that the caramel apple combination is concentrated in each pie bomb. Be mindful not to overfill; otherwise, the pastry might burst during baking.
Step 6: Fold the edges of the pastry over the filling and press to seal.
Sealing the pastry properly is essential to ensure that the filling does not leak out during baking. This step ensures a delightful, gooey interior once cooked.
Step 7: In a small bowl, beat the egg and brush it over the tops of the bombs.
Applying an egg wash gives the pie bombs a rich, golden appearance. This beautiful color is not only inviting but also signals a crispy texture.
Step 8: Place the bombs on a baking sheet lined with parchment paper.
Using parchment paper prevents sticking and aids in clean-up. Spacing the bombs out ensures even baking and airflow around each piece, promoting even browning.
Step 9: Bake for 20-25 minutes or until golden brown.
Baking until golden brown indicates that the pastry is fully cooked and has achieved that perfect flaky texture. Keep an eye on them to prevent overbaking, which could lead to a dry texture.
Step 10: Remove from oven and let cool for a few minutes.
Letting the pie bombs cool slightly before serving allows the filling to set a bit, preventing scorching and helping maintain their shape when biting into them.
Step 11: Dust with powdered sugar before serving.
A light dusting of powdered sugar adds a finishing touch that enhances the visual appeal. It balances the sweetness and pairs wonderfully with the caramel and apples.

Perfectly Spiced Apples: The Heart of the Dish
The apples in these pie bombs are more than just a filling; they embody the spirit of fall. By choosing a mix of sweet and tart varieties, you create a depth of flavor that surprises the palate. The caramel sauce not only sweetens the apples but adds complexity. This delightful blend of spices and textures results in a truly comforting flavor that evokes warm memories of autumn gatherings.
The Art of the Flaky Crust
Achieving the perfect flaky pastry is an essential skill in any baking repertoire. When rolling out the dough, handling it gently keeps the texture light. Ensuring that your oven is preheated allows the crust to puff up beautifully, while the egg wash gives it that golden gloss. Each bite reveals a crisp exterior that beckons you to indulge in the warm, gooey interior.
Creatively Serving Your Pie Bombs
While these caramel apple pie bombs are delightful on their own, get creative with presentations! Serve them warm with a scoop of vanilla ice cream or drizzle additional caramel sauce on top for an extra sweet indulgence. For a festive twist, sprinkle crushed nuts or serve alongside a spiced cider for a perfect fall-themed dessert.
FAQs
What can I do if my caramel sauce is too thick?
If your caramel sauce is too thick, gently heat it in the microwave or on the stove with a splash of cream or milk. This will help loosen it for easier mixing with the apples.
Can I substitute fresh apples for canned apples?
While it's possible to use canned apples, fresh apples offer better texture and flavor. If opting for canned, make sure to drain them well and reduce the caramel sauce to avoid excess moisture.
What if my pie bombs start to leak during baking?
If you notice leaking, it generally means the filling was overfilled. Next time, try using less filling and ensure the edges are sealed well. You can also use a fork to crimp the edges for added security.
Can I add other fruits to the filling?
Absolutely! Pears or even berries can be wonderful additions, as long as they complement the flavors of apple and caramel. Make adjustments to the sugar based on the sweetness of the fruits used.
What if my pie crusts are too dry?
If your pie crusts seem dry, they may have been exposed to air for too long. Keep refrigerated until ready to use, and be sure to work quickly. Adding a teaspoon of water while mixing can help hydrate the dough.
Can I scale this recipe for a larger crowd?
Yes! Simply double the ingredients and ensure you have a larger baking sheet or multiple sheets for baking. Just keep an eye on baking times, as more items may require slight adjustments.
Conclusion
Creating these caramel apple pie bombs is a gratifying experience that combines baking essentials with delightful flavors. They evoke a sense of comfort and joy, perfect for sharing.
With their warm, gooey filling wrapped in a flaky crust, these treats are bound to become a favorite in your home. Next time you're in the mood for a sweet indulgence, reach for this recipe and thrill your taste buds.
Recipe Card
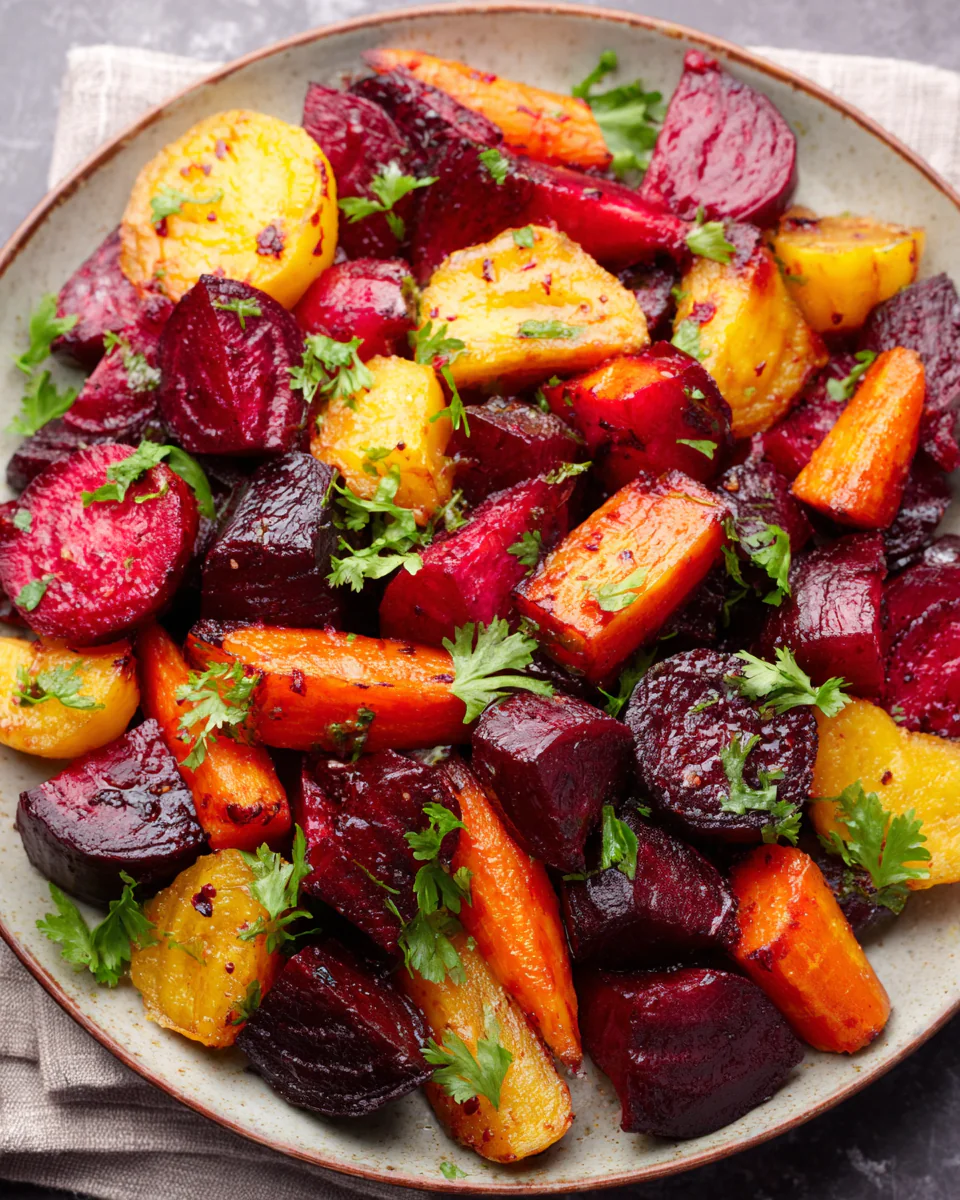
Savory Honey Roasted Beets and Carrots Delight
Ingredients
Method
- Preheat your oven to 400°F (200°C).
- Prepare the beets and carrots by peeling and chopping them.
- In a large mixing bowl, combine the cubed beets and sliced carrots.
- Drizzle the honey and olive oil over the vegetables, then season with salt and pepper.
- Toss everything together until the beets and carrots are well coated.
- Spread the coated vegetables on a parchment-lined baking sheet.
- Roast in the preheated oven for about 30-40 minutes, stirring halfway.
- Check for doneness; they should be fork-tender and caramelized.
- Remove from oven and garnish with fresh herbs, if desired.
Tried this recipe?
Let us know how it was!Notes
Additional serving suggestions: pair with a crisp salad, garlic bread, or roasted seasonal vegetables for balance.
For make-ahead, prep components separately and assemble just before heating to preserve texture.
Taste and adjust with acid (lemon/vinegar) and salt right at the end to wake up flavors.