Introduction
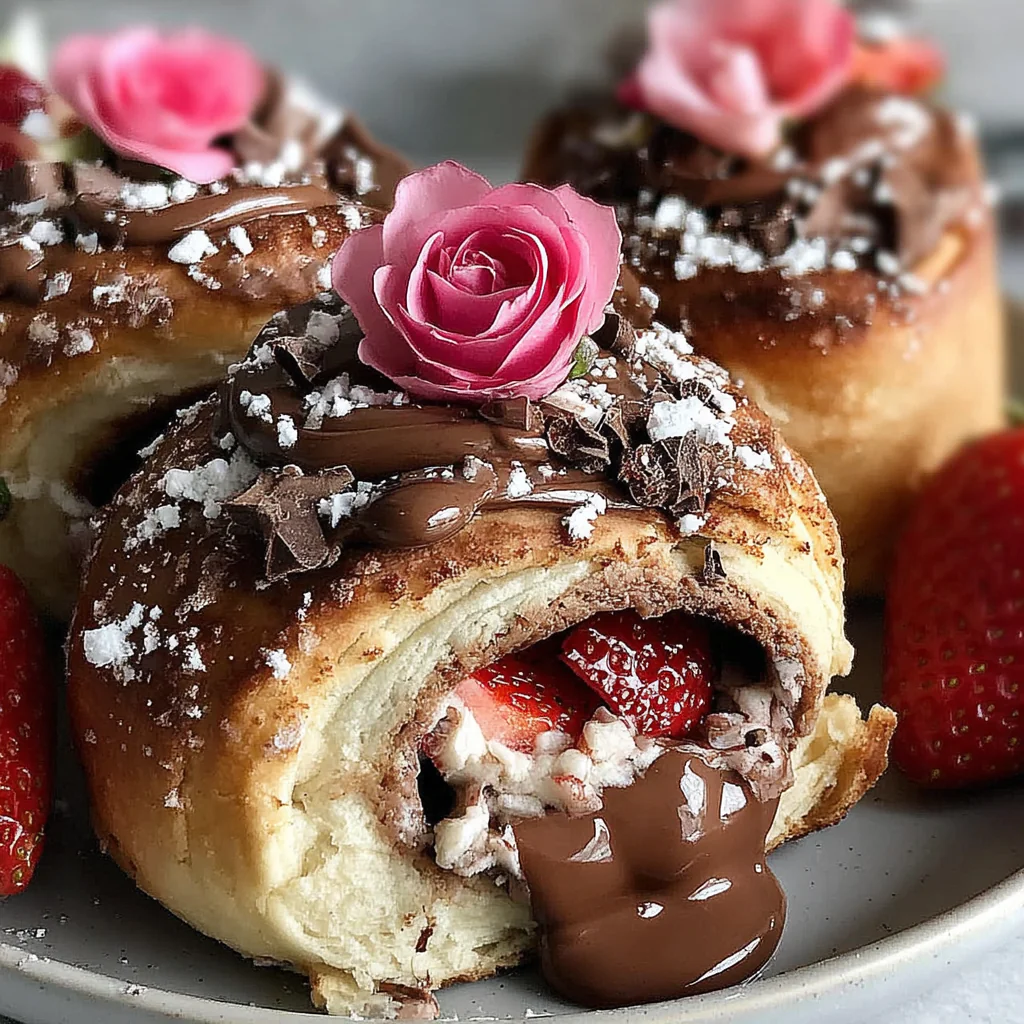
Valentine's Day is the perfect occasion to express love and affection, and what better way to do so than with homemade chocolate rolls? These delightful treats combine the rich flavors of chocolate with a soft, pillowy dough, ensuring a sweet indulgence that your loved ones will cherish.
The act of baking can be both a therapeutic and rewarding experience, and creating chocolate rolls for someone special only heightens that joy. With a few simple ingredients and a bit of patience, you can transform your kitchen into a warm haven filled with the irresistible aroma of chocolate.
Ingredients
- 4 cups all-purpose flour
Flour forms the structural backbone of the rolls, giving them the necessary framework to rise and maintain their shape. Using all-purpose flour ensures a soft texture while still providing enough gluten for elasticity. - 1 cup whole milk
Milk adds moisture to the dough, resulting in a tender crumb. The fat content from whole milk enriches the flavor and mouthfeel of the rolls, making each bite more indulgent. - 1/2 cup granulated sugar
Sugar isn’t merely a sweetener; it also activates yeast and assists in browning during baking. Its presence contributes to the overall flavor, enhancing the chocolate without overpowering it. - 1/4 cup unsweetened cocoa powder
Cocoa powder provides the essential chocolate flavor for the rolls. It gives the dough a rich, earthy taste, forms a beautiful color, and contributes to the deep chocolate aroma. - 1/2 cup unsalted butter
Butter serves multiple purposes in baking: it adds richness, moisture, and tenderness. The fat content helps create flaky layers while contributing to a delicious flavor that pairs wonderfully with chocolate. - 2 large eggs
Eggs are crucial for binding the ingredients together, adding structure and stability to the rolls. They also provide moisture and richness, leading to a more tender final product. - 2 teaspoons instant yeast
Yeast is the magic component that makes the dough rise. Instant yeast is preferred as it activates quickly, allowing for a quicker proofing time and enabling the rolls to develop a light texture. - 1/2 teaspoon salt
Salt is an essential ingredient in baking, enhancing the overall flavor. It balances the sweetness and complements the chocolate, resulting in a more nuanced taste. - 1/2 cup semi-sweet chocolate chips
Chocolate chips are the heart of these chocolate rolls, offering melted chocolate pockets that create a rich, gooey texture. They enhance the flavor and provide delightful bursts of chocolate in every bite. - 1 teaspoon vanilla extract
Vanilla adds a warm, aromatic quality to the rolls, rounding out the flavor profile. It enhances the chocolate taste, making it more pronounced without overshadowing other ingredients.
Directions & Preparation
Step 1: Combine dry ingredients in a bowl.
Start off by whisking together the flour, sugar, cocoa powder, salt, and yeast in a large mixing bowl. Properly combining these dry ingredients ensures even distribution of flavors and components. This initial step sets the foundation for a uniform dough, which is essential for achieving the desired texture and rise.
Step 2: Warm the milk and melt butter together.
In a small saucepan, gently heat the milk until warm, then add in the butter. This mixture should be warm, not hot, as too high a temperature can kill the yeast when mixed in. This step is crucial as it will create a conducive environment for yeast activation, leading to a fluffy and light roll.
Step 3: Mix wet ingredients with dry ingredients.
Once the milk and butter are combined and slightly cooled, pour this mixture into the bowl with dry ingredients. Add the eggs and vanilla extract at this time, then mix until a sticky dough forms. This step combines flavors and ensures that all wet elements are thoroughly integrated, which is vital for the consistent texture of the rolls.
Step 4: Knead the dough.
Transfer the dough onto a floured surface and knead for about 8-10 minutes until smooth and elastic. Kneading develops gluten, which provides the structure and chewiness of the final rolls. Pay attention to the texture; the dough should be slightly tacky but not overly sticky. This will impact the fluffiness of your rolls.
Step 5: Let the dough rise.
Place the kneaded dough in a greased bowl, cover it with a clean kitchen towel, and allow it to rise in a warm place for about an hour or until doubled in size. This fermentation process is crucial as it allows the yeast to produce gases that create pockets of air, which result in soft, airy rolls.
Step 6: Roll out the dough and add chocolate filling.
After the dough has risen, punch it down and roll it out into a rectangle on a floured surface. Sprinkle the chocolate chips evenly over the surface before rolling it tightly from one end to the other. This step is important for distributing the chocolate evenly throughout the rolls, ensuring that every bite is filled with delightful gooeyness.
Step 7: Cut into rolls.
With a sharp knife or a bench scraper, slice the rolled dough into equal-sized pieces, about 1 to 1.5 inches thick. Make sure to use a gentle sawing motion to avoid squishing the rolls. This method helps maintain the shape of the rolls as they rise and bake, ensuring they turn out fluffy and visually appealing.
Step 8: Prepare for the second rise.
Place the cut rolls in a greased baking dish, ensuring minimal space between them. Cover with a towel, and let them rise for another 30 minutes. This second rise is vital for creating a light texture, allowing the rolls to expand and become airy during baking.
Step 9: Preheat the oven.
While the rolls are rising, preheat your oven to 375°F (190°C). Preheating ensures that the rolls begin baking in a properly heated oven, which is essential for achieving an evenly baked result. This also promotes initial burst of steam that helps in the rise of the rolls.
Step 10: Bake the rolls.
Once the rolls have risen, place them in the preheated oven and bake for 20-25 minutes or until they are golden brown. Baking transforms the dough into fluffy rolls, while the chocolate chips melt and create a luscious filling. Keep an eye out for the color, which signals when they're finished.
Step 11: Cool and serve.
After baking, remove the rolls from the oven and allow them to cool slightly before serving. Enjoy while warm for a decadent treat. Cooling helps to set the rolls slightly, ensuring they maintain their structure when served. It's also an ideal time to add any icing or toppings you desire.

Chocolate Variations to Consider
While the classic chocolate filling is undeniably delicious, consider experimenting with different types of chocolate. Dark chocolate offers a rich, intense flavor, while milk chocolate yields a creamier bite. You could also introduce flavored chocolates or nuts for an additional layer of taste. This flexibility allows you to customize the rolls to perfectly suit your loved one's preferences.
Enhancing with Frosting or Glaze
Elevate the chocolate rolls further with a simple icing or glaze. A drizzle of chocolate ganache or a cream cheese frosting can transform the rolls from delightful to decadent. Use a mixture of powdered sugar, vanilla extract, and milk for a quick glaze that complements the chocolate beautifully without overwhelming it.
Serving Suggestions for a Romantic Touch
Present your chocolate rolls on a beautiful platter, perhaps dusted with powdered sugar for a touch of elegance. Pair them with fresh berries or a scoop of vanilla ice cream to enhance the experience. The contrast of the warm rolls with cool accompaniments creates a delightful sensory journey that is sure to impress your Valentine's Day guest.
FAQs
What if my dough is too sticky to handle?
If the dough is excessively sticky, sprinkle a small amount of flour onto your work surface and your hands while kneading. Adding flour in moderation will help achieve a workable consistency without altering the dough's texture too much.
Can I use baking chocolate instead of chocolate chips?
Yes, you can chop baking chocolate into small pieces to use as a filling. It may melt differently than chips, providing a mix of textures, but will still yield delicious rolls.
What if my chocolate rolls don’t rise properly?
If your rolls don’t rise well, ensure your yeast is fresh and properly activated. If the dough is too cold, try putting it in a warmer area or let the rolls rise longer until they double in size.
Can I make these rolls without cocoa powder?
While cocoa powder is integral to achieving chocolate flavor, you can substitute it with caramel or vanilla for a different taste profile, just keep the measurements in check for balance.
How do I adjust the quantity for a smaller batch?
To make fewer rolls, simply halve the quantities of all ingredients. Adjusting the baking time may also be necessary, so start checking for doneness a few minutes early.
Can I add other fillings to the chocolate rolls?
Absolutely! Feel free to mix in nuts, fruit, or spices to enhance the flavor of the chocolate rolls. Just ensure that any additional ingredients complement the chocolate and retain the dough's structure.
Conclusion
These chocolate rolls are not just a treat; they are a heartfelt way to show someone you care. Whether you’re an experienced baker or just starting out, the joy of creating something special is sure to make your Valentine’s Day memorable.
With their soft, rich texture and melty chocolate centers, these rolls are bound to impress. So gather your loved ones, bake, and enjoy these delightful treats as you celebrate the occasion together.
Recipe Card
Delicious Chocolate Rolls for Valentine's Day
Ingredients
Method
- Combine dry ingredients in a bowl.
- Warm the milk and melt butter together.
- Mix wet ingredients with dry ingredients.
- Knead the dough.
- Let the dough rise.
- Roll out the dough and add chocolate filling.
- Cut into rolls.
- Prepare for the second rise.
- Preheat the oven.
- Bake the rolls.
- Cool and serve.
Tried this recipe?
Let us know how it was!Notes
Additional serving suggestions: pair with a crisp salad, garlic bread, or roasted seasonal vegetables for balance.
For make-ahead, prep components separately and assemble just before heating to preserve texture.
Taste and adjust with acid (lemon/vinegar) and salt right at the end to wake up flavors.