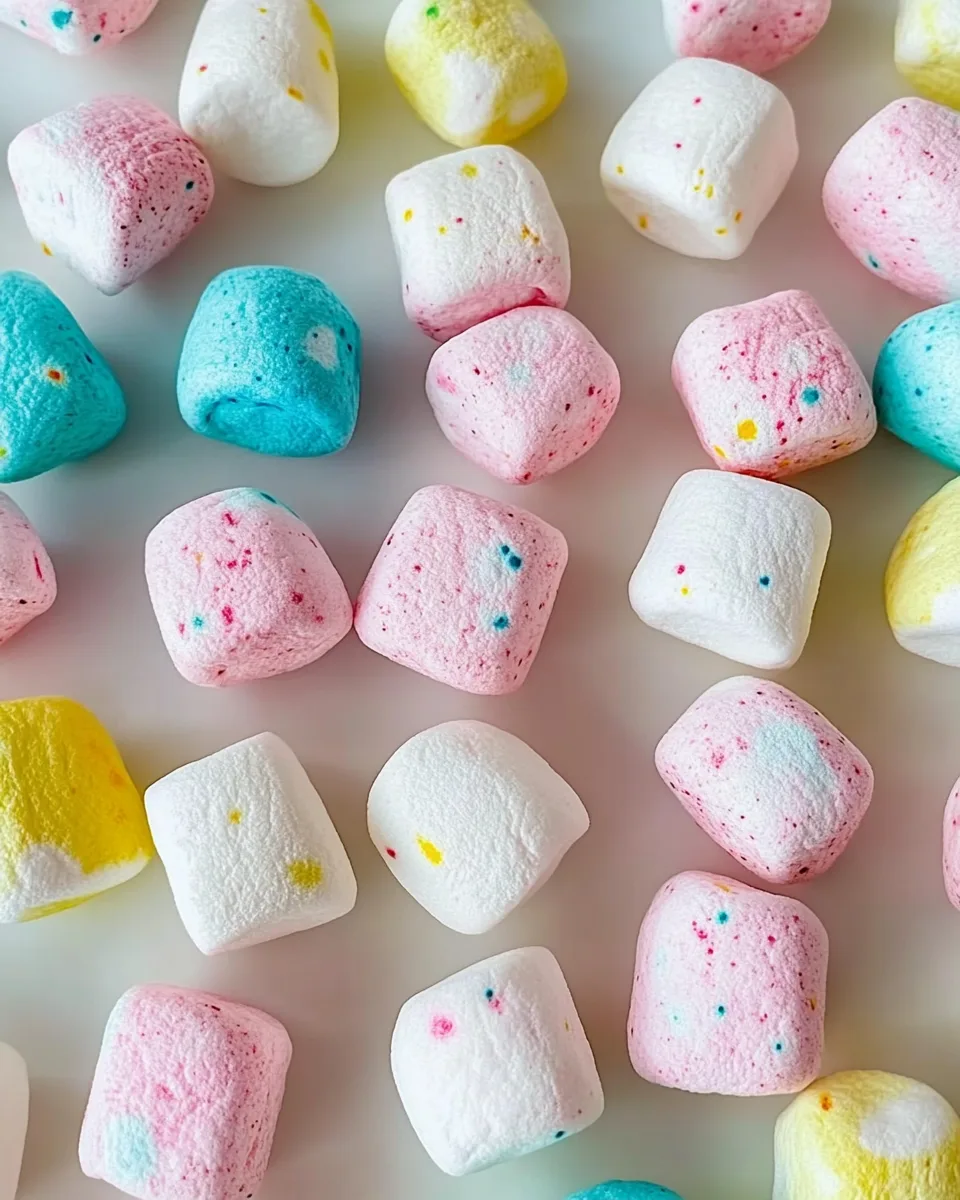
Welcome to the ultimate guide on Dyeing Marshmallows for Easter, a cheerful, creative activity that doubles as a tasty treat. Whether you’re looking to spice up your holiday dessert table, entertain the kids, or just dive into a crafty spring project, coloring marshmallows is the perfect blend of fun and flavor.
In this comprehensive, 5000-word article, we’ll walk you through everything you need to know—from supplies and instructions to unique design ideas, storage tips, and creative uses. We’ll also answer frequently asked questions and wrap things up with a conclusion that ties it all together. Let’s jump into the magic of Easter marshmallows!
What You Need to Dye Marshmallows
Before we start dipping and dyeing, let’s gather our ingredients and supplies. The beauty of this DIY is that it’s budget-friendly and uses everyday kitchen items.
Ingredients & Supplies:
- Large or mini marshmallows
- Food coloring (gel or liquid)
- Small bowls or cups
- Water
- White vinegar or lemon juice (optional, enhances color adherence)
- Toothpicks or tongs (for easy handling)
- Paper towels or parchment paper

These simple ingredients lay the foundation for bright, custom-colored marshmallows that make a big impact on your Easter decor and treats.
Step-by-Step Instructions to Dye Marshmallows for Easter
Let’s break down the process into easy-to-follow steps so your marshmallows come out colorful, cute, and completely edible.
1. Prepare the dye baths: In each small bowl or cup, mix about 1/4 cup of water with a few drops of food coloring. If you’re using gel food coloring, mix thoroughly to avoid clumps. To make the color more vibrant and long-lasting, add 1/2 teaspoon of vinegar or lemon juice.
2. Dip your marshmallows: Use tongs or a toothpick to dip your marshmallow into the dye bath. The longer you soak, the deeper the color. For pastel tones, a quick dip is enough. For bolder shades, let them soak for a few seconds longer.
3. Dry thoroughly: Once dyed, lay your marshmallows on paper towels or parchment paper. Make sure they are not touching each other. Let them air dry for 1–2 hours until they’re completely set and ready to use.
4. Add fun designs (optional): Feeling extra artistic? Use food-safe markers or fine brushes dipped in food coloring to draw polka dots, stripes, flowers, or even Easter eggs onto your dried marshmallows.
5. Display and enjoy: Once your marshmallows are dry and decorated, they’re ready to brighten up your Easter table. Use them in hot cocoa, cupcakes, treat bags, or as playful fillers in Easter baskets.
Creative Ideas for Easter Marshmallows
Dyeing marshmallows is just the beginning. Here are some fun ways to elevate them into showstoppers:
- Easter Bunny Faces: Use mini marshmallows as ears, and food-safe markers for faces.
- Marshmallow Bouquets: Skewer dyed marshmallows and tie with ribbon.
- Marshmallow Kabobs: Alternate colored marshmallows with jelly beans or fruit.
- Colorful Cupcake Toppers: Place one dyed marshmallow on each cupcake.
- DIY Hot Cocoa Kits: Add pastel marshmallows to jars of cocoa mix as thoughtful Easter gifts.
Tips for the Best Results
To ensure your Dyeing Marshmallows for Easter project is a hit, keep these pro tips in mind:
- Use gel colors for more vibrant tones without excess liquid.
- Let marshmallows dry on parchment for minimal sticking.
- Don’t oversoak—marshmallows can get too soggy.
- Use gloves if you’re handling the dye by hand to avoid stained fingers.
- Store finished marshmallows in an airtight container for up to a week.
Frequently Asked Questions (FAQs)
Q: Can I use natural food dyes? Yes, you can use natural dyes like beet juice, turmeric, or blueberry extract, though the colors will be more subtle.
Q: Are dyed marshmallows safe to eat? Absolutely! As long as you use food-safe coloring and tools, they are totally edible.
Q: How long do dyed marshmallows last? If stored in an airtight container, they can last up to 7–10 days.
Q: Can I dye flavored marshmallows? Yes, but be aware that colored or flavored coatings may affect how the dye appears.
Q: What if my marshmallows get sticky after drying? Dust lightly with cornstarch to absorb excess moisture.
Q: Can kids help with this craft? Definitely! It’s a fun and safe Easter project for kids—with supervision for the dyeing part.
Conclusion: Let Your Easter Be Colorful and Sweet
There you have it—your complete guide to Dyeing Marshmallows for Easter, packed with tips, tricks, and creative inspiration. Whether you’re adding charm to your dessert table, prepping Easter baskets, or just looking for a sweet activity, dyed marshmallows deliver on all fronts.
This DIY is easy enough for kids, pretty enough for Instagram, and tasty enough for everyone. So grab your marshmallows, pick your favorite pastel shades, and let your creativity shine this Easter season. Happy crafting and happy snacking!