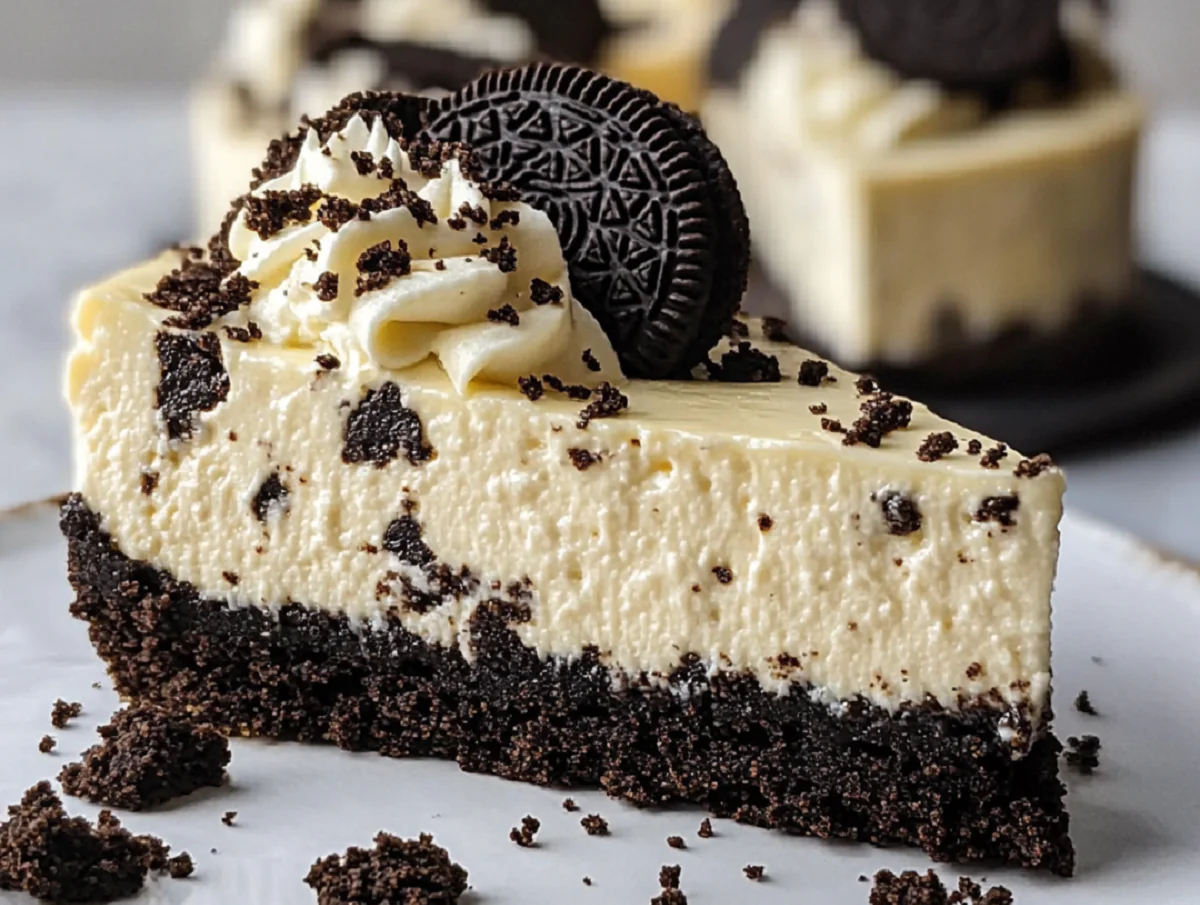
When it comes to indulgent desserts, an Oreo Crust Cheesecake stands out as a timeless favorite. Combining the rich, creamy texture of cheesecake with the chocolaty goodness of an Oreo crust, this dessert is guaranteed to please any crowd. Whether you’re a baking enthusiast or a beginner, this recipe is simple to follow and perfect for any occasion.
Ingredients
For the Crust:
- 2 cups Oreo cookie crumbs (about 24 Oreos)
- 5 tablespoons unsalted butter, melted
For the Cheesecake Filling:
- 3 (8-ounce) packages cream cheese, softened
- 1 cup granulated sugar
- 1 cup sour cream
- 3 large eggs
- 1 teaspoon vanilla extract
For the Topping (Optional):
- 1 cup whipped cream
- Crushed Oreos for garnish
Directions and Preparation Method
Step 1: Prepare the Oreo Crust
- Preheat the oven: Set your oven to 325°F (165°C) to get it ready for baking.
- Crush the Oreos: Use a food processor to grind about 24 Oreo cookies into fine crumbs. Alternatively, place the cookies in a sealed plastic bag and crush them with a rolling pin.
- Combine with butter: In a mixing bowl, stir the Oreo crumbs with melted butter until they’re well coated and slightly sticky.
- Press into the pan: Press the mixture evenly into the bottom of a 9-inch springform pan. Use the back of a spoon or the bottom of a glass to press the crust firmly. This ensures a solid base for your cheesecake.
Step 2: Make the Cheesecake Filling
- Beat the cream cheese and sugar: In a large mixing bowl, beat the softened cream cheese with the sugar using a hand mixer or stand mixer. Mix until the texture is smooth and creamy.
- Add sour cream and vanilla: Incorporate the sour cream and vanilla extract, blending well to achieve a uniform mixture.
- Mix in the eggs: Add the eggs one at a time, mixing on low speed after each addition. This step prevents overmixing, which can cause cracks in the cheesecake.
Step 3: Assemble and Bake
- Pour the filling over the crust: Once the filling is smooth, pour it over the prepared Oreo crust. Spread it evenly with a spatula to smooth the top.
- Bake: Place the springform pan on a baking sheet to catch any drips. Bake in the preheated oven for 50–55 minutes. The cheesecake is done when the center is just set but still slightly jiggly.
Step 4: Cool and Chill
- Cool to room temperature: Remove the cheesecake from the oven and allow it to cool in the pan on a wire rack. This gradual cooling helps prevent cracks.
- Refrigerate: Once cooled, cover the cheesecake with plastic wrap and refrigerate it for at least 4 hours or overnight for the best texture and flavor.
Step 5: Add the Topping (Optional)
- Whipped cream garnish: Before serving, spread or pipe whipped cream on top of the cheesecake.
- Crushed Oreos: Sprinkle crushed Oreo cookies over the whipped cream for added crunch and visual appeal.
Frequently Asked Questions (FAQs)
1. Can I use store-bought Oreo crumbs instead of crushing Oreos?
Absolutely! Using pre-made Oreo crumbs saves time and works perfectly for this recipe.
2. How do I soften cream cheese quickly?
To soften cream cheese quickly, remove it from the packaging and microwave it in 10-second intervals until it reaches room temperature.
3. Can I make this cheesecake ahead of time?
Yes! Cheesecake tastes even better when made a day ahead. Store it in the refrigerator, covered, for up to 3 days.
4. How do I prevent my cheesecake from cracking?
Avoid overmixing the batter, and ensure the eggs are incorporated on low speed. Also, cooling the cheesecake gradually helps prevent cracks.
5. Can I freeze this cheesecake?
Yes, Oreo Crust Cheesecake freezes beautifully. Wrap it tightly in plastic wrap and foil before freezing. Thaw in the refrigerator overnight before serving.
Conclusion
The Oreo Crust Cheesecake is a dessert masterpiece that combines a crunchy, chocolatey base with a smooth, creamy filling. This recipe is easy to follow and guarantees impressive results, whether for a family gathering, a holiday celebration, or a weekend treat. The optional whipped cream topping and crushed Oreos add the perfect finishing touch, making this dessert as visually stunning as it is delicious.
Make this recipe your go-to for indulgent occasions, and enjoy the endless compliments that come your way!


