Introduction
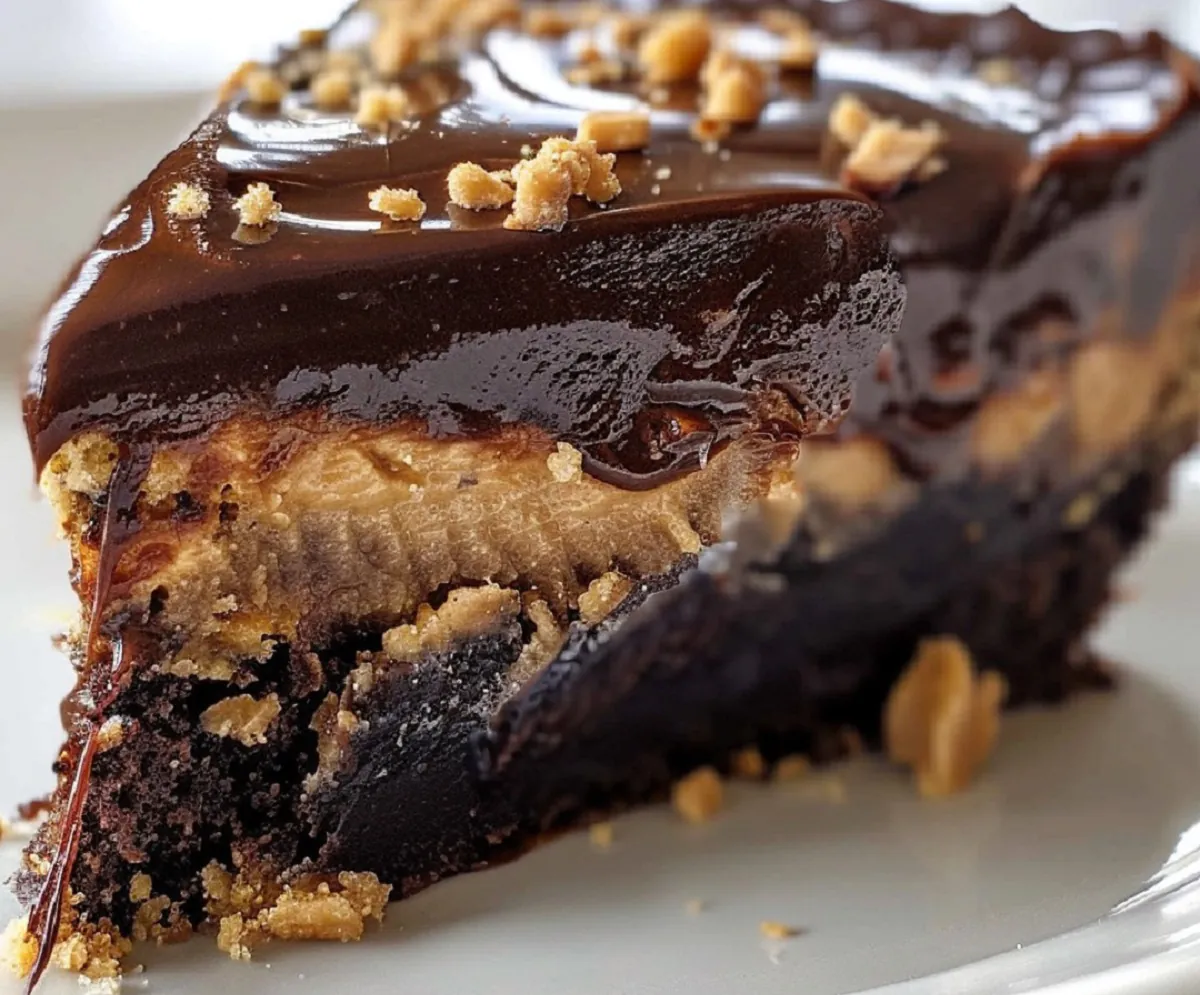
Craving a rich, indulgent dessert that will satisfy both your chocolate and peanut butter cravings? The Chocolate Peanut Butter Ooey Gooey Cake is a crowd-pleaser that’s perfect for any occasion. This cake combines layers of chocolate with creamy peanut butter and a touch of cream cheese for that perfect ooey-gooey texture. Whether it’s a special celebration or a weekend treat, this cake will surely steal the show.
Ingredients with Quantities
Chocolate Cake Base:
- 1 box chocolate cake mix
- ½ cup (1 stick) butter, melted
- 4 large eggs, divided
Peanut Butter Topping:
- 1 (8 oz) package cream cheese, softened
- 1 cup creamy peanut butter
- 1 lb (about 4 cups) powdered sugar
- 1 tsp vanilla extract
- 1 cup chocolate chips
Directions and Preparation Method
Step 1: Prepare the Chocolate Cake Base
- Preheat the Oven
Begin by preheating your oven to 350°F (175°C). Lightly grease a 9×13-inch baking dish, ensuring the cake doesn’t stick. - Combine Ingredients for the Cake Base
In a large mixing bowl, combine the chocolate cake mix, melted butter, and 2 eggs. Stir until the mixture is well blended. The texture should be slightly thick and sticky. - Press the Mixture into the Baking Dish
Once mixed, press this chocolate layer evenly into the bottom of the greased baking dish. This will form the rich chocolate base of the cake.
Step 2: Prepare the Peanut Butter Layer
- Mix the Cream Cheese and Peanut Butter
In another bowl, use a mixer to beat together the softened cream cheese and peanut butter until smooth. - Add the Remaining Ingredients
Next, add in the vanilla extract, powdered sugar, and the remaining 2 eggs. Continue to beat until everything is thoroughly combined and the mixture is creamy and smooth. - Spread Over the Chocolate Layer
Carefully spread this peanut butter mixture over the chocolate cake base in the baking dish, making sure it’s evenly distributed.
Step 3: Add Chocolate Chips and Bake
- Sprinkle Chocolate Chips
For added texture and richness, sprinkle the chocolate chips evenly over the peanut butter layer. - Bake the Cake
Place the baking dish in the oven and bake for 40-45 minutes. The edges should be set and golden brown, while the center remains slightly gooey. - Cool and Serve
Allow the cake to cool completely before slicing. The cooling process is essential as it allows the layers to set, making it easier to cut.
Frequently Asked Questions (FAQs)
1. Can I Use a Different Flavor of Cake Mix?
Yes, while chocolate is the recommended choice, you can try other flavors like vanilla or even red velvet for a twist. Keep in mind that these flavors will alter the overall taste of the dessert.
2. Can I Make This Cake Ahead of Time?
Absolutely! This cake can be made a day or two ahead and stored in the refrigerator. Just cover it tightly with plastic wrap to keep it fresh.
3. Can I Substitute the Peanut Butter?
If you have a peanut allergy or want a different flavor, try almond butter, cashew butter, or even a chocolate hazelnut spread. However, be aware that these substitutions will change the flavor profile of the cake.
4. How Should I Store Leftovers?
Leftover pieces of this cake should be stored in an airtight container in the refrigerator. It will stay fresh for up to five days.
5. Can I Freeze the Cake?
Yes, the cake can be frozen. Wrap individual slices in plastic wrap and then place them in a freezer-safe container. When ready to enjoy, let them thaw at room temperature or warm them in the microwave.
Conclusion
The Chocolate Peanut Butter Ooey Gooey Cake is more than just a dessert; it’s an experience! With its rich, chocolatey base, creamy peanut butter layer, and gooey center, each bite delivers the ultimate indulgence. Perfect for chocolate and peanut butter lovers alike, this cake is easy to make yet impressive enough to be the star at any gathering. Whether you’re baking for family, friends, or just yourself, this cake is sure to bring joy and satisfy those sweet cravings.


