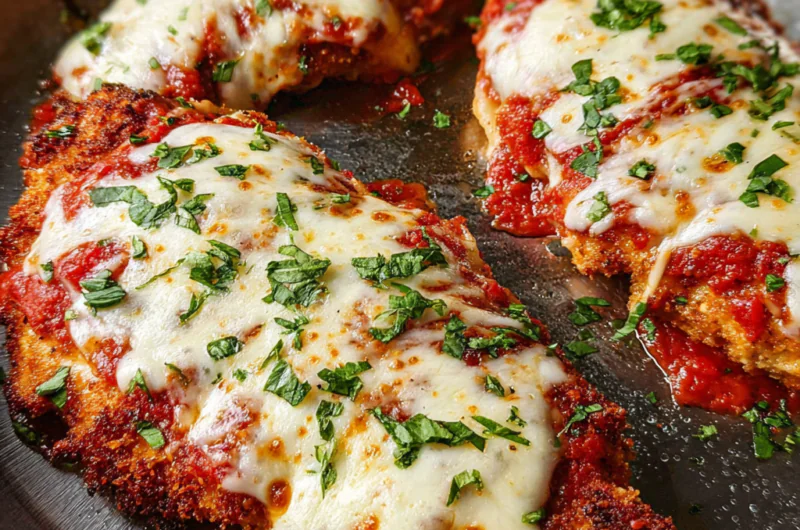
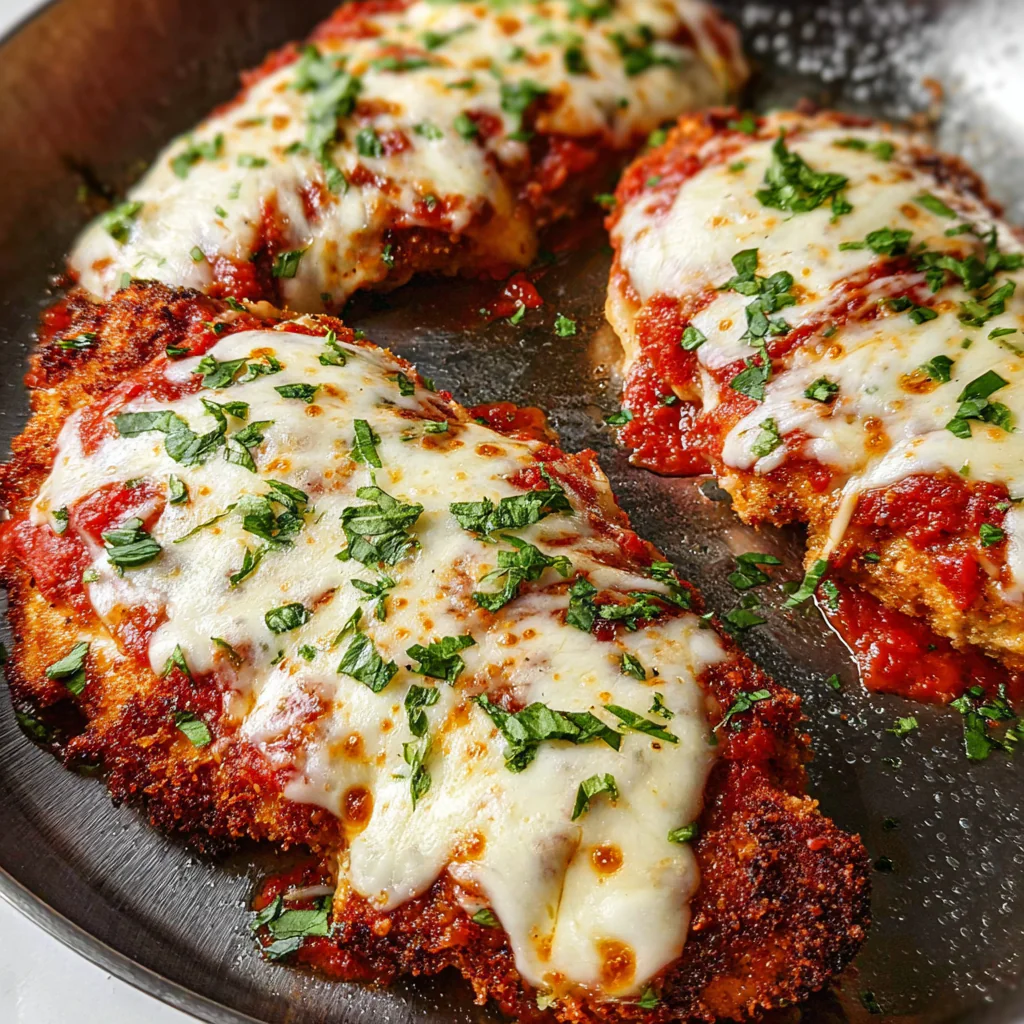
Golden, crispy-cutleted chicken smothered in marinara and melted mozzarella — a 45-minute weeknight hero that feeds a crowd.
📋 In This Article
- Introduction
- Why This Recipe Actually Works
- Essential Ingredients for Authentic Flavor
- Step-by-Step Instructions: Mastering Chicken Parmesan
- Common Mistakes to Avoid
- Variations & Serving Suggestions
- Storage, Reheating, and Make-Ahead Tips
- Pro Tips from the Test Kitchen
- Frequently Asked Questions (FAQ)
- Conclusion
Introduction
Let’s get one thing straight: most Classic Chicken Parmesan Recipe versions you find online are lying to you. They promise a shatteringly crisp crust that somehow survives beneath a blanket of sauce and cheese. It doesn’t work that way. But here’s the thing — you can get close. Really close. This dish, a cornerstone of Italian-American cuisine, became a household favorite for good reason. When done right, you get tender, juicy chicken with a crust that holds its own, all blanketed in rich tomato sauce and that irresistible cheese pull.
The trick isn’t magic. It’s technique. And a little bit of science. Garlic Parmesan Chicken Meatloaf Recipe: A Savory and Healthy Twist on a Classic Dish.
I’ve tested this recipe more times than I care to admit — burning crusts, drowning cutlets in sauce, ending up with rubbery chicken that made me question my life choices. Each failure taught me something. Now you get the benefit of those mistakes.
Why This Recipe Actually Works
Tenderizing chicken isn’t just about making it thinner. When you pound boneless skinless chicken breasts to an even thickness, you’re doing two things: creating a uniform surface area for even cooking, and physically breaking down muscle fibers. The result? Meat that stays juicy rather than seizing up into toughness.
Here’s where most home cooks go wrong with breading. That three-step dredge — flour, egg, breadcrumbs — isn’t arbitrary. The flour creates a dry surface for the egg to grip. The egg provides the sticky protein layer. The breadcrumbs adhere to that protein. Skip the flour? Your coating slides off in the pan. Skip the egg? You’re just shaking dry crumbs onto dry chicken.
The Maillard reaction — that beautiful browning that happens above 300°F — creates hundreds of new flavor compounds on your crust. This isn’t just about color. It’s about depth. When those amino acids and sugars react under heat, you get that nutty, savory complexity that makes you keep eating.
And then there’s the cheese situation. Fresh mozzarella melts into creamy strands, while Parmigiano Reggiano brings that sharp, salty punch. Together? They create what food scientists call “flavor layering” — distinct tastes hitting your palate at different moments.
Essential Ingredients for Authentic Flavor
For the Chicken
- Boneless Skinless Chicken Breasts (3): The foundation. Pound them to 1/2-inch thickness for even cooking and maximum tenderness.
- All-Purpose Flour (1/2 cup): The first layer of your breading station. Gluten-free flour blends work as a 1:1 substitute.
- Eggs (3, beaten): Your binding agent. Room temperature eggs coat more evenly.
- Panko Breadcrumbs (1 1/2 cups): Larger flakes mean more surface area, which means more crunch. Regular breadcrumbs work, but panko is superior.
- Olive Oil (1/3 cup): For pan-frying. Use a neutral oil like canola if you prefer a higher smoke point.
For the Toppings
- Parmigiano Reggiano (1/2 cup, freshly grated): The real stuff. Pre-grated contains anti-caking agents that prevent proper melting.
- Fresh Mozzarella (6 slices): Low-moisture mozzarella works too and actually browns better.
- Marinara Sauce (1 1/2 cups): San Marzano tomatoes make the best sauce. Their low acidity and natural sweetness need less doctoring.
- Dried Italian Herbs (2 tsp): Oregano, basil, thyme — this blend seasons your breading from within.
- Garlic Powder (1 tsp): Infuses the crust without the risk of burning fresh garlic.
- Salt & Pepper (1/2 tsp each): Season every layer. Under-seasoning is the enemy.
- Fresh Basil (2 tbsp, chopped): Added at the end for brightness and color.
Step-by-Step Instructions: Mastering Chicken Parmesan
Step 1: Prepare the Chicken (10 minutes)
Place boneless, skinless chicken breasts between two sheets of parchment paper or inside a ziplock bag. Using a meat mallet, pound to an even 1/2-inch thickness. Work from the center outward — this prevents tearing.
Pat the chicken completely dry with paper towels. Moisture is the enemy of breading adhesion. I learned this the hard way when my first attempt resulted in a naked cutlet swimming in detached crumbs.
Step 2: Set Up the Breading Station (5 minutes)
Arrange three shallow bowls in a line:
- All-purpose flour mixed with salt and pepper
- Beaten eggs with a splash of water
- Panko breadcrumbs combined with grated Parmesan, garlic powder, and Italian herbs
This assembly line setup isn’t just convenient — it prevents cross-contamination and keeps your hands from turning into breaded clubs.
Step 3: The Breading Process (10 minutes)
Dredge each piece in flour, shaking off excess. You want a light dusting, not a coating. Dip into the egg mixture, letting excess drip off for about 3 seconds. Press firmly into the breadcrumb mixture on both sides.
Here’s a pro move: let the breaded cutlets rest on a wire rack for 15 minutes before cooking. This allows the egg to set and creates a stronger bond between meat and coating. Skip this, and you’ll watch your beautiful crust separate in the pan.
Step 4: Cooking Methods
Pan-Frying Method (recommended for maximum crunch):
- Heat olive oil in a large skillet over medium heat until shimmering — about 350°F (175°C) if you’re using a thermometer.
- Add breaded chicken without crowding. Work in batches if needed.
- Cook 3-4 minutes per side until deeply golden.
The oil temperature matters more than you think. Too hot, and the exterior burns before the interior cooks. Too cool, and the breading absorbs oil like a sponge, leaving you with greasy, soggy chicken.
Baking Method (easier for large batches):
- Preheat oven to 425°F (220°C).
- Arrange breaded chicken on a wire rack set over a baking sheet. Drizzle with oil.
- Bake 15-20 minutes until the internal temperature reaches 165°F (74°C).
The wire rack is non-negotiable here. It allows hot air to circulate underneath, preventing the dreaded soggy bottom.
Step 5: Assembly (5 minutes)
Transfer cooked chicken to a baking dish. Top each cutlet with a modest layer of marinara sauce — about 2 tablespoons each. Less is more here. You want to flavor the chicken, not drown it.
Layer with fresh mozzarella slices and a final sprinkle of Parmigiano Reggiano.
Step 6: Final Bake (5 minutes)
Broil on high for 2-3 minutes until the cheese bubbles and develops golden spots. Watch closely. The difference between perfectly browned and burnt is about 30 seconds.
Remove from oven and let rest for 5 minutes. This allows carryover cooking to finish — the internal temperature continues rising even after leaving the heat source — and lets the juices redistribute throughout the meat.
⚠️ Common Mistakes to Avoid
Even experienced cooks mess this up. Here’s what trips people up:
Overcrowding the pan. When you add too much chicken at once, the oil temperature plummets. Instead of frying, you’re essentially steaming. Work in batches and let the oil come back up to temperature between rounds.
Soggy breading. This usually stems from one of three culprits: not patting the chicken dry, adding sauce underneath the chicken (never do this), or using low-moisture mozzarella that weeps during baking. Keep sauce on top only.
Under-seasoning. If your chicken tastes bland, you likely seasoned only the exterior. Salt your chicken directly, add seasoning to the flour, and mix herbs into the breadcrumbs. Every layer needs attention. Pasta Fagioli: The Authentic, Hearty Italian Classic.
Overcooking. Chicken breast goes from juicy to rubbery in seconds. Use an instant-read thermometer and pull at 165°F (74°C). Trust the numbers, not your instincts.
Burning the cheese. That broiler is a double-edged sword. Stay by the oven. Don’t walk away “just for a second.” I’ve ruined more dishes than I’d like to admit thinking I could multitask during the final broil.
Variations & Serving Suggestions
This recipe flexes in multiple directions. For spicy chicken parm, add red pepper flakes to both the breading and sauce. The heat cuts through the richness beautifully.
Eggplant parm follows the same technique — slice eggplant into 1/2-inch rounds, salt and drain for 30 minutes to remove bitterness, then proceed with breading. Vegetarian and just as satisfying.
Short on time? Air fryer chicken parm works surprisingly well. Cook at 375°F for 12-15 minutes, flipping halfway. You sacrifice some crunch for convenience, but the trade-off is worth it on busy nights.
For serving, keep it classic: toss spaghetti or linguine with the remaining marinara. Add a simple side salad with vinaigrette to cut through the richness. Garlic bread is never wrong.
Low-carb diners can swap the breading for crushed pork rinds or almond flour mixed with Parmesan. The texture differs, but the flavor profile holds up.
Storage, Reheating, and Make-Ahead Tips
Leftover Classic Chicken Parmesan keeps in the refrigerator for 3-4 days in an airtight container. For longer storage, freeze individual portions for up to 3 months. Wrap tightly in plastic, then foil to prevent freezer burn.
Reheating requires patience. The microwave destroys that hard-won crispiness. Instead, place the chicken on a wire rack over a baking sheet and reheat in a 375°F (190°C) oven for 15-20 minutes. The rack prevents the bottom from steaming.
Make-ahead options: bread the cutlets up to 24 hours in advance and refrigerate uncovered on a wire rack. The coating actually improves with this rest time. You can also freeze breaded, uncooked cutlets for up to a month — thaw completely before cooking.
💡 Pro Tips from the Test Kitchen
After making this dish more times than I can count, a few insights stand out:
Homemade breadcrumbs beat store-bought. Tear good-quality sandwich bread into pieces, pulse in a food processor, and toast in a 300°F oven until dry but not browned. The texture is lighter and the flavor is cleaner.
Room temperature ingredients matter. Cold egg wash creates a thicker, uneven coating. Let eggs sit out for 20 minutes before beating.
Don’t skip the rest period. After breading, those 15 minutes of rest aren’t optional. The egg proteins need time to bond with both the flour and the breadcrumbs. Rush this step, and your coating separates.
San Marzano tomatoes are worth it. If you’re making sauce from scratch, spend the extra dollar on D.O.P. certified San Marzanos. Their lower acidity and natural sweetness mean less added sugar and better flavor.
Rest the cooked chicken too. Those juices need to redistribute. Cut too early, and you lose a significant amount of moisture to the cutting board. Creamy Tuscan Chicken Pasta: The Ultimate 30-Minute Meal.
Frequently Asked Questions (FAQ)
+Why does my chicken parmesan come out soggy?
Sogginess usually comes from excess moisture or improper technique. Pat chicken completely dry before breading, don’t add sauce underneath the cutlet, and use a wire rack for both cooking and cooling to allow air circulation.
+Can I make chicken parmesan ahead of time?
Yes. Bread the cutlets up to 24 hours in advance and refrigerate uncovered. You can also fully cook the dish, refrigerate, and reheat in a 375°F oven for 15-20 minutes. The crust softens slightly but still tastes great.
+How do I know when chicken parmesan is fully cooked?
Use an instant-read thermometer inserted into the thickest part of the meat. It should read 165°F (74°C). If you don’t have a thermometer, cut into the center — the meat should be opaque throughout with no pink.
+Can I skip the flour in the breading?
Technically yes, but your coating won’t adhere as well. The flour creates a dry surface for the egg to grip. Without it, the breading is more likely to slide off during cooking.
+What pasta goes best with chicken parmesan?
Long, thin pasta like spaghetti or linguine works best for twirling through sauce. Short shapes like penne or rigatoni also work well and catch sauce in their tubes.
+How long does chicken parmesan last in the fridge?
Properly stored in an airtight container, cooked chicken parmesan keeps for 3-4 days in the refrigerator. Reheat in the oven rather than the microwave to preserve the crust’s texture.
+Can I use chicken thighs instead of breasts?
Absolutely. Boneless, skinless chicken thighs work well and stay juicier thanks to their higher fat content. Pound them to even thickness just like breasts, though they may need an extra minute of cooking time.
+Is chicken parmesan actually Italian?
Not exactly. The dish evolved from Italian immigrants in America, adapting the traditional melanzane alla Parmigiana (eggplant parmesan) to include meat. It’s a true Italian-American creation, beloved in both countries now.
Conclusion
A great Classic Chicken Parmesan Recipe comes down to respecting the process. The tenderizing, the breading sequence, the oil temperature, the resting periods — none of it is busywork. Each step builds on the last, creating layers of texture and flavor that make this dish so enduringly popular.
This isn’t fast food. It’s not even particularly quick. But it’s the kind of meal that brings people to the table and keeps them there. Golden, crispy chicken. Rich, tangy sauce. That cheese pull. It’s comfort on a plate, and now you have the tools to make it right.
Cook it once, and you’ll understand why this recipe has stood the test of time. Cook it twice, and it’ll become part of your regular rotation. Just remember — sauce on top, not underneath. Trust me on that one.
The Best Chicken Parmesan (Parmigiana)
Ingredients
Method
- Preheat oven to 425F
- Tenderize chicken: place chicken cutlets/breasts in a large ziplock bag or between two sheets of parchment paper. Firmly pound with a rolling pin or the smooth side of a meat hammer (chicken thickness should be 1/2 inch). Remove cutlets from the bag and pat dry with paper towels.
- Breadcrumbs: In a shallow dish, mix all of breadcrumb ingredients together.
- Assembly line: Set up a line of shallow bowls/dishes with flour, whisked eggs, and breadcrumbs.
- Bread the chicken: First, coat the chicken in flour on both sides, then shake off the excess flour that isn't sticking. Transfer to whisked eggs, then dip into the breadcrumbs. Use your hands to gently pack the breadcrumbs onto each side of the chicken. Repeat until all the cutlets have been breaded.
- Brown the chicken: Heat 3 tablespoons of oil at a time in a cast iron skillet or pan on LOW to MEDIUM heat. Brown chicken for 2-3 minutes on both sides until the breading is golden.
- Layer and bake: arrange browned chicken in a large baking dish or pan. Layer first with mozzarella slices then tomato sauce over top. Bake uncovered in the oven for 14 minutes - remove from oven then sprinkle with shredded Parmigiano cheese. Then broil on HIGH for 1 minute until the cheese is melted and browned. Sprinkle with fresh basil and serve!
- Instructions for Baked Chicken Parmesan
Nutrition
Notes
- For perfectly cooked chicken, aim for an internal temperature of 165°F; the breading should be golden brown and crisp to the touch.
- To avoid dryness, be careful not to over-brown the chicken; 2-3 minutes per side is ideal, and remember it will continue cooking in the oven.
- If you want to save time, use store-bought marinara sauce, but elevate it with added herbs or a splash of red wine for extra flavor.
- For a gluten-free option, substitute regular breadcrumbs with crushed gluten-free crackers or use a gluten-free flour blend for the coating.
- Leftovers can be stored in the fridge for up to 3 days; reheat in a 350°F oven for 15-20 minutes to keep the chicken crispy.