Introduction
In the hustle and bustle of modern living, small spaces often present unique challenges. Yet with a little creativity and practical planning, they can also become showcases of style and functionality. One ingenious solution for maximizing storage and display in tight corners is the installation of DIY corner shelves.
Corner shelves not only utilize otherwise wasted space, but they also offer a chance to express personal style through design. Whether you're looking to showcase books, plants, or decorative items, crafting these shelves can elevate your home decor while keeping it organized.
This article dives into the essential materials you'll need, the simple preparation involved, and answers to common questions, ensuring that your project is a success from start to finish.
Ingredients
- 2 wooden shelves (1 inch thick, size based on your space)
- 4 corner brackets (sturdy enough to hold the shelves)
- 8 screws (appropriate length for brackets)
- Wood glue (optional, for added stability)
- Sandpaper (medium and fine grit)
- Wood varnish or paint (for finishing)
- Tools: drill, level, measuring tape, saw (if cutting shelves to size)
Directions & Preparation
- Choose the ideal location for your corner shelves, considering both aesthetics and practical usage.
- Measure the space where you plan to install the shelves. Use a measuring tape to get the dimensions for your wooden shelves.
- Cut the wooden shelves to size if necessary. Sand the edges and surfaces with medium grit sandpaper first and finish with fine grit for a smooth finish.
- Apply wood glue along the edge of the brackets for additional security, if desired, then position the brackets on the wall in accordance with the shelf placement.
- Use a level to ensure that the brackets are straight before securing them with screws into the wall, ensuring that they can support the weight of the shelves and items you intend to place.
- Once the brackets are securely in place, gently place the shelves onto them. If needed, add additional screws through the shelf into the bracket for extra stability.
- Finish your shelves as desired with varnish or paint, allowing the finish to dry completely before placing any items on the shelves.
- Decorate your shelves with books, plants, or art, making sure to arrange items in a visually appealing manner.

FAQs
What type of wood is best for shelves?
Pine and plywood are good options due to their balance of strength and weight.
How can I ensure my shelves are level?
Always use a level tool while installing brackets and place shelves.
What if my shelves are sagging after installation?
Check if the brackets are securely attached and consider adding more support or using thicker wood.
Can I use these shelves in a bathroom?
Yes, but ensure they are treated to withstand humidity.
Is it possible to install these shelves in a rented space?
Consider using adhesive brackets that won’t damage walls.
What should I do if I don’t have a drill?
You can use screw anchors and attach brackets using a screwdriver if you have sturdy wall material.
How can I make the shelves more decorative?
Consider adding a decorative edge or using colorful paint or vinyl for a pop of color.
Can I customize the height of the shelves?
Absolutely! Adjust the height based on what you plan to display and your personal preference.
Conclusion
Building DIY corner shelves is not just functional; it’s a simple way to enhance your living space. With minimal materials and tools, you can create an attractive storage solution that fits your style.
As you plan your installation, remember to embrace your creativity and personalize your designs to reflect your aesthetic. Every corner of your home has the potential to shine with the right touches.
Recipe Card
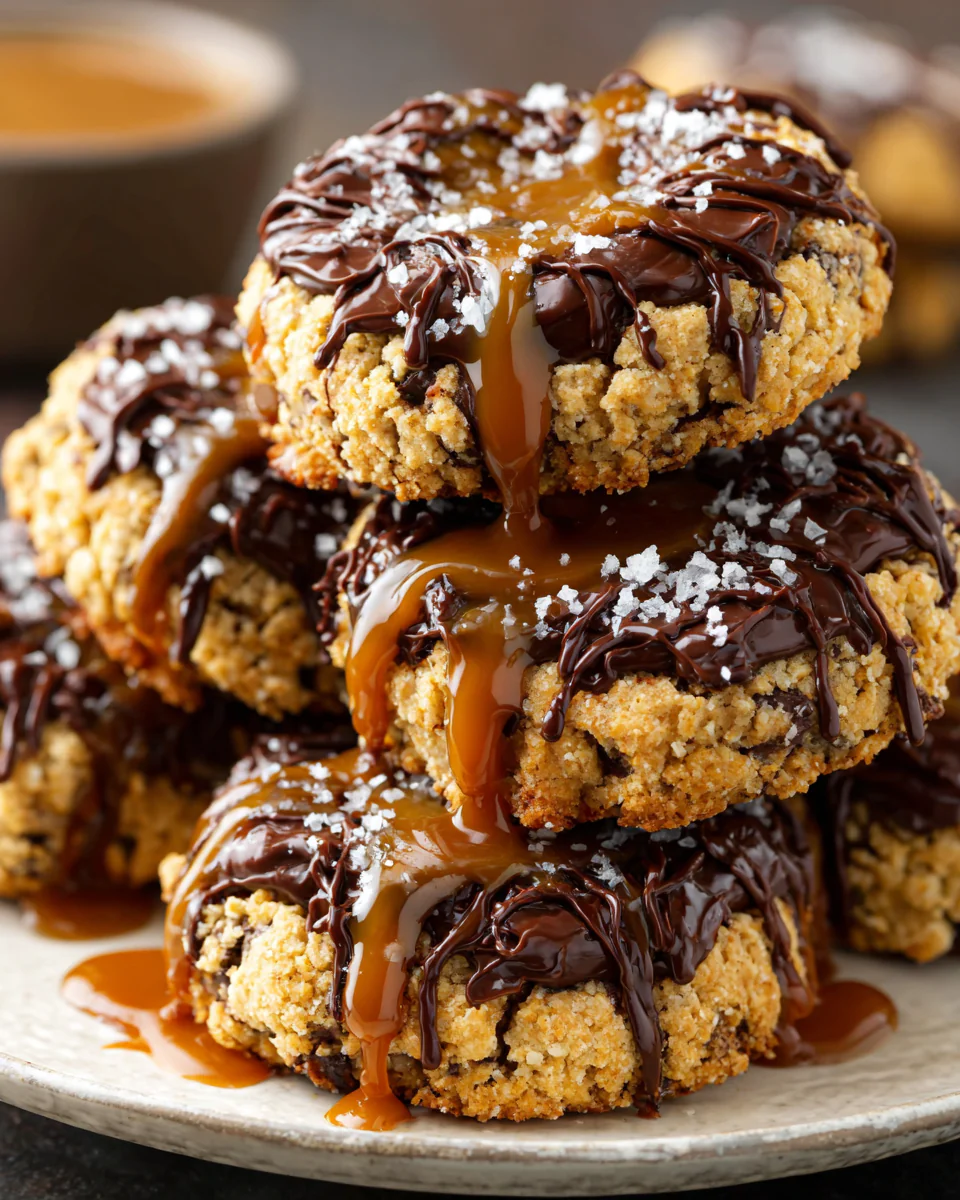
Irresistible Peanut Butter Chocolate Caramel Cookies
Ingredients
Method
- Preheat your oven to 350°F (175°C).
- In a large bowl, mix together the peanut butter, brown sugar, and granulated sugar until smooth.
- Add the egg and vanilla extract, mixing until fully combined.
- Stir in the baking soda until fully incorporated.
- Fold in the chocolate chips and caramel bits gently.
- Scoop tablespoon-sized amounts of dough onto a baking sheet lined with parchment paper.
- Bake in the preheated oven for 10–12 minutes, or until the edges are golden brown.
- Remove from the oven and let the cookies cool on the baking sheet for 5 minutes before transferring them to a wire rack.
Tried this recipe?
Let us know how it was!Notes
Additional serving suggestions: pair with a crisp salad, garlic bread, or roasted seasonal vegetables for balance.
For make-ahead, prep components separately and assemble just before heating to preserve texture.
Taste and adjust with acid (lemon/vinegar) and salt right at the end to wake up flavors.