Introduction
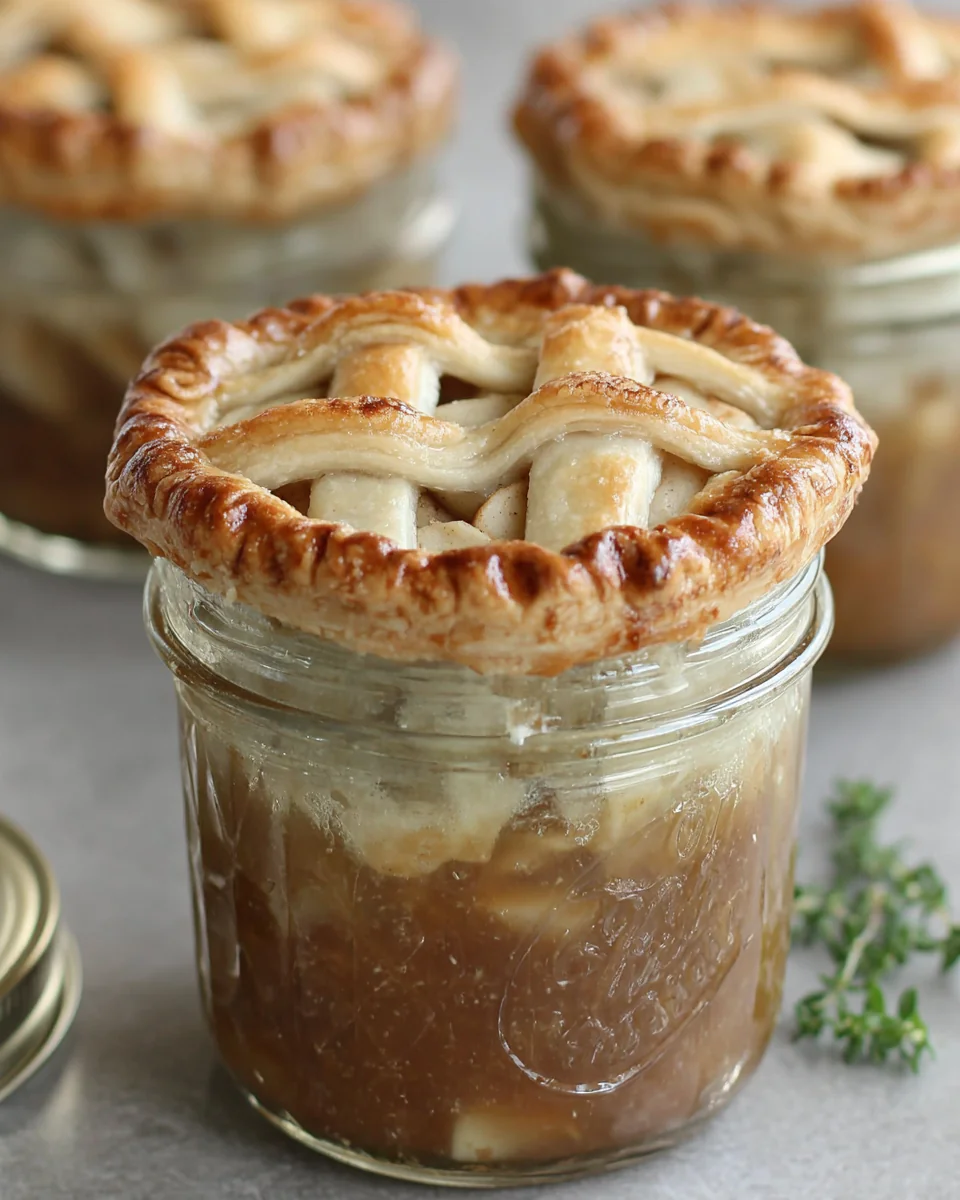
Mason jar desserts have gained popularity for their rustic charm and ease of preparation. They offer a delightful twist on classic recipes, and what better way to embrace this trend than with a Mason jar apple pie? This dessert captures the essence of autumn with sweet, spiced apples encased in a buttery crust, all presented in an adorable jar.
Whether for a picnic, a dinner party, or just a cozy night in, these individual servings of apple pie bring warmth and nostalgia. Each bite offers the perfect balance of sweetness and tartness, complemented by the crunch of the crust. Plus, making these in jars adds a touch of fun to your baking routine.
Ingredients
- 6 cups peeled, sliced apples (Granny Smith or Honeycrisp)
Choosing the right apple is crucial for flavor and texture. Granny Smith apples provide a tartness that balances the sweetness, while Honeycrisp offers a juicier option. Mixing these helps create a complex flavor. - 3/4 cup granulated sugar
Sugar sweetens the filling, aiding in the caramelization of the apples during baking. It also helps create that gooey, thick consistency that makes each bite of pie satisfying. - 1 tablespoon lemon juice
The acidity of lemon juice brightens the flavors and prevents the apples from browning. It also helps to enhance the natural taste of the apples. - 1 teaspoon ground cinnamon
Cinnamon is a quintessential spice in apple desserts, adding warmth and depth to the flavors. Its aroma fills your kitchen, inviting everyone to indulge. - 1/4 teaspoon ground nutmeg
Nutmeg adds an earthy depth to the pie, complementing the sweetness of the apples. A little goes a long way, enhancing the overall taste without overpowering it. - 2 tablespoons cornstarch
Cornstarch thickens the apple filling, ensuring that the juices don't make the crust soggy. This ingredient is essential for achieving the perfect pie consistency. - 1/4 teaspoon salt
Salt balances the sweetness and enhances the flavors. It brings out the natural sweetness of the apples, creating a more rounded taste. - 1 package pie crusts (store-bought or homemade)
The crust serves as the foundation of the pie, providing a flaky texture that contrasts beautifully with the soft, juicy apples. Using pre-made crusts saves time without sacrificing flavor. - Egg wash (1 egg beaten with 1 tablespoon water)
An egg wash on the crust gives a beautiful golden-brown color and adds shine. This finishing touch elevates the visual appeal of your Mason jar pies.
Directions & Preparation
Step 1: Preheat your oven to 425°F (220°C).
Preheating the oven is crucial for even baking. A hot oven helps the crust begin baking immediately, ensuring it becomes flaky and perfectly crisp while the apple filling cooks.
Step 2: Prepare the apple filling by mixing together the sliced apples, sugar, lemon juice, cinnamon, nutmeg, cornstarch, and salt in a large bowl.
Combining the ingredients in a large bowl allows the flavors to meld together. The sugar draws out the apple juices, creating a syrupy filling. The cornstarch thickens this mixture, ensuring it won’t be runny inside the jars.
Step 3: Roll out your pie crust and cut it into circles that fit the tops and bottoms of your jars.
Rolling out the crust ensures that each piece is even for cooking. Properly sized dough circles will make assembly easier and help form a secure seal, containing the delicious filling within.
Step 4: Layer your apple filling into the jars, filling them about three-quarters full.
Filling the jars to the right level ensures there’s enough space for the apples to expand while baking. Over-filling can lead to bubbling over, making a mess and potentially ruining the presentation.
Step 5: Place a dough circle on top of each jar and crimp the edges to seal.
Sealing the jars properly keeps the moisture in while baking. Crimping the edges not only secures the lid but also promotes a nicely baked, flaky crust as air circulates.
Step 6: Brush the tops with egg wash for a golden finish.
Applying an egg wash not only enhances the color but also gives the finished pies a shiny, appealing look. This simple step can make a significant difference in presentation.
Step 7: Cut a small slit in the center of each crust to allow steam to escape.
The slits prevent the crust from becoming soggy by allowing steam to escape. They also create a charming decorative feature that adds to the homemade aesthetic.
Step 8: Place the jars on a baking sheet and bake for 20-25 minutes until golden brown and bubbly.
Baking on a sheet makes it easier to manage any spilling from the jars. The combination of the high oven temperature and the baking time is essential for achieving the perfect golden crust.
Step 9: Remove the jars from the oven and let them cool before serving.
Cooling is critical for allowing the filling to set. Serving them too hot may result in a gooey mess, while allowing them to cool ensures the filling retains its shape when served.

Personalizing Your Apple Pie Filling
Feel free to customize your apple pie filling to suit your taste. Add a splash of vanilla extract for extra aroma, or mix in dried cranberries or raisins for a burst of flavor. Experimenting with different spices like allspice or cardamom offers new dimensions to this classic dish.
Choosing the Perfect Jars for Your Pie
Using mason jars not only adds a unique presentation but also helps with portion control. Opt for wide-mouth jars for easier filling and eating. Their glass design allows you to showcase the vibrant colors of the layered apple filling, making dessert even more inviting.
Creative Serving Suggestions for Mason Jar Pies
These Mason jar apple pies may be delightful on their own, but they can be enhanced with a scoop of vanilla ice cream or a dollop of whipped cream. Consider presenting them at a gathering with a selection of toppings, such as caramel sauce or chopped nuts, inviting guests to customize their dessert.
FAQs
Can I make mason jar apple pie filling the night before?
Yes, you can prepare the apple filling in advance. Just keep it covered in the refrigerator overnight to maintain freshness.
What if my apple pie filling is too runny?
If the filling seems runny after baking, you can thicken it by adding a bit more cornstarch or flour next time, or let it cool longer to set.
Can I substitute butter for shortening in the crust?
Yes, you can use butter in place of shortening for a richer flavor, but it may affect the crust's flakiness slightly.
How do I know when the jars are done baking?
Look for a golden-brown crust and bubbling filling. The filling should appear thick and cohesive, not soupy.
Can I use other fruits in a mason jar pie?
Absolutely! You can substitute other fruits like pears or berries, but take care to adjust the sugar and spices to match the flavors.
What's the best way to clean up caramelized spills around the jars?
Let the jars cool before cleaning, using warm soapy water to loosen and wipe away any sticky residue from the baking sheet.
Conclusion
Creating a Mason jar apple pie is an enjoyable experience that highlights the beauty of home cooking. It captures the heartwarming essence of traditional apple pie in a modern form that's perfect for sharing.
With its charming presentation and delicious flavors, this dessert is sure to impress family and friends alike. So gather your ingredients, roll up your sleeves, and enjoy the process of making something truly special.
Recipe Card
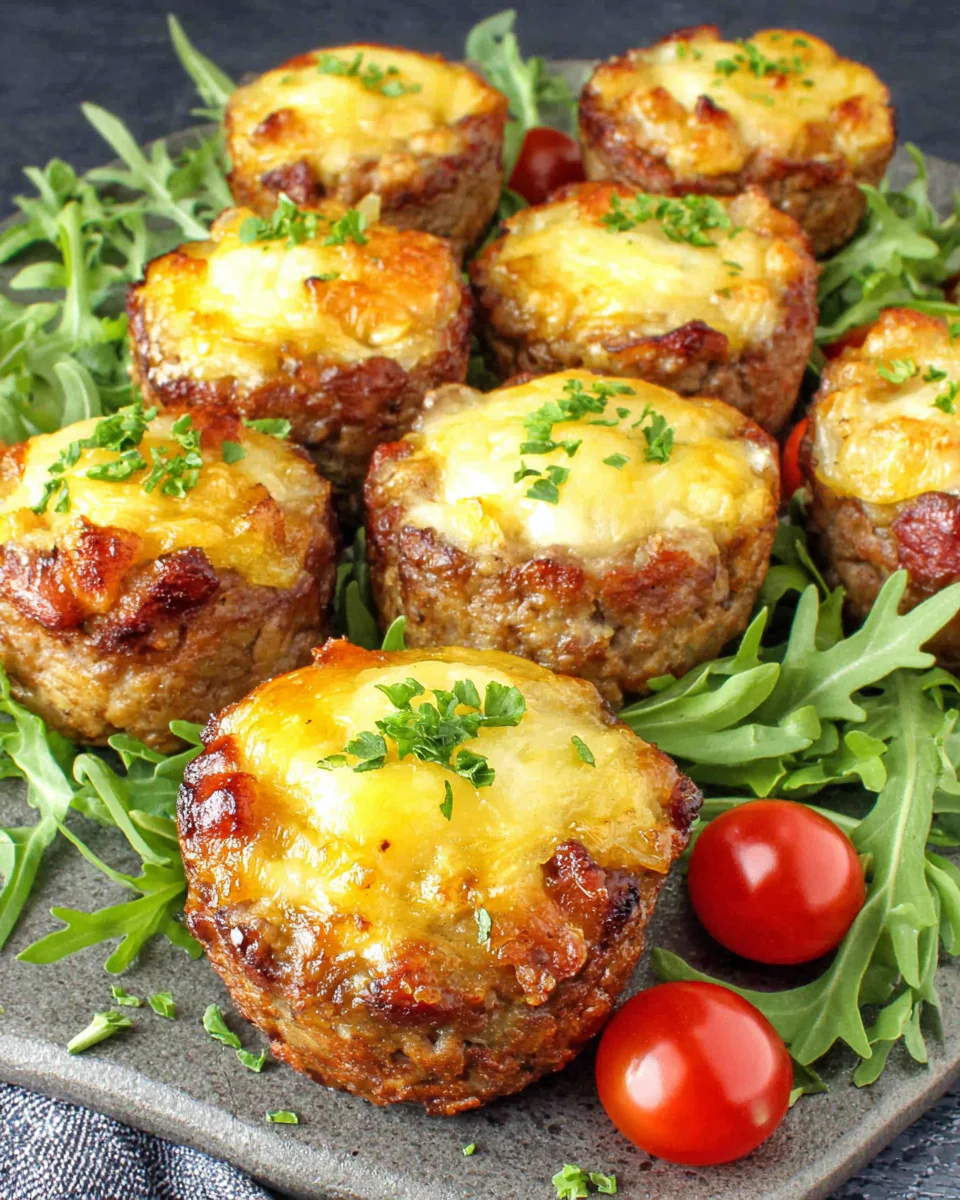
Deliciously Easy Meatloaf Cups for Busy Cooks
Ingredients
Method
- Preheat your oven to 375°F (190°C).
- In a large bowl, mix together the ground beef, breadcrumbs, ketchup, egg, onion, garlic powder, salt, and black pepper until fully combined.
- Grease a muffin tin with non-stick spray or oil.
- Scoop the meat mixture into the muffin tin cups, filling each one about 3/4 of the way full.
- If using cheese, sprinkle a small amount on top of each meatloaf cup before baking.
- Bake the meatloaf cups in the preheated oven for 20-25 minutes, or until they reach an internal temperature of 160°F (70°C).
- Let the meatloaf cups cool for a few minutes before carefully removing them from the muffin tin.
- Garnish with chopped parsley if desired and serve warm.
Tried this recipe?
Let us know how it was!Notes
Additional serving suggestions: pair with a crisp salad, garlic bread, or roasted seasonal vegetables for balance.
For make-ahead, prep components separately and assemble just before heating to preserve texture.
Taste and adjust with acid (lemon/vinegar) and salt right at the end to wake up flavors.