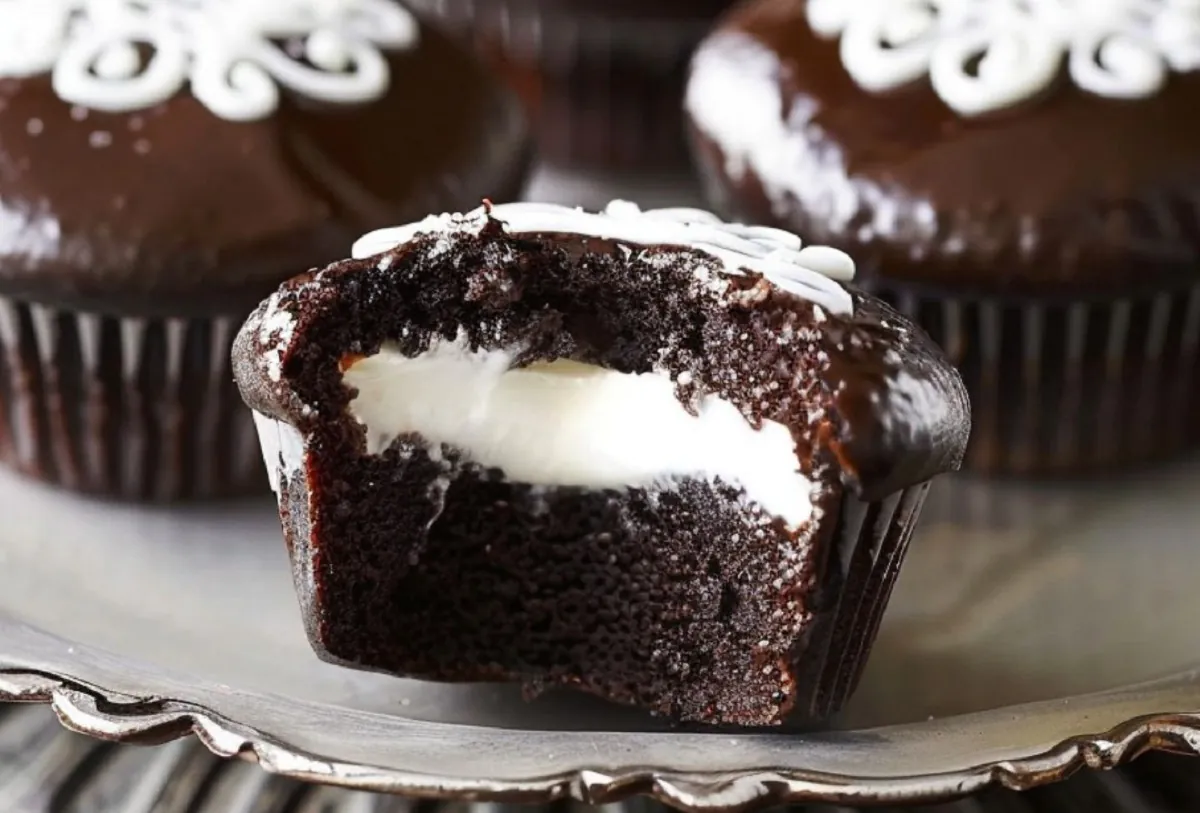
Homemade Hostess Cupcakes are the ultimate indulgence for anyone craving a nostalgic dessert with a modern twist. These soft, chocolatey cupcakes are filled with a gooey marshmallow filling, topped with a silky chocolate glaze, and decorated with a signature swirl of icing that will make your taste buds dance. Whether you’re a fan of the original Hostess snack or new to the idea, this homemade version will impress everyone at your next gathering or special occasion. Read on for a detailed guide on how to make these irresistible cupcakes, along with answers to some frequently asked questions.
Ingredients for Homemade Hostess Cupcakes
For the Cupcakes:
- 1 cup all-purpose flour
- 1/2 cup cocoa powder
- 1 tsp baking powder
- 1/2 tsp baking soda
- 1/4 tsp salt
- 1/2 cup sugar
- 1/2 cup brown sugar
- 1/2 cup vegetable oil
- 2 large eggs
- 1 tsp vanilla extract
- 1/2 cup milk
For the Filling:
- 1/2 cup marshmallow fluff
- 2 tbsp unsalted butter, softened
- 1/2 cup powdered sugar
- 1/2 tsp vanilla extract
For the Chocolate Glaze:
- 1 cup semi-sweet chocolate chips
- 1/4 cup heavy cream
For the Decorative Swirl (optional):
- 1/4 cup powdered sugar
- 1 tbsp milk
Directions and Preparation Method
Step 1: Preheat the Oven and Prepare the Cupcake Tin
Start by preheating your oven to 350°F (175°C). Line a standard 12-cup cupcake tin with paper liners to ensure the cupcakes don’t stick and are easy to remove once baked.
Step 2: Mix the Dry Ingredients
In a large mixing bowl, whisk together the dry ingredients for the cupcakes: all-purpose flour, cocoa powder, baking powder, baking soda, and salt. This step ensures that the leavening agents (baking powder and baking soda) are evenly distributed, allowing the cupcakes to rise evenly while baking.
Step 3: Prepare the Wet Ingredients
In a separate bowl, combine the sugar, brown sugar, vegetable oil, eggs, vanilla extract, and milk. Mix everything together until smooth and well combined. The wet ingredients should form a glossy mixture, and the sugars should dissolve completely.
Step 4: Combine Wet and Dry Ingredients
Gradually add the dry ingredients to the wet ingredients, mixing gently as you go. Stir until the batter is smooth and no dry flour remains. Be careful not to overmix, as this can make the cupcakes dense.
Step 5: Fill the Cupcake Liners
Using a spoon or an ice cream scoop, carefully fill each cupcake liner about two-thirds full with batter. This helps ensure that the cupcakes have enough space to rise without overflowing. Bake the cupcakes in the preheated oven for 18-20 minutes or until a toothpick inserted into the center of the cupcakes comes out clean.
Step 6: Cool the Cupcakes
Once the cupcakes are done baking, remove them from the oven and place the tin on a wire rack to cool for a few minutes. After that, remove the cupcakes from the tin and let them cool completely on the wire rack. It’s important that the cupcakes cool completely before adding the filling and glaze to prevent them from melting.
Step 7: Make the Marshmallow Filling
While the cupcakes are cooling, prepare the marshmallow filling. In a medium-sized bowl, beat together the marshmallow fluff, softened butter, powdered sugar, and vanilla extract. Use an electric mixer on medium speed to create a smooth and fluffy filling. Once the mixture is smooth, transfer it to a piping bag fitted with a small round tip for easy filling.
Step 8: Fill the Cupcakes
Once the cupcakes have cooled completely, use a small paring knife to carefully cut a small cone shape from the center of each cupcake. This creates space for the marshmallow filling. Fill the piping bag with the marshmallow mixture and pipe the filling into the hole you created in each cupcake. Afterward, place the cut-out piece of cupcake back on top to seal in the filling.
Step 9: Prepare the Chocolate Glaze
For the chocolate glaze, melt the semi-sweet chocolate chips and heavy cream together in a microwave-safe bowl. Heat in 20-second intervals, stirring in between, until the mixture is smooth and glossy. Be careful not to overheat the chocolate, as it can seize up.
Step 10: Glaze the Cupcakes
Once the glaze is ready, spoon a generous amount over the top of each cupcake, allowing it to drip slightly over the edges. This creates the glossy, decadent look that Hostess Cupcakes are known for. Let the cupcakes sit for 10 minutes to allow the glaze to set before moving on to the next step.
Step 11: Make the Decorative Swirl (Optional)
If you want to add the classic swirl to the top of your cupcakes, mix the powdered sugar and milk in a small bowl until it forms a thick, smooth icing. Transfer this icing to a piping bag fitted with a small round tip, and pipe a decorative swirl on top of each cupcake. This step is entirely optional but adds that extra touch of nostalgia.
Step 12: Let the Cupcakes Set
Allow the cupcakes to set for about 10-15 minutes to ensure the glaze and decorative swirl firm up. Once they’ve fully set, they’re ready to be served!
FAQs
Can I make these cupcakes ahead of time?
Yes! These cupcakes can be baked and stored in an airtight container for up to 3 days at room temperature. You can also prepare the cupcakes and the filling a day in advance. However, it’s best to add the glaze and decorative swirl just before serving to maintain their glossy appearance.
Can I substitute the marshmallow fluff?
If you can’t find marshmallow fluff, you can substitute it with homemade marshmallow cream. Just make sure the consistency is similar to the store-bought fluff to get the right texture for the filling.
Can I use a different type of chocolate for the glaze?
You can absolutely experiment with different types of chocolate for the glaze. Dark chocolate or milk chocolate are both good options, but the sweetness of the glaze will vary depending on the type of chocolate used.
How do I store leftover cupcakes?
To keep the cupcakes fresh, store them in an airtight container at room temperature for up to 3 days. If you need to store them for a longer period, you can freeze the cupcakes (without the glaze) for up to 2 months. Just make sure to wrap them tightly in plastic wrap and foil before freezing.
Conclusion
These Homemade Hostess Cupcakes are the perfect combination of moist chocolate cupcakes, gooey marshmallow filling, and silky chocolate glaze. Whether you’re making them for a birthday, a special occasion, or just because you’re craving a delicious treat, these cupcakes will definitely satisfy your sweet tooth. With simple ingredients and easy-to-follow steps, this recipe is a great way to recreate a classic dessert at home. Don’t forget to enjoy them with a cup of milk or coffee for the ultimate indulgence!
This recipe is a fun, nostalgic way to treat yourself or share with friends and family. Happy baking!


