Sticky, savory, and ready in 45 minutes—this is the weeknight hero you’ll make on repeat until September.
📋 In This Article
- Introduction
- Why This Recipe is a Game-Changer for Summer
- The Secret to Our Irresistible Honey Garlic Sauce (5-Ingredient Magic!)
- Gather Your Ingredients: What You’ll Need for One-Pan Perfection
- Step-by-Step: How to Make the Easiest One-Pan Honey Garlic Chicken
- Common Mistakes to Avoid for Perfect Honey Garlic Chicken
- Customize Your Creation: Delicious Variations and Add-ins
- Serving Suggestions: What to Pair with Your Honey Garlic Chicken
- Storage & Reheating: Enjoying Leftovers Like Fresh
- Expert Pro Tips for Next-Level Flavor
- Frequently Asked Questions (FAQ)
Introduction
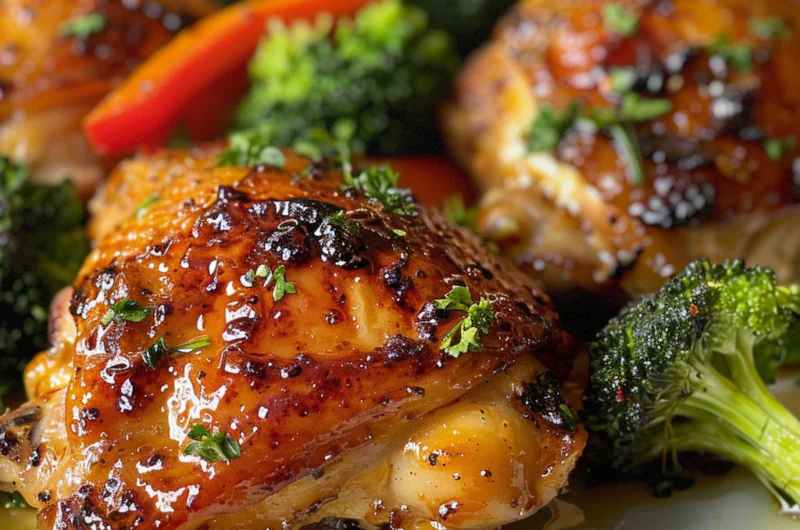
It is too hot to be hovering over a stove for hours. That’s just a fact. But that doesn’t mean you have to resort to takeout or sad salads. Enter the Easiest One-Pan Honey Garlic Chicken You’ll Make All Summer Long. This recipe is the answer to that specific summer fatigue: it demands minimal effort, uses a single pan to keep cleanup non-existent, and delivers the kind of sticky, savory glaze that makes everyone at the table quiet down and eat.
The brilliance here lies in the simplicity. We are talking about a flavor profile built on the holy trinity of weeknight cooking: sweet honey, pungent garlic, and salty soy sauce. It’s a combination that never fails. But to make this truly great, we have to treat the chicken right. That means getting a good sear. It means not overcrowding the pan. And it means letting the meat rest so those juices stay exactly where they belong—inside the meat, not all over your cutting board.
Why This Recipe is a Game-Changer for Summer
Let’s be real about summer cooking. The last thing you want is a mountain of dishes or an oven that turns your kitchen into a sauna. This recipe solves both problems. By keeping everything in one vessel—ideally a large, oven-safe skillet or a heavy-duty sheet pan—you minimize the thermal load on your house and the scrubbing time at the sink.
But the real reason this dish shines is the texture. Because we aren’t drowning the chicken in liquid from the start, we allow the Maillard reaction to work its magic. This is the chemical process where amino acids and sugars react under heat to create hundreds of new flavor compounds and that gorgeous golden-brown crust. If you just threw everything in a pot and boiled it, you’d have chicken in sauce. By searing first, you have steakhouse-level chicken in a velvety, umami-rich glaze.
The Secret to Our Irresistible Honey Garlic Sauce (5-Ingredient Magic!)
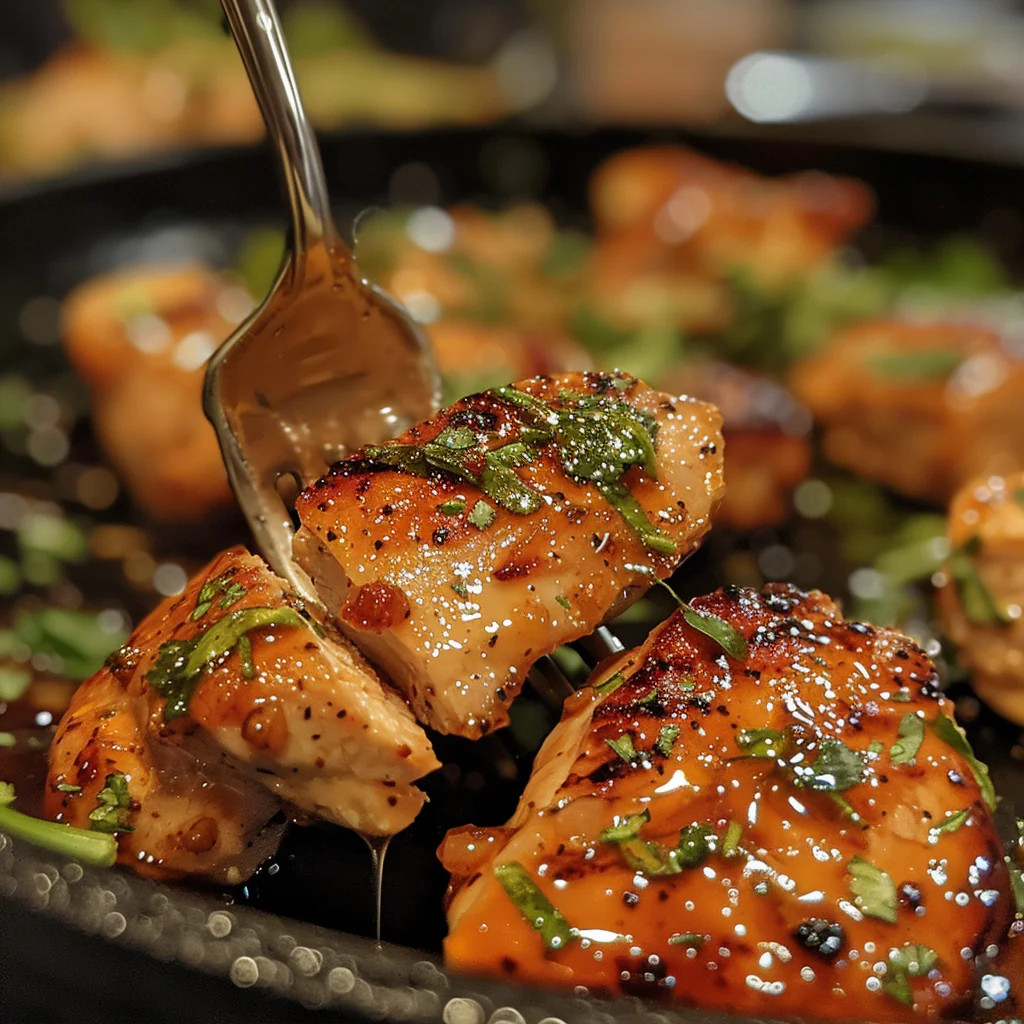
The sauce is the heartbeat of this dish. It looks simple—honey, garlic, soy sauce, chicken broth, and a little oil—but there is a specific alchemy at play. Honey is hygroscopic, meaning it attracts and holds onto moisture, which keeps the meat incredibly juicy. However, honey also burns faster than sugar because of its fructose content.
To balance this, we use soy sauce not just for salt, but for depth. It provides the savory backbone that prevents the glaze from tasting like dessert. When these two hit the hot pan along with the garlic, the sauce reduces into a glossy, sticky emulsion that clings to every bite. It’s a classic sweet-and-savory balance, brightened by the sharp, aromatic bite of fresh garlic.
Gather Your Ingredients: What You’ll Need for One-Pan Perfection
To create the Easiest One-Pan Honey Garlic Chicken, you’ll need a handful of simple yet flavorful ingredients. Gather the following:
- Chicken: 12-14 small drumsticks, or 6-8 large bone-in chicken thighs, which provide a juicy base for the dish.
- Honey: 1 cup, ideally organic, for a natural sweetness that balances the savory elements.
- Garlic: 5 cloves, very finely minced; fresh garlic is recommended for a vibrant flavor.
- Soy Sauce: 1/4 cup, opt for low-sodium to control the saltiness of your dish.
- Chicken Broth: 1/2 cup, to add depth and moisture while enhancing the overall flavor.
- Olive Oil: 2 tablespoons, used for searing the chicken and infusing it with richness.
- Salt and Pepper: to taste, essential for bringing out the flavors of each ingredient.
Optional Additions for Extra Flavor:
- Sesame Oil: A drizzle can provide a nutty aroma and taste.
- Chili Flakes: For those who enjoy a bit of heat, sprinkle in some chili flakes to elevate the dish.
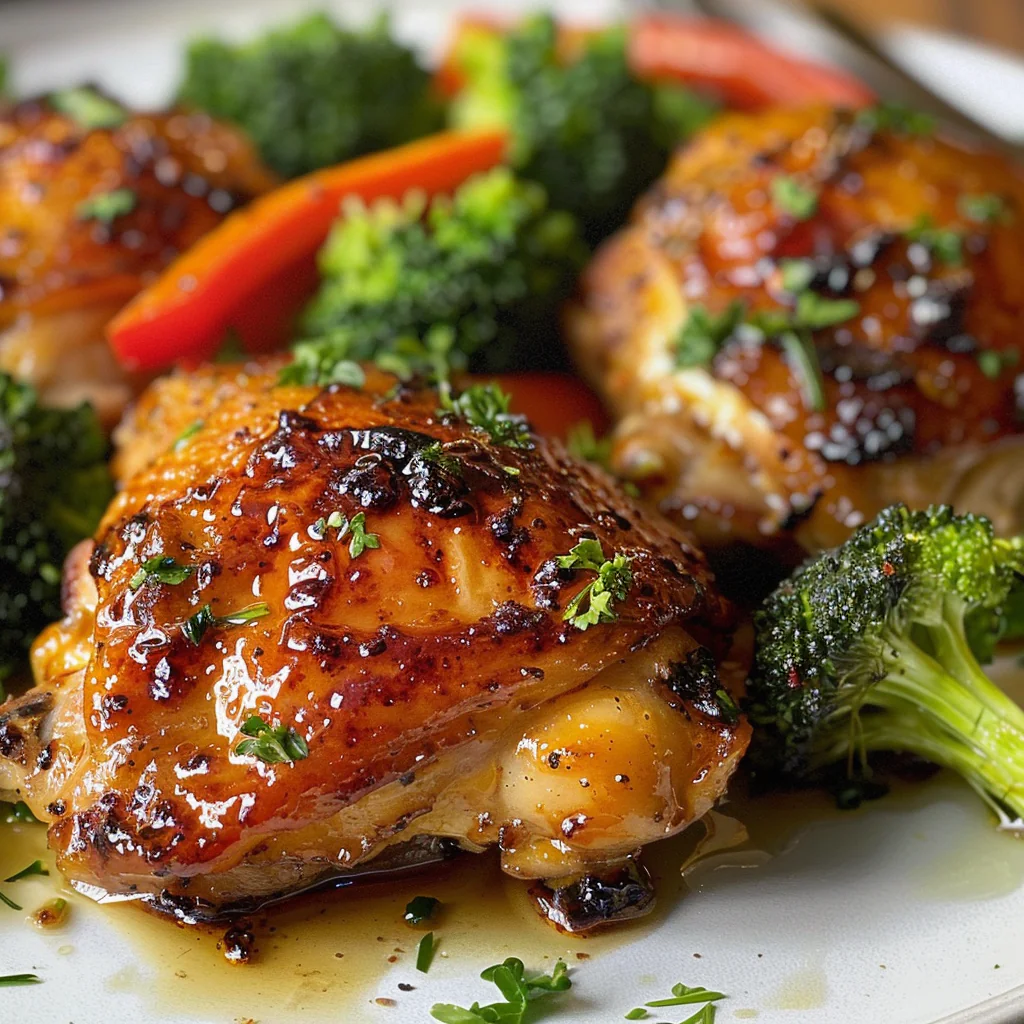
Recommended Vegetables:
- Broccoli: Adds color and nutrition, perfect for a balanced meal.
- Bell Peppers: Sweet and crunchy, they complement the chicken beautifully.
- Green Beans: Their crispness adds texture to the dish.
Step-by-Step: How to Make the Easiest One-Pan Honey Garlic Chicken
This method assumes you are using an oven-safe skillet (cast iron or stainless steel) for the best results. If you only have a baking sheet, sear the chicken in a pan first, then transfer to the sheet to finish.
Preparation (10 minutes)
- Gather Ingredients: Ensure your chicken is patted very dry with paper towels. Moisture is the enemy of a good crust.
- Preheat Oven: Preheat your oven to 400°F (200°C). This temperature is hot enough to roast the chicken quickly without burning the honey glaze.
- Season: Generously season the chicken pieces with salt and pepper on all sides.
Cooking (20-30 minutes)
- Sear the Chicken: Heat the olive oil in a large oven-safe skillet over medium-high heat. Place the chicken skin-side down. Do not touch it for 4-5 minutes. You want a deep golden crust. Flip and sear the other side for 3-4 minutes. Remove chicken from the pan and set aside.
- Build the Sauce: Reduce heat to medium. Add the garlic to the hot fat in the pan and sauté for 30 seconds until fragrant—don’t let it burn. Pour in the honey, soy sauce, and chicken broth. Stir well, scraping up the browned bits (the fond) stuck to the bottom of the pan. That stuff is pure flavor.
- Combine and Roast: Return the chicken to the pan, turning it to coat in the sauce. If adding vegetables like broccoli or peppers, toss them in the sauce around the chicken.
- Bake: Transfer the skillet to the preheated oven. Bake for 20-25 minutes, or until the chicken reaches an internal temperature of 165°F (74°C).
- Rest: Remove from the oven. Let the chicken rest in the sauce for 5 minutes. This allows the muscle fibers to relax and reabsorb the juices, ensuring the meat stays moist when you cut into it.
⚠️ Common Mistakes to Avoid for Perfect Honey Garlic Chicken
Even a simple recipe has pitfalls. Here is how to avoid them.
Overcrowding the pan. If the chicken pieces are touching, they will steam instead of sear. Steam equals rubbery skin and bland, grey meat. Use a large enough skillet or cook in batches. It is worth the extra three minutes.
Burning the garlic. Garlic goes from “fragrant” to “bitter and acrid” in seconds. When you sauté the garlic in step 5, do it quickly and have your liquids ready to pour in immediately. The liquid cools the pan and stops the cooking process.
Skipping the rest period. I used to slice into the chicken immediately because I was hungry. The result? A pool of juices on the cutting board and dry meat on the plate. Resting is not optional; it is a physical necessity for juicy protein.
Not checking the temperature. Visual cues can be deceiving, especially with a sticky glaze that colors the skin. An instant-read thermometer is your best friend. Insert it into the thickest part of the meat without touching the bone. You are looking for exactly 165°F (74°C).
Customize Your Creation: Delicious Variations and Add-ins
This recipe is a template. Once you have the technique down, you can riff on it endlessly.
Spice it up. The sweetness of the honey can handle a lot of heat. Add a tablespoon of Sriracha or a teaspoon of red pepper flakes to the sauce for a sweet-and-spicy version that cuts through the richness.
Go Low-Carb. Substitute the honey with a sugar-free alternative like erythritol or monk fruit. The texture will be slightly different, but the savory satisfaction remains. Serve over cauliflower rice to keep the carb count low.
Change the cut. While bone-in thighs offer the best flavor and moisture protection, you can use boneless, skinless chicken breasts. Just be aware they cook much faster—reduce the oven time to 15-18 minutes and watch the internal temperature closely to avoid drying them out.
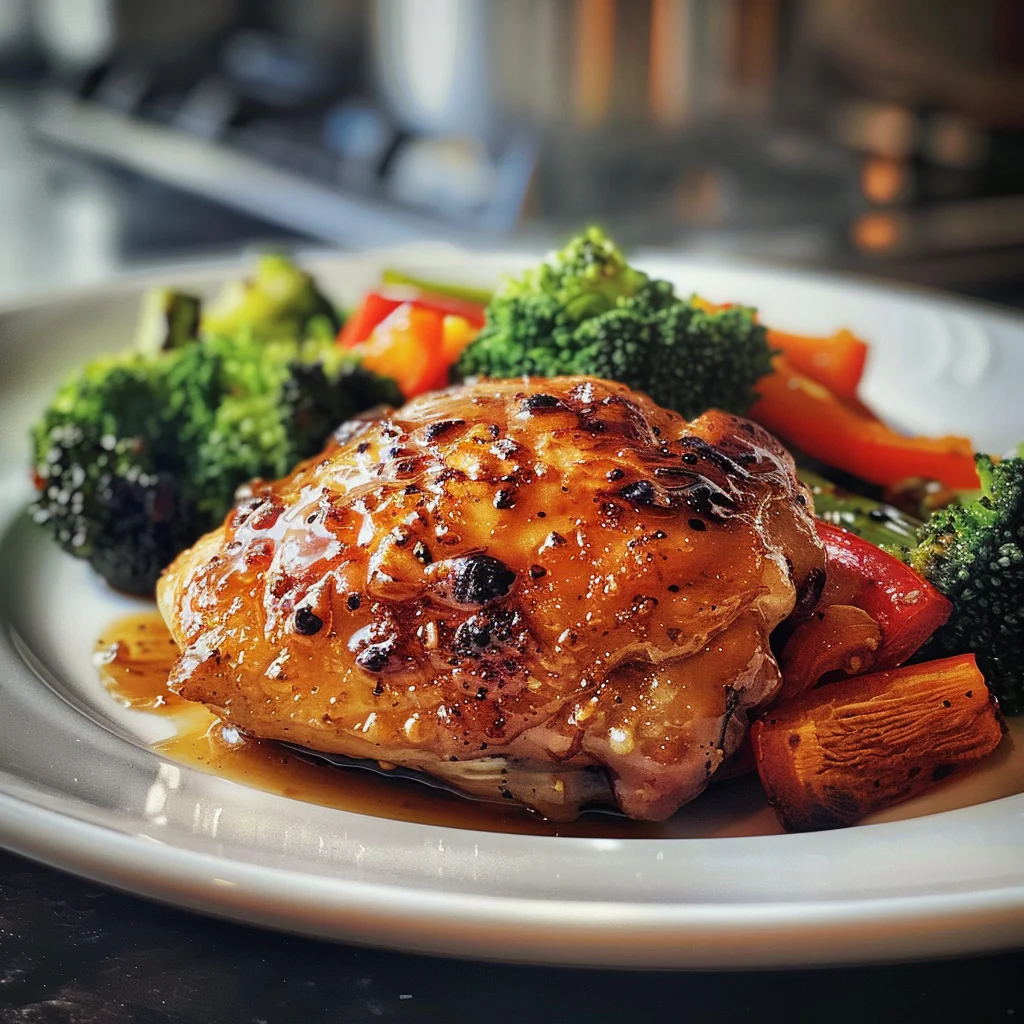
Serving Suggestions: What to Pair with Your Honey Garlic Chicken
The sauce is the star here, so you want sides that can soak it up.
The Starch. Steamed white rice is the classic choice, but don’t sleep on mashed potatoes. The buttery texture of the potatoes melting into the honey-garlic glaze is honestly a bit decadent. Noodles—like udon or even spaghetti—also work beautifully.
The Fresh Crunch. Balance the sticky richness with something fresh. A simple cucumber salad with rice vinegar and sesame seeds cuts the sweetness instantly. Grilled corn on the cob is another excellent summer option that requires zero extra pans.
Storage & Reheating: Enjoying Leftovers Like Fresh
Refrigeration. Let the chicken cool completely, then store in an airtight container for up to 3-4 days. Keep the sauce! It keeps the meat moist during storage.
Reheating. The microwave is fast, but it often makes chicken rubbery. For the best texture, reheat in a 350°F (175°C) oven for 15-20 minutes. Cover the dish with foil to trap steam and prevent the glaze from burning.
Freezing. You can freeze this dish for up to 3 months. Thaw overnight in the fridge before reheating. The texture of the skin won’t be as crispy, but the meat will still be tender and flavorful.
💡 Expert Pro Tips for Next-Level Flavor
Dry brine for success. If you have the time, salt your chicken and let it sit uncovered in the fridge for 2-4 hours before cooking. This draws moisture to the surface, which then evaporates, leaving you with skin that crisps up significantly better.
Use fresh garlic, always. Garlic powder is convenient, but it lacks the volatile oils that give fresh garlic its punch. For this recipe, fresh is non-negotiable.
Finish with acid. If the sauce tastes too sweet or “heavy,” a splash of rice vinegar or a squeeze of fresh lime juice right at the end wakes everything up. Acid balances fat and sugar, making the flavors pop.
Frequently Asked Questions (FAQ)
+Why is my honey garlic chicken dry?
Dry chicken is almost always the result of overcooking. Because honey helps retain moisture, this recipe is forgiving, but you must pull the chicken at 165°F (74°C). Carryover cooking will raise the temp a few degrees after you remove it from the heat.
+Can I use chicken breasts instead of thighs?
Yes, but adjust the cooking time. Boneless breasts cook much faster, often in 15-20 minutes. Watch the thermometer closely. If using bone-in breasts, they may take slightly longer than thighs, roughly 35-40 minutes.
+How do I know when the chicken is fully cooked?
The only accurate way to know is with a meat thermometer. Insert it into the thickest part of the meat. It should read 165°F (74°C). If the juices run clear when you pierce the meat, that is a good secondary sign, but temperature is safer.
+Can I make this recipe gluten-free?
Absolutely. Simply swap the regular soy sauce for tamari or a certified gluten-free soy sauce. The flavor profile remains virtually identical.
+What sides go best with this dish?
Starchy sides like rice, quinoa, or roasted potatoes are ideal for soaking up the extra sauce. For vegetables, roasted broccoli or a crisp green salad provide a nice textural contrast to the sticky chicken.
Easy One Pan Honey Garlic Chicken
Ingredients
Method
- Preheat your oven to 350 degrees Fahrenheit.
- Heat a large skillet over medium-high heat and add the oil.
- Add the chicken drumsticks one at a time, seasoning them with salt and pepper in the pan.
- Brown the chicken on all sides for 2-3 minutes per side and remove the chicken to a plate. Depending on the size of your skillet you may need to cook the chicken drumsticks in two batches in order to not overcrowd the pan.
- Reduce the heat to medium and add the honey, butter, garlic, ketchup and soy sauce, whisking everything together until well combined.
- Add the chicken drumsticks back into the pan, nestling them into the sauce and using a spoon to coat the chicken in the thin sauce.
- Bake the chicken at 350 degrees Fahrenheit for about 18-20 minutes, or until the sauce thickens and the chicken is cooked through to an internal temperature of 165 degrees Fahrenheit. Spoon the sauce over the chicken again after removing it from the oven, before serving.
- Sprinkle with some freshly chopped parsley, sesame seeds, or chopped green onions for garnish, and serve!
Nutrition
Notes
- For perfectly cooked chicken, use a meat thermometer to check for an internal temperature of 165°F; this ensures your drumsticks are juicy and safe to eat.
- To avoid dryness, be careful not to overbake the chicken; keep an eye on the sauce and remove it from the oven once it thickens and the chicken is cooked through.
- If you prefer a thicker sauce, let it simmer on the stovetop for an extra few minutes after baking to achieve your desired consistency.
- For a quick flavor boost, marinate the chicken in the honey garlic sauce in the refrigerator for 30 minutes before cooking; this adds depth without the need for overnight marinating.
- Leftovers can be stored in an airtight container in the fridge for up to 3 days; reheat gently in a skillet over medium heat to keep the chicken moist.