Introduction
Indulging in a sweet treat while adhering to a keto diet can be challenging, but this Keto Twix Bars recipe brings classic flavors back to your kitchen. With layers of crunchy cookie, rich sugar-free caramel, and smooth chocolate, these bars offer a delightful low-carb alternative to traditional candy bars.
Crafted with wholesome ingredients that cater to a low-carb lifestyle, these bars are perfect for satisfying your sweet tooth without the guilt. Whether you’re enjoying them as an afternoon snack or a post-dinner dessert, this recipe is sure to become a household favorite.
Ingredients
- 1 ½ cups almond flour
Almond flour is a fantastic low-carb alternative to traditional flour, making it ideal for keto recipes. Its nutty flavor and fine texture provide a great base for the cookie layer. - 1/2 cup unsalted butter
Unsalted butter adds richness and moisture to the cookie base, helping achieve a tender texture. It also enhances the overall flavor of the bars. - 1/3 cup erythritol
Erythritol is a natural sugar substitute that contains zero calories and doesn’t spike blood sugar levels. It's perfect for achieving sweetness in the cookie layer without the carbs. - 1 large egg
The egg acts as a binding agent, helping the cookie mixture hold together. It also contributes to the structure and moisture of the final product. - 1/2 teaspoon vanilla extract
Vanilla extract enhances the flavor of the cookie layer, giving it a warm, aromatic quality. It’s a key ingredient for bringing out all the other flavors. - 1 cup sugar-free caramel sauce
This caramel sauce adds complexity and a rich taste to the Twix Bars. Opting for sugar-free keeps the recipe true to a low-carb diet. - 1 cup sugar-free dark chocolate chips
Sugar-free dark chocolate provides the final chocolate layer that gives these bars their signature taste without added sugar. Look for brands that are low in net carbs. - 1 tablespoon coconut oil
Coconut oil is added to the chocolate for a smoother melting experience and helps achieve a shiny, appealing finish once the bars are cooled.
Directions & Preparation
Step 1: Preheat your oven to 350°F (175°C).
Preheating the oven ensures even cooking from the moment you place the cookie base inside. This step is crucial for achieving a perfectly baked layer that is golden brown and firm, providing the right foundation for your Twix Bars.
Step 2: In a mixing bowl, combine the almond flour, almond butter, erythritol, egg, and vanilla extract.
By mixing these ingredients together, you’re creating a cookie dough that will serve as the crust of the bars. The almond flour gives the right texture, while the erythritol sweetens without added carbs. Ensure that everything is well-integrated for a consistent texture.
Step 3: Press the mixture into a lined 8×8 inch baking pan.
Pressing the dough into an even layer ensures that the cookie layer bakes uniformly. This step is important to avoid uneven thickness, which could lead to some parts being hard and others too soft after baking.
Step 4: Bake for 12-15 minutes or until lightly golden.
Baking until golden provides the cookie with a firm texture, essential for the overall structure of the Twix Bars. Keep an eye on them to prevent over-baking, which could result in a dry crust.
Step 5: Allow the cookie layer to cool completely.
Cooling the cookie layer prevents the caramel from melting through it when added. This step is vital for maintaining distinct layers in your Twix Bars, ensuring they hold their shape and look appealing when served.
Step 6: Once cooled, spread the sugar-free caramel sauce over the cookie layer.
This step is where the magic happens, as the caramel adds creaminess and sweetness to your bars. Make sure to spread it evenly to ensure every bite has that delicious flavor. A thicker layer may mean more sweetness, so adjust based on your preference.
Step 7: Melt the sugar-free dark chocolate chips with coconut oil in a double boiler.
Using a double boiler prevents the chocolate from burning and ensures a silky smooth melt. The addition of coconut oil helps to create a more liquid consistency, making it easier to spread or drizzle over the caramel layer.
Step 8: Pour the melted chocolate over the caramel layer, smoothing it out as necessary.
Covering the caramel with chocolate seals the layers and adds that rich flavor everyone loves. Use a spatula to ensure even coverage, channeling your inner chocolatier. This is also the point where visual appeal takes shape.
Step 9: Refrigerate the bars for at least 2 hours until set.
Chilling is essential for the chocolate to harden properly, allowing the layers to bond together. It's worth the wait, as cutting into well-set bars ensures clean, attractive slices.
Step 10: Slice into bars and enjoy!
Cutting the bars after they've chilled will yield neat, uniform pieces. Enjoying them cold enhances the flavors while providing that satisfying crunch and chew of the different layers.

The Subtle Art of Caramel Perfection
Creating the perfect sugar-free caramel is essential for the overall success of these Keto Twix Bars. The richness of the caramel contrasts beautifully with the cookie base and chocolate layer. It’s made with carefully chosen ingredients that ensure it’s both satisfying and guilt-free. Consider experimenting with flavored extracts or a pinch of sea salt for unexpected variations.
Chocolate Choices that Shine
When selecting your sugar-free chocolate chips, quality matters. Many brands offer darker options that not only taste better but also elevate the dish’s overall appeal. Consider brands that use natural sweeteners and have a rich cocoa content for that deep chocolate flavor. These choices will make your bars a truly gourmet experience.
Make It Your Own
Customization is key in the world of low-carb desserts. Feel free to add texture by incorporating crushed keto-friendly nuts or sprinkle a little sea salt on top before chilling. You can also experiment with different flavors, such as adding peanut butter to the caramel or incorporating spices like cinnamon for added depth. The possibilities are endless!
FAQs
What can I do if the cookie layer turns out too crumbly?
If the cookie layer is too crumbly, consider adding a bit more melted butter to help bind the ingredients better. Ensure that the mixture holds together before pressing it into the baking pan.
How can I adjust the sweetness if the layer is bland?
If you find that the sweetness is lacking, you can add more erythritol gradually to the cookie mixture or the caramel layer. Taste as you go to achieve the desired level of sweetness.
Can I use a different sweetener instead of erythritol?
Yes, other sugar substitutes like stevia or monk fruit sweetener can be used. Just ensure to follow the conversion ratios as they vary in sweetness.
What if my chocolate does not melt smoothly?
If your chocolate becomes stiff or clumpy, it might have been overheated. Always melt at low temperatures and consider adding a bit more coconut oil to achieve a smoother consistency.
Can I add flavors to the caramel sauce?
Absolutely! Consider adding vanilla, chocolate, or even almond flavoring to the caramel for an extra layer of taste. Experimentation is welcome!
What type of chocolate works best for these bars?
Look for high-quality sugar-free dark chocolate that has a high cocoa content for a rich, satisfying flavor. This will complement the caramel and cookie layers beautifully.
Is it possible to decorate the bars for special occasions?
Definitely! You can drizzle additional melted chocolate on top, sprinkle with chopped nuts, or even edible glitter for a festive touch. Get creative!
Conclusion
Keto Twix Bars are a testament to how delicious low-carb treats can be, merging flavor and guilt-free satisfaction. Each layer brings something unique to the table, and with a little creativity, you can adapt them to your taste.
So go ahead and treat yourself to a sweet experience that stays true to your keto lifestyle. Enjoy making these delightful bars and feel good about every bite!
Recipe Card
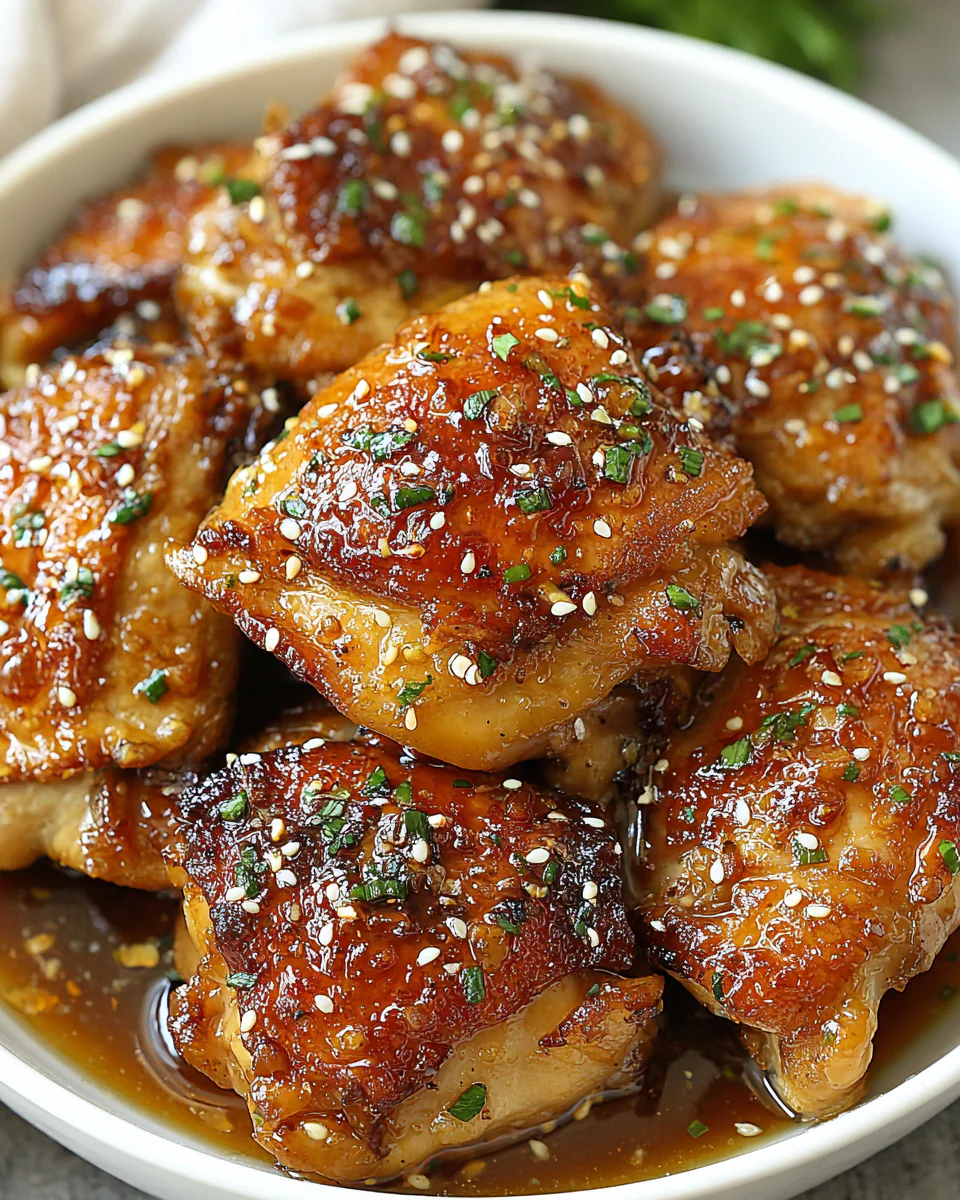
Honey Garlic Chicken Thighs for Easy Weeknight Dinners
Ingredients
Method
- Prepare the chicken thighs
- Mix the sauce ingredients
- Season the chicken
- Combine in the crock pot
- Cook on low for 6-7 hours
- Finish and garnish
Tried this recipe?
Let us know how it was!Notes
Additional serving suggestions: pair with a crisp salad, garlic bread, or roasted seasonal vegetables for balance.
For make-ahead, prep components separately and assemble just before heating to preserve texture.
Taste and adjust with acid (lemon/vinegar) and salt right at the end to wake up flavors.