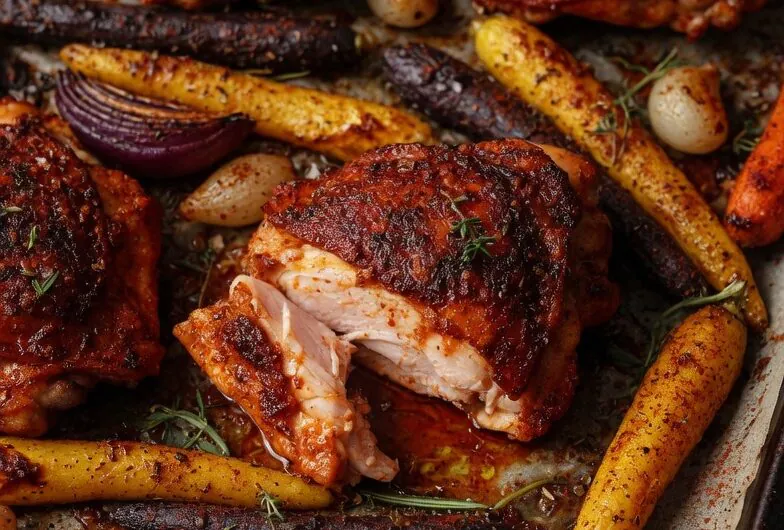
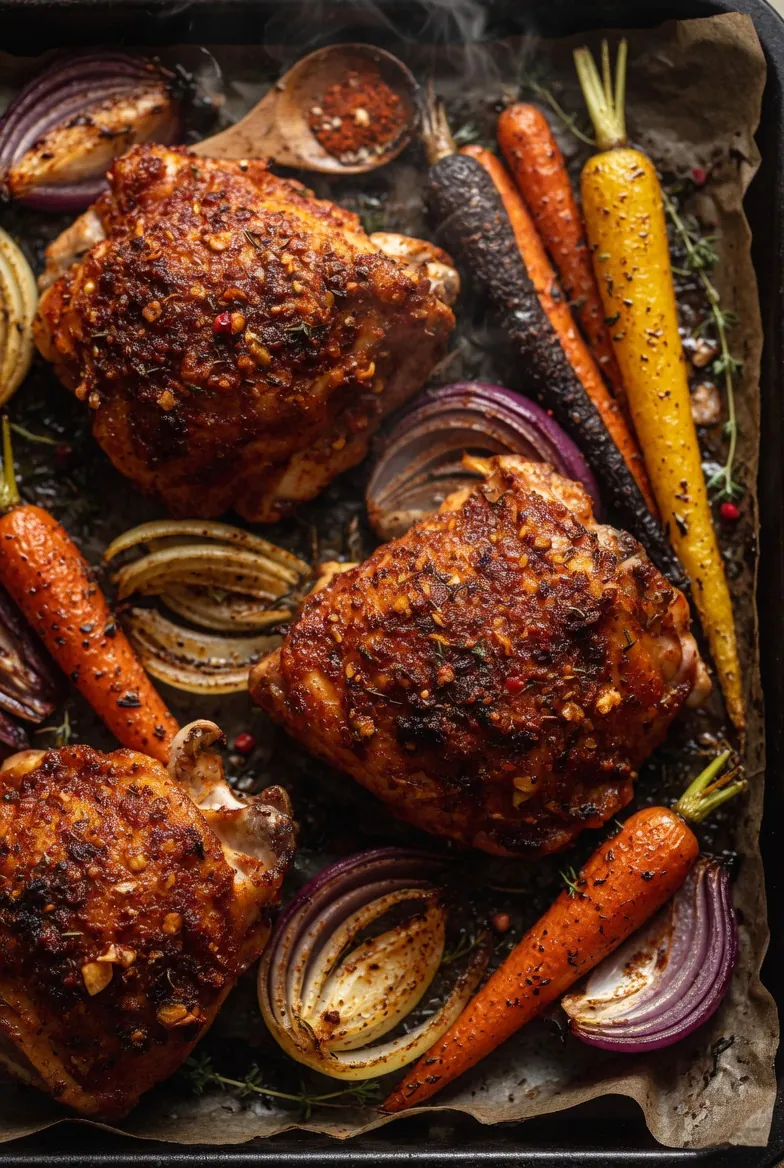
Golden, juicy chicken thighs with impossibly crispy skin and caramelized vegetables — ready in 45 minutes with just 5 minutes of hands-on prep.
📋 In This Article
Introduction
Here’s the thing about Smoked Paprika Chicken Thighs Roasted With Rainbow Carrots and Onions: it’s the kind of recipe that makes you look like you tried harder than you actually did. The smoked paprika does most of the heavy lifting, infusing chicken thighs with a deep, woodsy flavor while the rainbow carrots and onions caramelize in the rendered fat below. One pan. Forty minutes. Done.
What makes this work isn’t magic — it’s chemistry. The Maillard reaction browns the chicken skin while caramelization transforms the natural sugars in those vegetables. And because thighs stay juicy at higher temperatures than breasts, you get crispy skin without dry meat. It’s a weeknight dinner that doubles as something you’d serve at a dinner party without apology.
Why This Recipe Works: The Science Behind the Smoky Flavor
Fat renders. Vegetables caramelize. Spices bloom. That’s the whole game.
Smoked Paprika Chicken Thighs Roasted With Rainbow Carrots and Onions works because every component pulls its weight. The smoked paprika — specifically the Spanish pimentón de la Vera variety if you can find it — brings an earthy, campfire intensity that regular paprika simply lacks. When heat hits those dried, smoked peppers, the aromatic compounds release and coat the chicken in a rust-colored crust.
But the real transformation happens underneath. Chicken thighs contain enough intramuscular fat to self-baste during roasting. As that fat renders at 400°F, it drips down onto the rainbow carrots and onions, creating a convection of flavor. The vegetables don’t just roast — they braise in chicken fat. This is why one-pan cooking at high heat works: everything cooks together, but nothing cooks the same way.
The caramelization of the vegetables is crucial. Carrots contain about 10% sugar by weight. When they hit 320°F, those sugars break down and reform into new compounds — brown, complex, slightly nutty. The same happens with the onions, whose sulfur compounds mellow into sweetness. You’re not just cooking vegetables. You’re fundamentally changing them.
Ingredients You’ll Need
The ingredient list is short, but each one matters. Here’s what you need:
For the Chicken:
- Bone-in, skin-on chicken thighs (4-6 pieces): The bone conducts heat slowly, keeping the meat tender. The skin protects the surface and crisps into something worth eating on its own.
- Smoked paprika (2 tablespoons): Spanish pimentón is ideal — it’s smoked over oak for weeks. Regular paprika won’t give you the same depth.
- Garlic powder (1 teaspoon): Dehydrated garlic survives high-heat roasting better than fresh, which burns and turns bitter.
- Onion powder (1 teaspoon): Adds another layer of allium flavor without the moisture of fresh onion.
- Kosher salt (1½ teaspoons): The large crystals distribute more evenly than table salt.
- Black pepper (½ teaspoon): Freshly cracked, always.
- Olive oil (2 tablespoons): A neutral oil works too, but olive oil adds fruitiness that complements the paprika.
For the Vegetables:
- Rainbow carrots (1 pound): The different colors aren’t just aesthetic — purple carrots have more anthocyanins, orange have more beta-carotene. All of them taste sweet when roasted.
- Red onion (1 medium): Milder and sweeter than yellow when raw, but it caramelizes beautifully.
- Yellow onion (1 medium): The classic roasting onion. It breaks down more than red onion, creating jammy bits.
Optional but Recommended:
- Fresh parsley: A finishing herb that cuts through the richness.
- Lemon wedges: Acid balances the smoky, sweet flavors. A squeeze at the end wakes everything up.
Step-by-Step Cooking Instructions
Step 1: Preheat and Prepare
Preheat your oven to 400°F (200°C). This isn’t arbitrary. At 400°F, the chicken skin renders fat and crisps before the interior overcooks. Lower temperatures leave you with flabby skin; higher temperatures burn the paprika before the meat is done.
While the oven heats, take the chicken thighs out of the refrigerator. Cold chicken into a hot oven causes temperature shock — the muscle fibers contract unevenly, squeezing out juices. Let them sit at room temperature for 15-20 minutes while you prep everything else.
Step 2: Season the Chicken
Pat the chicken dry with paper towels. Moisture is the enemy of crust development. Water turns to steam at 212°F, creating a barrier between the meat and the heat. Dry skin browns; wet skin steams.
In a small bowl, combine the smoked paprika, garlic powder, onion powder, salt, and black pepper. Rub the chicken thighs all over with olive oil, then coat generously with the spice mixture. Get under the skin too — seasonings directly on the meat penetrate better than those sitting on top of the skin.
Here’s where I made a mistake the first dozen times: I was too gentle with the rub. Press it into the meat. The paprika needs contact to adhere, and the friction helps the spices penetrate the surface.
Step 3: Prepare the Vegetables
Peel the rainbow carrots and cut them into 2-inch pieces on a diagonal. The diagonal cut isn’t just for looks — it increases surface area, which means more caramelization. Cut the red onion and yellow onion into 1-inch wedges, leaving the root end intact so the layers hold together.
Toss the vegetables on a large rimmed baking sheet or in a roasting pan. Drizzle with another tablespoon of olive oil and sprinkle with salt and pepper. Toss with your hands until everything is coated. Your hands are the best tool here — you can feel when the oil has evenly distributed.
Step 4: Arrange and Roast
Spread the vegetables in an even layer. Crowding is the enemy. When vegetables touch, they steam; when they have space, they roast. Use two pans if necessary.
Place the seasoned chicken thighs skin-side up directly on top of the vegetables. The chicken should be in a single layer, not stacked. The fat that renders from the thighs will drip down and coat the vegetables below — this is the foundation of the dish’s flavor.
Roast for 35-45 minutes. The exact time depends on the size of your thighs. Start checking at 35 minutes.
Step 5: Check for Doneness
Use an instant-read thermometer inserted into the thickest part of the thigh, avoiding the bone. You’re looking for 165°F (74°C). At this temperature, harmful bacteria are killed, and the proteins have fully denatured — meaning the meat is cooked through but still retains moisture.
Here’s what most recipes don’t tell you: the chicken will continue cooking after it leaves the oven. This is carryover cooking — the internal temperature rises about 5-10°F as the heat redistributes from the surface to the center. If you pull at 165°F, you’ll end up at 170-175°F by the time you serve. For thighs, that’s fine. They have enough connective tissue to stay moist even at 175°F.
Step 6: Rest and Serve
Remove the pan from the oven. Let the chicken rest for 5-10 minutes before serving. This isn’t optional. During cooking, the muscle fibers contract and push juices toward the center. Resting allows those fibers to relax and reabsorb the liquid. Cut too early, and you lose up to 40% of the juices on your cutting board.
Transfer the chicken to a platter. Spoon the vegetables around it, making sure to get all the pan drippings — that’s concentrated chicken fat and caramelized vegetable essence. Squeeze fresh lemon over everything. Garnish with parsley if you’re feeling fancy.
⚠️ Common Mistakes to Avoid
Even a simple recipe has pitfalls. Here’s what trips people up:
Overcrowding the pan. This is the most common mistake. When vegetables are packed too tightly, they release moisture that has nowhere to go. Instead of roasting, they steam in their own liquid. The result? Soggy carrots and onions that never develop that deep, caramelized flavor. Give everything breathing room. Use two pans if you need to.
Under-seasoning the chicken. Smoked paprika is potent, but it’s not a replacement for salt. Salt draws moisture out of the meat initially, but then that moisture — now seasoned — gets reabsorbed. The result is chicken that’s seasoned throughout, not just on the surface. If you taste the finished dish and think “it needs something,” that something is probably salt.
Skipping the rest period. I used to skip this step — don’t. Cutting into chicken immediately after roasting releases all the juices onto your board instead of staying in the meat. Five minutes of patience yields significantly juicier results.
Not drying the chicken. Wet chicken skin never gets crispy. The water has to evaporate before browning can begin, and by then, the meat is already overcooking. Pat dry with paper towels before seasoning. Every time.
Using old paprika. Spices lose potency over time. Smoked paprika should smell intensely smoky when you open the jar. If it smells faint or musty, buy fresh. The difference is dramatic.
Delicious Variations & Serving Suggestions
The base recipe is solid, but there’s room to play. This dish adapts well to variations.
Root vegetable swaps. Sweet potatoes, parsnips, and turnips all work beautifully. Cut them the same size as the carrots for even cooking. Sweet potatoes caramelize faster than carrots, so check them at 30 minutes if you’re using them.
Potatoes. Baby potatoes or fingerlings can go right on the pan. Cut them in half so the cut side gets crispy in the chicken fat. They’re like mini roasted potatoes, but better because they’re cooked in pan drippings.
Add greens. Throw in kale or Brussels sprouts during the last 15 minutes of roasting. They’ll get crispy edges without burning. The bitterness cuts through the sweet carrots and smoky chicken.
Herb variations. Fresh thyme, rosemary, or oregano can be scattered over the pan before roasting. Dried herbs work too — add them to the spice rub. Thyme and smoked paprika are a classic combination; the piney notes of thyme complement the smoky depth.
Make it spicy. Add a teaspoon of cayenne or use hot smoked paprika (pimentón picante) instead of the mild variety. The heat balances the sweetness of the carrots.
Serving suggestions. This dish is complete on its own, but if you want to stretch it, serve over couscous, quinoa, or polenta. The grains absorb the pan drippings, which would otherwise be lost. A simple green salad with vinaigrette on the side provides acid and crunch to contrast the rich, roasted flavors.
Storage & Reheating Tips
Leftovers happen. Here’s how to handle them properly.
Refrigeration. Cool the dish to room temperature within two hours of cooking. Store in an airtight container for up to 4 days. The flavors actually improve after a day — the smoked paprika and vegetable sweetness meld together.
Freezing. Freeze in airtight containers or heavy-duty freezer bags for up to 3 months. Label with the date. Thaw overnight in the refrigerator before reheating.
Reheating. The microwave is convenient but destructive. It heats unevenly and makes the chicken skin rubbery. Instead, reheat in a 350°F (175°C) oven for 15-20 minutes. Cover with foil for the first 10 minutes to prevent drying, then uncover for the last 5-10 minutes to re-crisp the skin.
The vegetables won’t be as crisp after reheating, but the flavor remains. If the chicken skin has gone soft, you can crisp it under the broiler for 1-2 minutes — watch closely, as it goes from crispy to burnt quickly.
💡 Pro Tips for Next-Level Flavor
These aren’t necessary, but they elevate the dish from good to memorable.
Brine the chicken. A quick brine of water, salt, and sugar for 1-4 hours before cooking ensures juicy meat. The salt penetrates the muscle fibers, seasoning from within. Skip this if you’re short on time, but try it once and you’ll taste the difference.
Marinate overnight. If you have the foresight, season the chicken the night before and let it sit uncovered in the refrigerator. The dry air draws moisture out of the skin, which means better crisping. The spices also penetrate deeper. 45 minutes gives you 80% of the flavor; overnight gives you 100%.
Use high-quality paprika. Not all smoked paprika is created equal. The Spanish varieties — pimentón de la Vera — are smoked over oak for up to two weeks. The flavor is incomparable to generic brands. It costs more, but a little goes a long way.
Deglaze the pan. After removing the chicken and vegetables, there will be browned bits stuck to the pan — the fond. Pour a splash of white wine, chicken broth, or even water onto the hot pan and scrape up those bits. Drizzle the resulting jus over the chicken. It’s concentrated flavor that would otherwise be wasted.
Finish with acid. Smoky + sweet + acid = balance. A squeeze of lemon at the end brightens everything. It’s a small step that makes a big difference.
Serve in the right vessel. A cast iron skillet or ceramic baking dish retains heat better than a thin baking sheet. The chicken stays warm longer, and the presentation is more appealing. Transfer to a platter for serving, or serve directly from the baking dish for a rustic, family-style approach.
Frequently Asked Questions (FAQ)
+Why is my roasted chicken dry?
Dry chicken usually means overcooking or under-seasoning. Chicken thighs are more forgiving than breasts because they have higher fat content, but they can still dry out if cooked past 175°F. Use a thermometer and pull at 165°F — carryover cooking will bring it to the right temperature. Also, don’t skip the rest period. Cutting too early releases juices that should stay in the meat.
+Can I use boneless chicken thighs?
Yes, but adjust the cooking time. Boneless chicken thighs cook faster — check them at 25 minutes. You’ll lose some flavor from the bone, and the skin (if included) won’t get as crispy because there’s less structure underneath. Boneless, skinless thighs work but won’t have the same textural contrast. Increase the amount of vegetables to compensate for the reduced cooking time.
+How do I know when chicken thighs are done?
Use an instant-read thermometer inserted into the thickest part of the thigh, avoiding the bone. The internal temperature should reach 165°F (74°C). If you don’t have a thermometer, the juices should run clear (not pink) when you cut into the thickest part, and the meat should pull away from the bone easily. The skin should be golden brown and crisp.
+Can I use regular paprika instead of smoked?
You can, but you’ll lose the signature smoky flavor that defines this dish. Regular paprika adds color and mild pepper flavor, but it lacks the depth of smoked paprika. If you must substitute, add a pinch of cayenne for heat and a drop of liquid smoke to approximate the flavor. Better yet, buy smoked paprika — it’s widely available and transforms many dishes beyond this one.
+How long do leftovers last in the fridge?
Properly stored in an airtight container, leftovers last 3-4 days in the refrigerator. The flavor often improves after a day as the ingredients meld. For longer storage, freeze for up to 3 months. Reheat to 165°F before serving.
+What sides go with smoked paprika chicken?
This dish is a complete meal, but if you want sides, keep it simple. A crisp green salad with vinaigrette cuts through the richness. Fluffy couscous or quinoa absorbs the pan drippings. Crusty bread serves the same purpose. For something heartier, serve over polenta or alongside roasted potatoes. The key is choosing sides that complement — not compete with — the smoky, sweet flavors of the main dish.