Introduction
When it comes to comfort food, few dishes can match the delightful allure of cheesy garlic chicken wraps. This dish seamlessly combines tender chicken, the aromatic charm of garlic, and luscious melted cheese, all wrapped in a warm tortilla. Perfect for a cozy night in or a casual gathering, these wraps deliver satisfying flavors that are sure to please everyone at the table.
What makes these wraps truly special is their versatility. You can personalize them with your favorite toppings or dips, creating endless variations. Moreover, they come together quickly, making them the ideal option for busy weeknights or impromptu meal plans. So, let’s dive into the ingredients and preparation that will make cheesy garlic chicken wraps your new culinary favorite!
Ingredients
- 2 cups cooked chicken, shredded
Cooked chicken is the star ingredient, providing lean protein and a savory base. Using shredded chicken ensures each wrap is easy to bite into and allows the seasonings to blend well. - 2 tablespoons olive oil
Olive oil adds richness and aids in sautéing the garlic to enhance its flavor. It also prevents sticking and helps to create a lovely golden color on the wraps. - 4 cloves garlic, minced
Garlic infuses the dish with its signature pungent aroma and taste. Sautéing minced garlic brings out its natural sweetness, beautifully complementing the chicken. - 1 cup shredded mozzarella cheese
Mozzarella is creamy and stretchy, delivering that essential gooey texture. It melts beautifully, ensuring every bite is rich and satisfying. - 1 teaspoon paprika
Paprika introduces a subtle smokiness and vibrant color to the wraps. It adds depth to the flavor profile without overpowering the garlic. - 1 teaspoon dried oregano
Oregano contributes an earthy note that pairs well with both chicken and garlic, enhancing the overall flavor without being intrusive. - 4 large tortillas
Tortillas are the perfect vessel for these wraps, providing a soft and pliable base that holds the delicious filling securely. Choose large sizes to accommodate generous portions. - 1 cup fresh spinach, optional
Fresh spinach adds a pop of color and nutrients. It also brings a refreshing contrast to the warm, cheesy filling, boosting the overall nutritional content. - Sour cream or ranch for serving, optional
Serving with a creamy dip adds an extra layer of deliciousness. Sour cream or ranch complements the wraps perfectly, enhancing flavor and moisture.
Directions & Preparation
Step 1: Prepare the chicken and garlic mixture
Start by heating olive oil in a skillet over medium heat. Once hot, add minced garlic and sauté for a minute until fragrant, being careful not to let it burn. This step is crucial for maximizing the flavor of the garlic throughout the dish. Then, incorporate the shredded chicken, paprika, and oregano, cooking until heated through. This base will transform into a savory filling that carries the essence of comfort food.
Step 2: Add cheese to the chicken mixture
Stir in the shredded mozzarella cheese and allow it to melt into the chicken mixture. This is the moment when the wraps gain their iconic ooey-gooey quality. Stirring continuously will ensure even melting, creating a creamy filling that clings to the chicken and garlic, enhancing the overall mouthfeel of the wraps.
Step 3: Assemble the wraps
Lay a large tortilla flat on a clean surface and spoon a generous amount of the chicken and cheese mixture in the center. If desired, add fresh spinach for a burst of color and nutrition. This step allows you to customize each wrap to your liking, ensuring every bite is packed with flavor. Carefully fold in the sides of the tortilla and roll it up tightly from the bottom. Ensuring a snug wrap helps retain the fillings and makes for easier handling.
Step 4: Cook the wraps
Heat a clean skillet over medium heat and place the wrapped tortilla seam-side down on the skillet. Cook for about 3-4 minutes on each side until golden brown. This critical step not only warms the tortilla but also creates a delightful crispy texture that contrasts beautifully with the molten interior. Press gently with a spatula to ensure even browning, and pay attention to prevent burning.
Step 5: Slice and serve
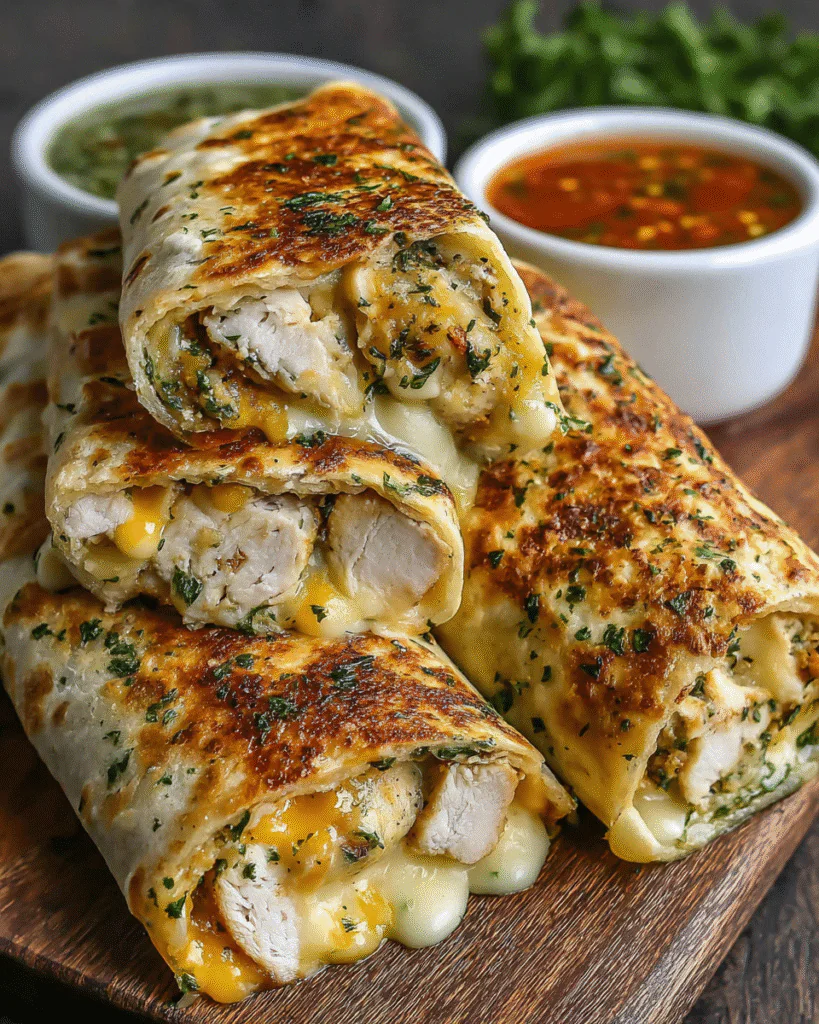
Once cooked, remove the wraps from the skillet and let them cool slightly before slicing them in half. This allows the cheese to set just a bit, preventing a messy ooze. Plating them beautifully can elevate the dining experience, and serve them hot with a side of sour cream or ranch for dipping. This final flourish enhances the flavor while adding a creamy element that complements the cheesy chicken perfectly.
The Magic of Garlic
Garlic isn’t just a flavoring; it’s a powerhouse of health benefits. This ingredient not only elevates the taste profile of cheesy garlic chicken wraps but also adds potential antioxidant properties. The secret lies in how garlic transforms from its raw state to a caramelized, sweet delight when sautéed. This process enriches the dish, making garlic an essential component for both flavor and well-being.
Choosing the Perfect Tortilla
Tortillas are more than just a wrap; they provide the structure necessary to hold your scrumptious filling together. When selecting tortillas, consider the type: flour tortillas are soft and chewy, while corn tortillas add a delightful earthy flavor but can be less pliable. Choosing large tortillas allows for generous fillings, ensuring every bite is just as delicious as the last, enhancing the eating experience.
Customizing Your Wraps
One of the most enjoyable aspects of crafting cheesy garlic chicken wraps is the ability to customize them. You can add a variety of ingredients such as sautéed peppers, onions, or even different cheeses. Try experimenting with other spices or toppings like jalapeños for a kick or guacamole for a creamy richness. This adaptability makes the recipe perfect for any occasion, allowing you to cater to different palates.
FAQs
What if my chicken mixture is too dry?
If your chicken mixture appears too dry, consider adding a small amount of chicken broth or extra olive oil to moisten it. This will help achieve that creamy, luscious texture.
How can I make these wraps spicy?
To add spice to your cheesy garlic chicken wraps, incorporate diced jalapeños or sprinkle some red pepper flakes into the chicken mixture before cooking. Adjust to your heat preference.
What can I do if my tortillas tear during wrapping?
If your tortillas tear, slightly warm them in a pan or microwave for a few seconds to make them more pliable. This will help prevent tearing while rolling.
Can I use leftover chicken for these wraps?
Absolutely! Leftover roasted or grilled chicken works perfectly and adds great flavor. Just ensure to heat it properly before mixing with garlic and cheese.
What if I want a different cheese?
You can easily substitute mozzarella with other melting cheeses like cheddar or Monterey Jack, but keep in mind that this can change the flavor profile.
How can I make these wraps more nutritious?
To boost the nutrition of your wraps, consider adding more vegetables into the filling, such as bell peppers, mushrooms, or zucchini, alongside the spinach.
Conclusion
Cheesy garlic chicken wraps offer a deliciously comforting dish that taps into everyone’s love for cheese and savory chicken. With their unique flavor profile and versatility, they can swiftly become a family favorite, perfect for any occasion—whether casual lunches or elegant dinners.
As you explore this recipe, feel free to adjust and make it your own, swapping in different ingredients or flavors to suit your taste. Each bite promises to bring satisfaction and warmth, sealing the deal on this new comfort food classic.