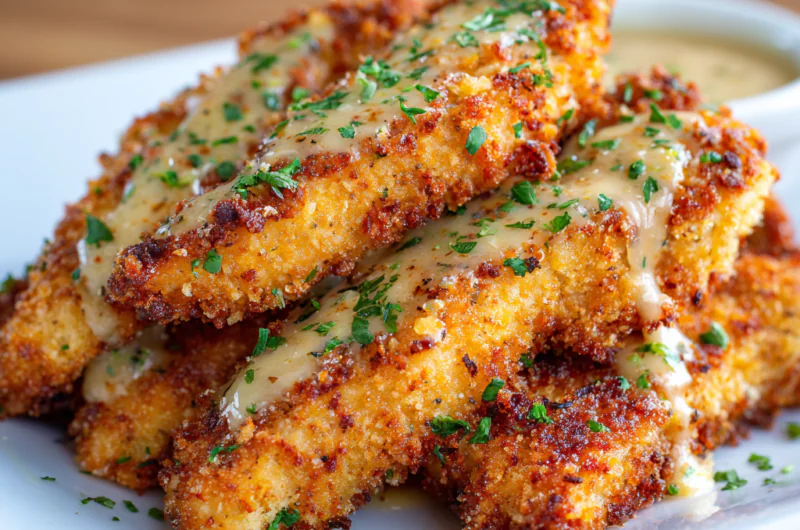
Golden, crunchy, and baked—not fried. This recipe uses a smart two-step breading process and a wire rack for maximum crunch without the grease.
📋 In This Article
Introduction
Let’s be honest: most baked chicken tenders are a disappointment. You expect a crunchy, golden crust, but too often, you pull a tray out of the oven only to find a soggy bottom and a dry, overcooked interior. It’s the tragedy of the weeknight dinner. But these Crispy Baked Parmesan Chicken Tenders are different. They are the result of years of testing in test kitchens to bridge the gap between healthy baking and deep-fried satisfaction. The secret isn’t just in the ingredients—it’s in the technique. By toasting the Panko before it hits the chicken and using a unique batter method, we guarantee a shatteringly crisp crust that stays crunchy long after it leaves the oven.
Why These Baked Parmesan Tenders Are a Game Changer
Most recipes rely on a standard flour-egg-crumb assembly line. The problem? Flour dust doesn’t stick well, and crumbs fall off. We do it differently. We skip the messy dredging station entirely. Instead, we whisk flour directly into the egg to create a thick, heavy batter. This “glue” ensures the Panko adheres aggressively to the chicken, meaning every bite is seasoned and crunchy, not naked and sad.
Then there’s the Panko. We toast it on the baking sheet for a few minutes before breading. This triggers the Maillard reaction—the chemical process that browns food and creates complex savory flavors—before the chicken even hits the heat. This ensures an even, deep golden hue without drying out the meat. Finally, we use a wire rack. Elevating the chicken allows hot air to circulate 360 degrees, eliminating the “soggy bottom” syndrome that plagues standard sheet-pan dinners.
Ingredients You’ll Need
- 1 lb (500 g) Chicken Tenders: Look for plump, moist tenders. If they vary in size, try to select ones of similar thickness.
- 1/2 cup Freshly Grated Parmesan Cheese: Do not use the shelf-stable shaker cheese; it contains anti-caking agents that prevent melting and result in a sandy texture.
- 1 cup Panko Breadcrumbs: These Japanese breadcrumbs have a larger, flakier structure than Western crumbs, creating an airy, crispy crust.
- 2 large Eggs: We are increasing the standard amount to create a better batter. Room temperature eggs blend more smoothly.
- 1/2 cup All-Purpose Flour: Whisked directly into the egg, this turns the egg into a batter that clings like glue.
- 2 tbsp Butter or Olive Oil: Melted butter adds richness, while olive oil keeps it dairy-free and light.
- 1 tsp Garlic Powder & 1 tsp Onion Powder: These provide the savory baseline without the moisture of fresh aromatics, which can steam the crust.
- 1 tsp Smoked Paprika: For a hint of smoke and a vibrant color.
- Salt and Black Pepper: Essential for waking up the flavors in the coating.
Step-by-Step Instructions
Step-by-Step Instructions
- Preheat Your Oven: Preheat to 425°F (220°C). This high heat is crucial for setting the crust quickly before the juices can escape.
- Toast the Panko: Spread the Panko on a baking sheet and toast in the oven for 3-5 minutes. Watch them like a hawk—they go from blonde to burnt fast. This step ensures the crust browns evenly.
- Make the Batter: While the crumbs toast, whisk the eggs, flour, garlic powder, onion powder, smoked paprika, salt, and pepper in a shallow dish until smooth. This batter should be thick, not runny.
- Coat the Chicken: Dip each tender into the batter, letting excess drip off. Press the chicken firmly into the toasted Panko mixture. The first time I skipped pressing firmly, half the coating fell off—don’t make that mistake.
- Bake on a Rack: Place a wire rack on a baking sheet and arrange the tenders on top. Lightly spray the tops with cooking spray or drizzle with melted butter.
- Bake: Bake for 15-20 minutes, flipping halfway through, until the internal temperature reaches 165°F (74°C).
- Rest: Let them rest for 5 minutes. This allows the juices to redistribute so they don’t run out the moment you cut into the meat.
💡 Pro Tips for the Ultimate Crispy Tenders
Unlock the secret to the ultimate Crispy Baked Parmesan Chicken Tenders with these pro tips. Start by brining the chicken tenders in a simple saltwater solution for at least 30 minutes. This technique enhances juiciness and ensures a tender texture that holds up during baking. Next, take the time to pound the chicken to an even thickness; this ensures uniform cooking and prevents some pieces from drying out while others remain undercooked.
To achieve that coveted crunch, use a wire rack for baking. Elevating the chicken tenders allows hot air to circulate all around, resulting in a uniformly crispy exterior. Additionally, pay attention to fat distribution; consider lightly misting the breadcrumbs with olive oil before baking. This ensures every crumb gets evenly toasted, preventing the dreaded ‘Marshmallow Fingers’ effect when coating—where your fingers get caked with batter. With these techniques, your chicken tenders will be irresistibly crispy and delicious!
⚠️ Common Mistakes to Avoid for Perfect Tenders
To achieve Crispy Baked Parmesan Chicken Tenders that kids and adults alike will fight over, avoid these pitfalls. One major mistake is not pre-toasting panko breadcrumbs. Toasting them ensures a more even and crunchy coating, preventing soggy tenders. Another critical error is overcrowding the baking sheet; this traps steam and results in uneven cooking. To achieve that desired crunch, ensure there is ample space between each tender. Furthermore, don’t skimp on the fat! A light drizzle of olive oil or cooking spray is crucial for getting that golden crispiness. Finally, don’t skip the resting period after baking! Allowing your tenders to rest helps the coating set, minimizing the risk of uneven coating and overcooked chicken.
Flavor Variations & Serving Suggestions
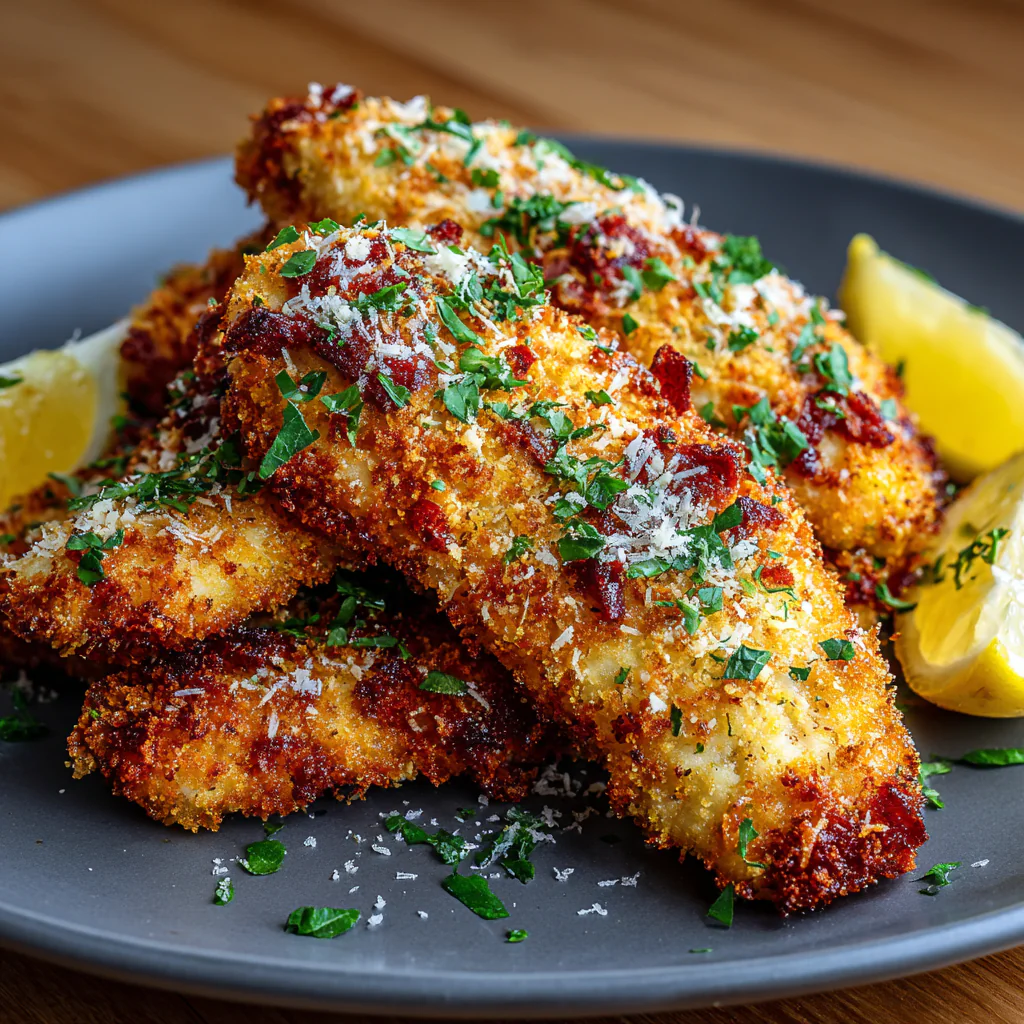
Crispy Baked Parmesan Chicken Tenders can be customized to suit any palate. For a sharper flavor profile, mix Pecorino Romano with your Parmesan. Incorporate freshly chopped herbs such as parsley or oregano into the breadcrumb coating for added freshness. If you like heat, a sprinkle of cayenne pepper elevates the flavor.
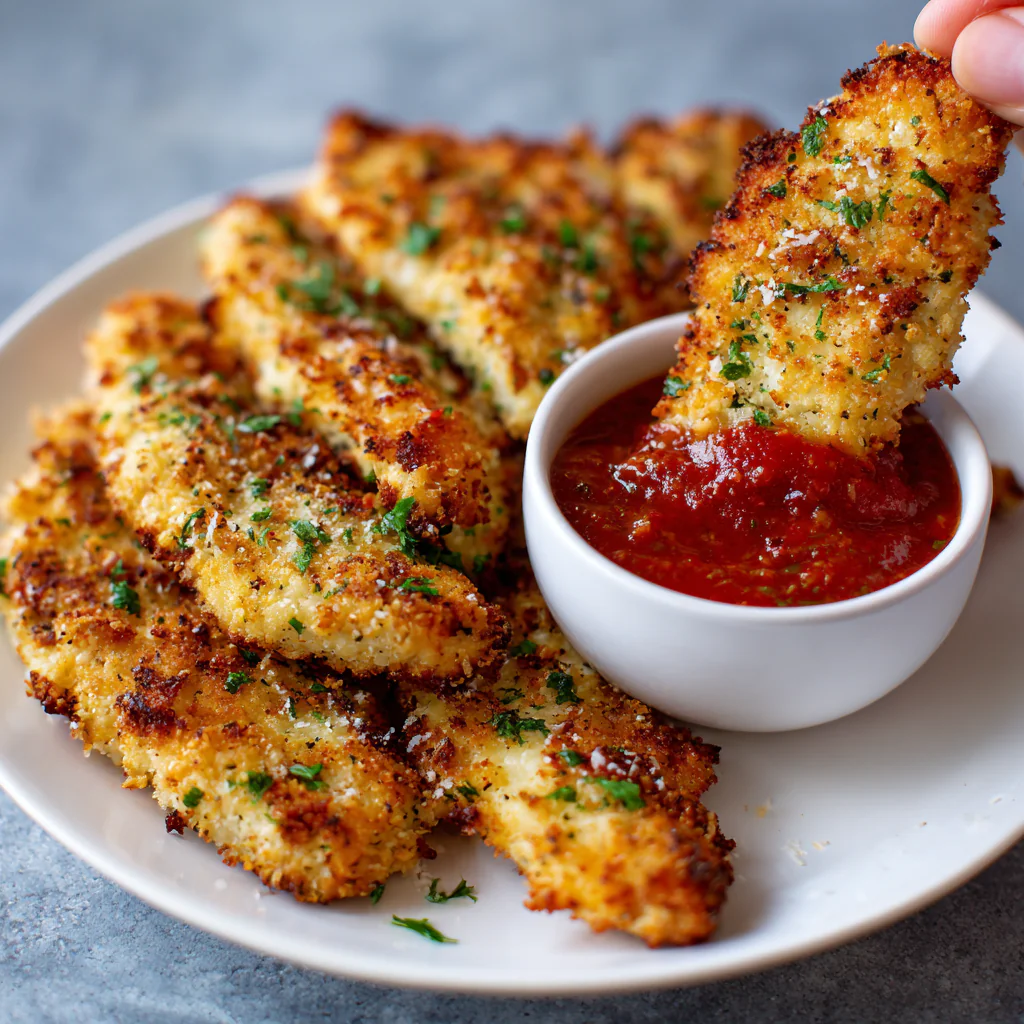
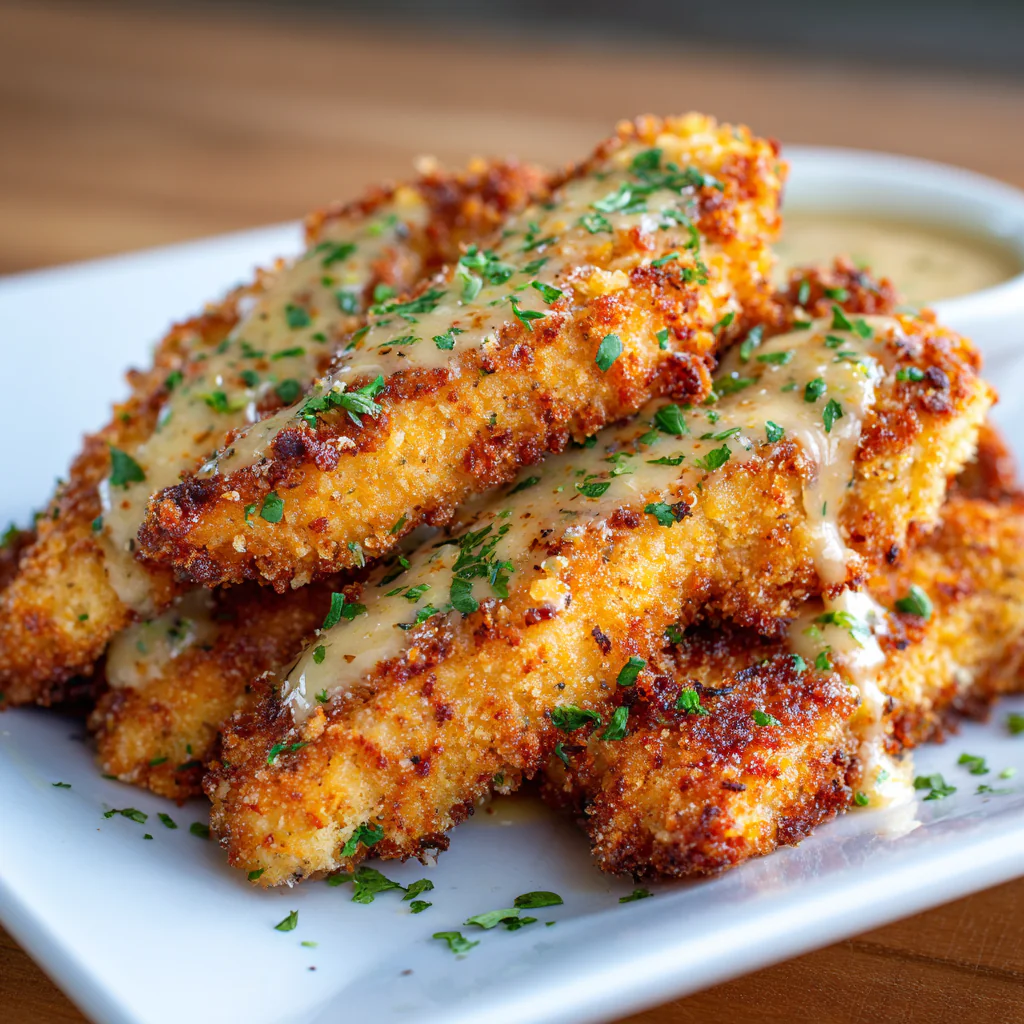
When serving, pair them with dipping sauces like honey mustard, ranch, or marinara. For sides, consider classic fries or mac and cheese for a kid-friendly meal, while adults may appreciate a crisp salad or roasted veggies. For those with dietary preferences, gluten-free breadcrumbs make this dish accessible for everyone.
Storage & Reheating Tips
To ensure your Crispy Baked Parmesan Chicken Tenders maintain their crunch, proper storage is essential. Store cooked tenders in an airtight container in the fridge for up to 3 days. For longer storage, freeze them in a single layer on a baking sheet before transferring them to a freezer-safe bag for up to 3 months.
When reheating, avoid the microwave—it creates steam that turns the crust soggy. Instead, preheat your oven to 400°F (200°C) or use an air fryer. Place the tenders in a single layer and reheat for about 10-15 minutes in the oven or 8-10 minutes in the air fryer, ensuring they reach an internal temperature of 165°F (74°C). This method restores the crispy texture, making them just as irresistible as when freshly baked.
Frequently Asked Questions (FAQ)
+How do you make baked chicken tenders crispy?
To achieve perfectly crispy Crispy Baked Parmesan Chicken Tenders, use panko breadcrumbs instead of regular breadcrumbs. Panko provides a lighter, airier texture that crisps up beautifully. Toasting the panko beforehand and baking on a wire rack allows air to circulate, keeping them crisp rather than steamed.
+Why are my chicken tenders soggy?
Sogginess usually comes from overcrowding the pan, which traps steam, or skipping the fat (oil/butter) on the coating. Ensure you leave space between tenders and give them a light spray of oil to facilitate browning and evaporation of surface moisture.
+Can I use regular breadcrumbs instead of panko?
You can, but the texture will be denser and less crispy. Panko is specifically processed to create jagged, airy shards that crisp better than fine, powdery regular breadcrumbs. If you must use regular crumbs, crush some butter crackers into the mix to add flakiness.
+Can I make these in an air fryer?
Absolutely. Preheat your air fryer to 400°F (200°C). Cook the tenders for about 10-12 minutes, flipping halfway through. The air fryer is excellent for this recipe as it mimics the convection effect of the oven but faster, resulting in an incredibly crispy exterior with less oil.
+How long do leftovers last?
Store the tenders in an airtight container in the refrigerator for up to 3 days. For best results when reheating, use an oven or air fryer to restore the crispiness that is lost in the microwave.
Oven Fried Parmesan Baked Chicken Tenders
Ingredients
Method
- Preheat oven to 200C/390F.
- Spread panko breadcrumbs on a baking tray. Spray lightly with oil. Bake for 3 to 5 minutes or until LIGHT golden.
- Scrape into a bowl. Add parmesan and mix.
- In a separate bowl, whisk together Batter ingredients with a fork. Add chicken and mix to coat.
- Optional: Place a rack on the baking tray (Note 3)
- Pick up chicken with left hand and place in breadcrumbs. Use right hand to sprinkle with breadcrumbs, press to adhere. Use right hand to transfer to baking tray. Repeat with remaining chicken. Spray lightly with oil.
- Bake for 15 minutes for small tenders, 18 minutes for large ones. No longer than 20 minutes, otherwise they will begin to lose juiciness.
- Serve immediately with Ranch or Honey Mustard Dip if desired (Note 4).
Nutrition
Notes
- For perfectly juicy chicken tenders, aim for an internal temperature of 75°C (165°F); use a meat thermometer to check doneness without cutting into the meat.
- To prevent the breading from falling off, ensure the chicken is well-coated in the batter before pressing it into the panko mixture.
- If you prefer a bit of spice, feel free to add a pinch of cayenne pepper or paprika to the panko and parmesan mix for added flavor.
- Store any leftovers in an airtight container in the fridge for up to 4 days; reheat in a preheated oven at 180°C (350°F) for about 10 minutes to keep them crispy.
- For a lighter version, substitute half of the mayonnaise with Greek yogurt for added creaminess and tang without the extra calories.